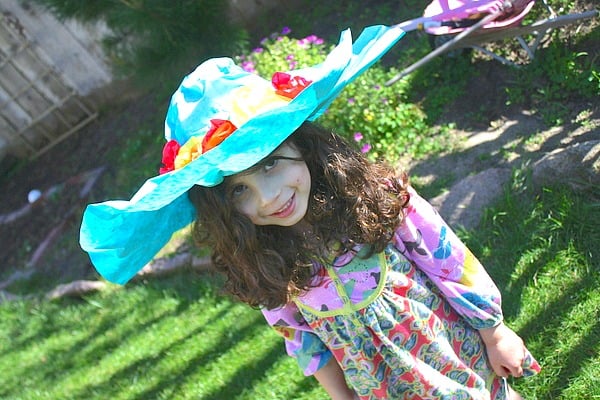
One of our favorite spring crafts for kids is making giant paper mache hats! The kids have so much fun creating their own hats from butcher paper and wearing them around all spring!
Follow our Spring Crafts & Learning Pinterest board!
I thought it would be fun to welcome spring with one of my favorite spring crafts for kids~ giant paper spring hats! This has been a favorite art project over the years to do with my students, and now I’m enjoying doing it at home with my kids. (This post contains affiliate links. )
Spring Crafts for Kids: Paper Mache Hats
In the past I’ve done these hats many different ways. This project really lends itself to so many creative options. For this particular project, I’m using giant sheets of butcher paper as the main component to the hat. However, I have done it over the years with giant sheets of wrapping paper or sheets of newspaper (later painted when dry). They all work wonderfully!
Materials for Spring Hats
- Giant sheet of butcher paper (or wrapping paper)
- Bowl and paintbrush
- Liquid glue and water
- Masking tape
- Newspaper for stuffing
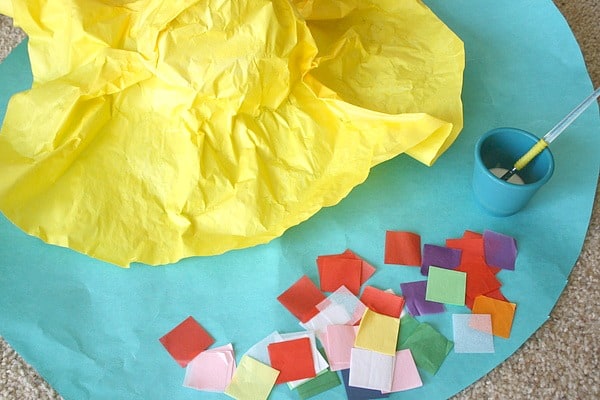
- Tissue paper or other materials to decorate your hat
Directions for Making Spring Hats
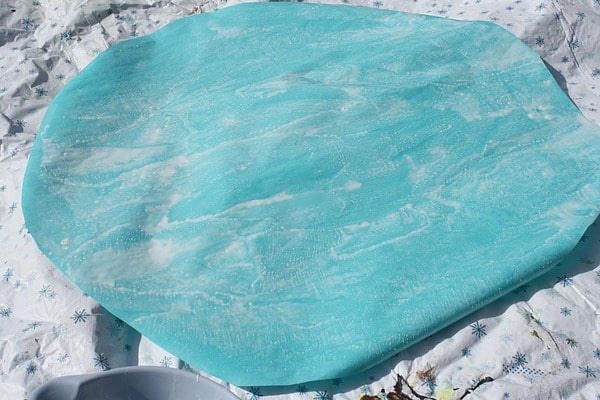
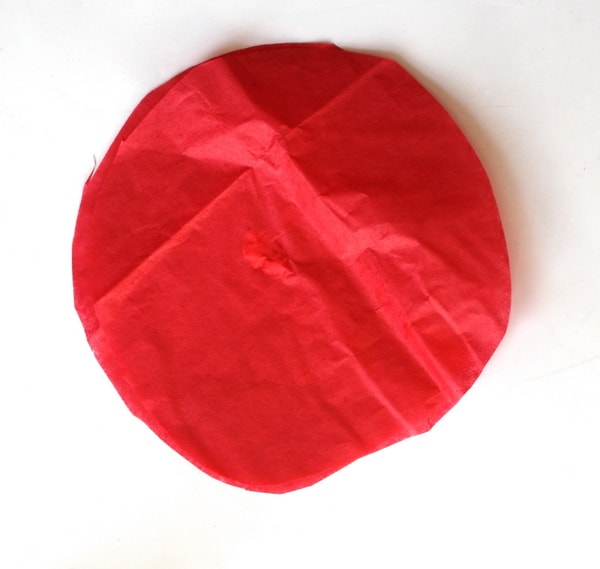
1. Cut your butcher paper into a large circle.
2. Prepare your paper mache mixture of glue and water. (I used about a 1:1 ratio.)
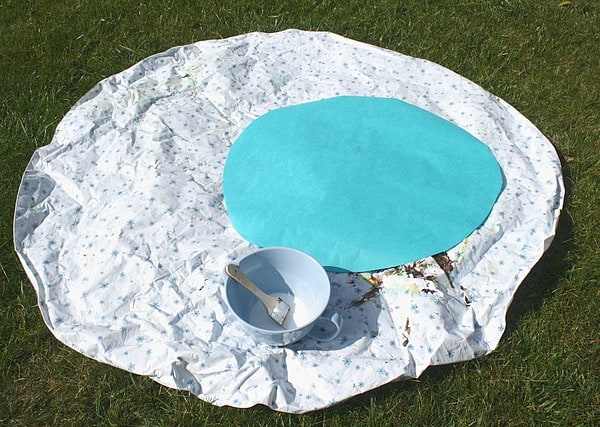
3. Paint the top of your large circle with the mixture.
4. Now it’s time to shape the hat to your child’s head. First, place a DRY sheet of newspaper on top of your child’s head (to protect him or her from getting covered with gluey water.) Then place the wet butcher paper circle on top of the dry newspaper. Gently press the paper around his/her head and wrap a few times with masking tape to hold in place. (The kids always think this part is super fun!)
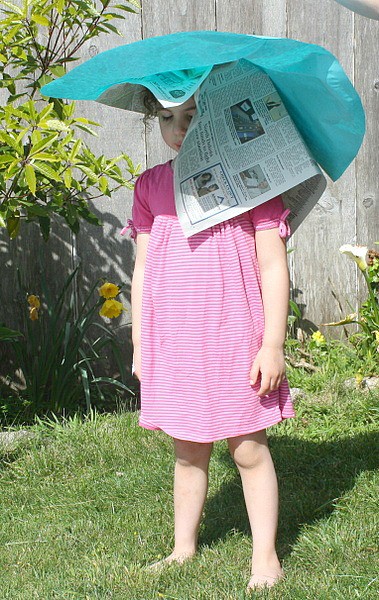
5. Gently take the hat off, and place it somewhere to dry. I take the newspaper and crumple it up into a ball and stuff it inside the head area to help it keep its shape while drying. Also be sure to play around with the outer part of the hat and get it shaped just the way you want it to dry.
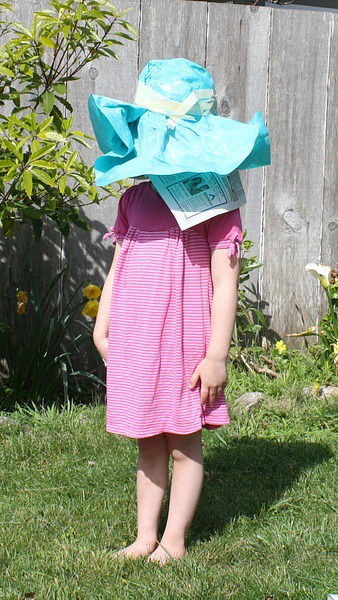
6. Once the hat is dry it’s time to decorate it! Gently pull off the masking tape. Once your hat is dry the tape is no longer necessary to hold the hat’s shape.
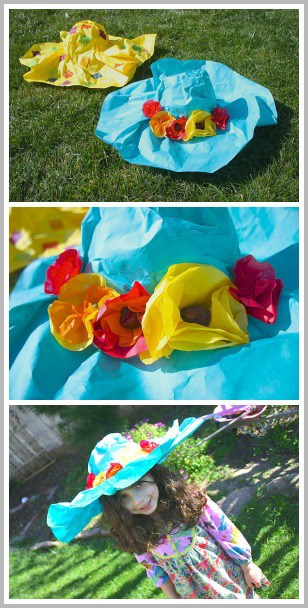
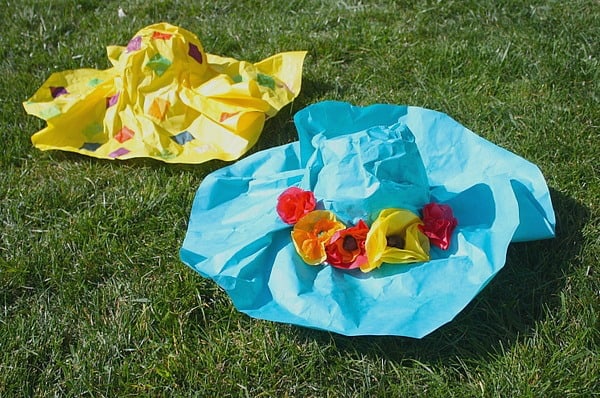
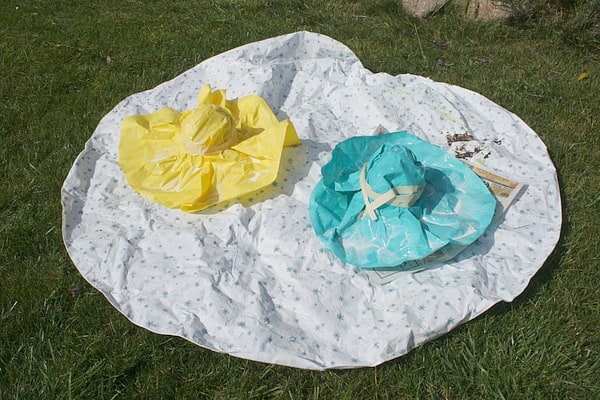
7. Decorate your hat any way you want! We did one with tissue paper squares.
How to Make Tissue Paper Flowers
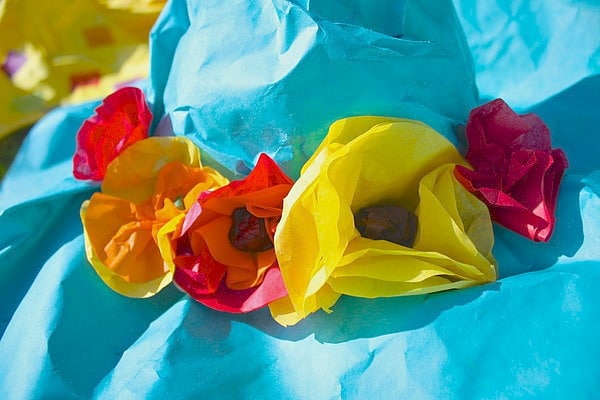
We decorated the other hat with tissue paper flowers!
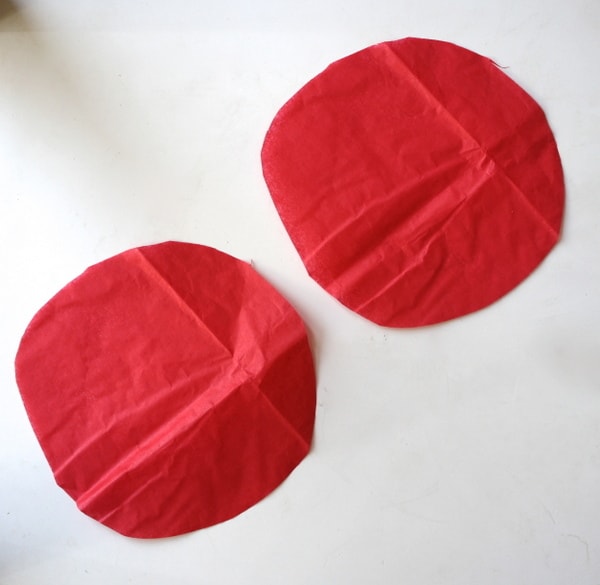
Cut out two circles from tissue paper.
Place a small dot of glue in the center of circle.
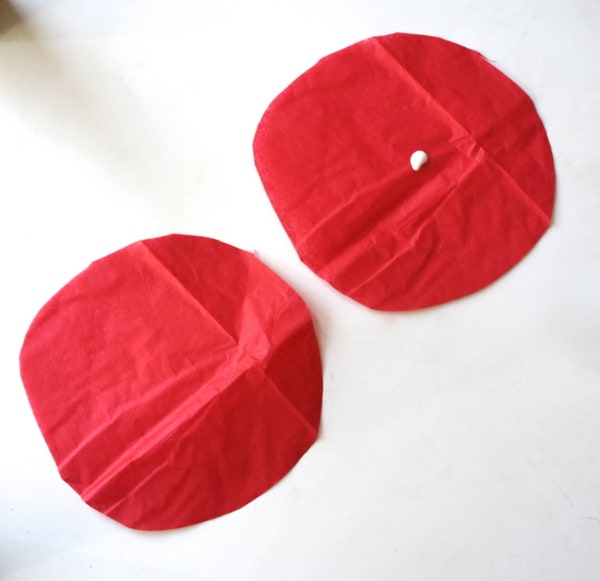
Glue the circles together.
Fold and press the paper together until you like how your flower looks! (It’s really fun to play around with different sizes and colors of circles.)

Tips
- After the hat dries you can add another layer of paper mache and let dry before decorating. This will make it even more sturdy.
- I leave the stuffed newspaper inside while the kids are decorating the hat. This helps protect it from accidental crushing.
- If you are doing this as a class project, it would probably work best doing it small group. I used to always do it in small groups, and it was even better when I had parent volunteers to assist!
Happy Spring!