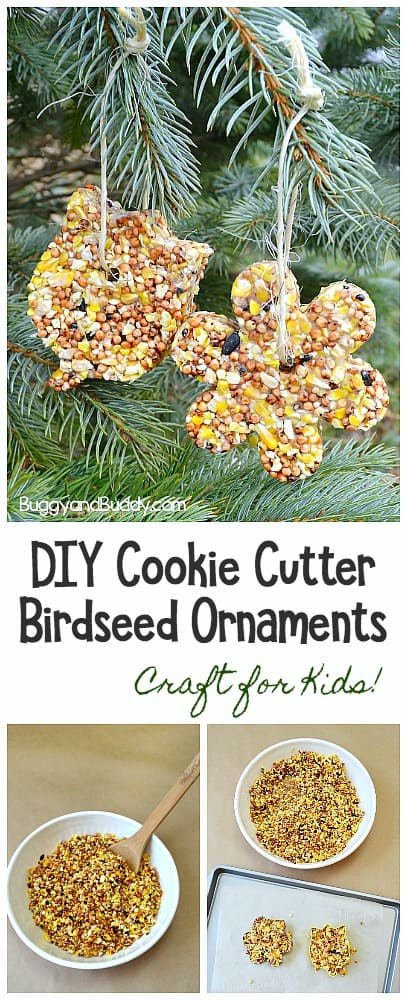
Here’s how to make your very own DIY birdseed ornaments. This is a wonderful craft for kids to make for the outdoors. Children can hang their bird feeder ornaments in their backyard and enjoy watching all the birds that come to visit.
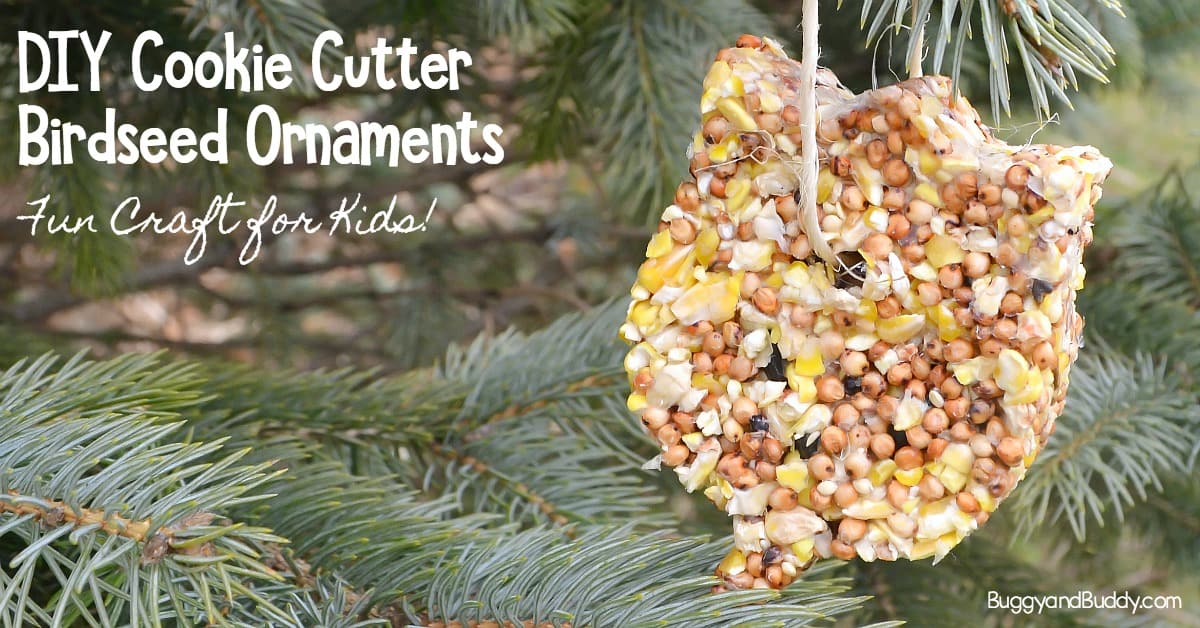
This classic cookie cutter bird feeder ornament is one of my all-time favorites. I love how kids of any age can make them and how they inspire children to observe animals in nature. You can make your birdseed ornaments in just about any shape you can think of, making it an excellent activity to pair with various children’s books or birthday party themes.
After you hang your homemade birdseed ornaments, be sure to print out our free birdwatching book and encourage your children or students to observe local birds in the area. It’s such a fun family activity!
DIY Cookie Cutter Birdseed Ornaments
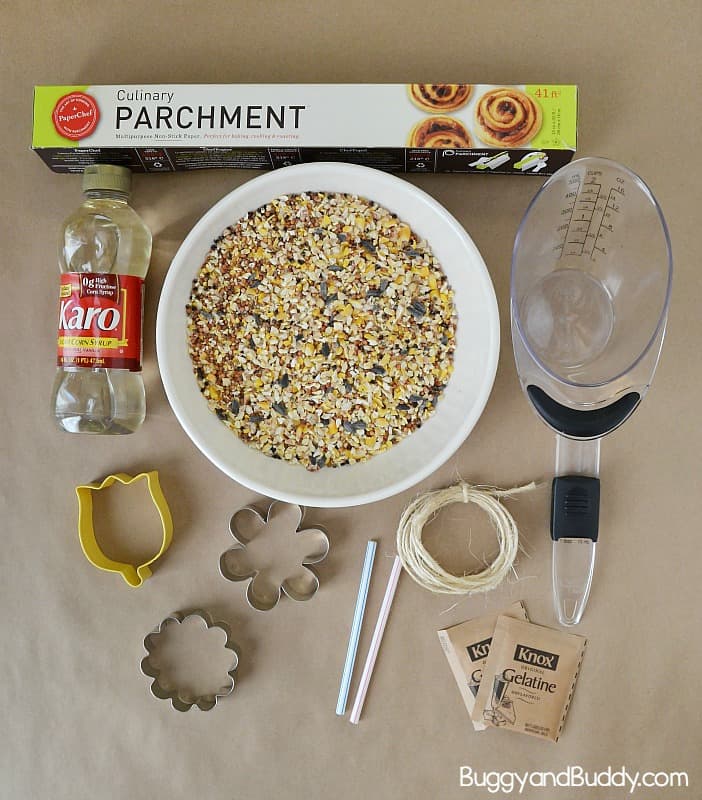
Materials for Homemade Birdseed Ornaments
- Cold water
- Boiling water
- 2 packets of gelatin or container of gelatin powder
- Corn syrup
- Bird seed (about 2 1/2 cups)
- Cookie Cutters (in any shape you’d like)
- Straws cut in 2” pieces
- Parchment paper (I like this parchment paper already cut into cookie sheet size. You can use what’s leftover for baking!)
- Twine or other kind of string
- Scissors
Directions for Homemade Birdseed Ornaments
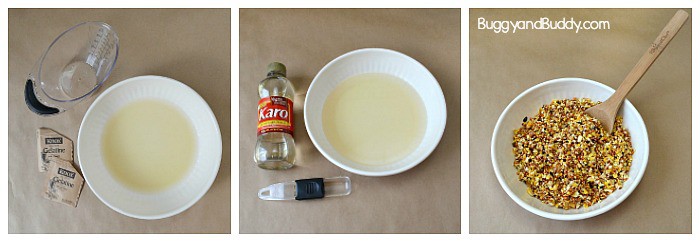
1. Mix 2 packets of gelatin or 5 teaspoons of gelatin with 1/2 cup cold water until dissolved.
2. Add a 1/2 cup of boiling water to the bowl, stir slowly until dissolved.
3. Next, add 2 tablespoons of corn syrup. Stir until dissolved. (Quick tip, spray the tablespoon with a little non-stick spray and the corn syrup will slide right off!)
4. Mix in the bird seed. Keep mixing until the gelatin/ corn syrup mixture evenly coats each seed. Let this rest for a couple minutes if the mixture seems watery.
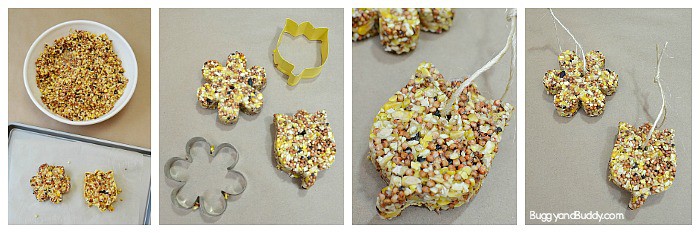
5. Spoon the seed mixture into the cookie cutters. Fill the cookie cutters about half way and use a small piece of parchment paper to press the seeds firmly into the mold. Then fill the cookie cutter to the top and press again.
6. Press the straw into the birdseed filled ornament, making a hole. Be sure to leave plenty of room between the straw and the edge. Press around the straw to ensure the seeds will hold shape around the hole. (This is where you’ll eventually thread your twine through the ornament.)
7. Place the cookie cutters in the refrigerator to set overnight.
8. Once set, remove the cookie cutters by gently pushing at the edges until they fall off, leaving just the birdseed ornament.
9. Push the straws out & thread the twine through the hole.
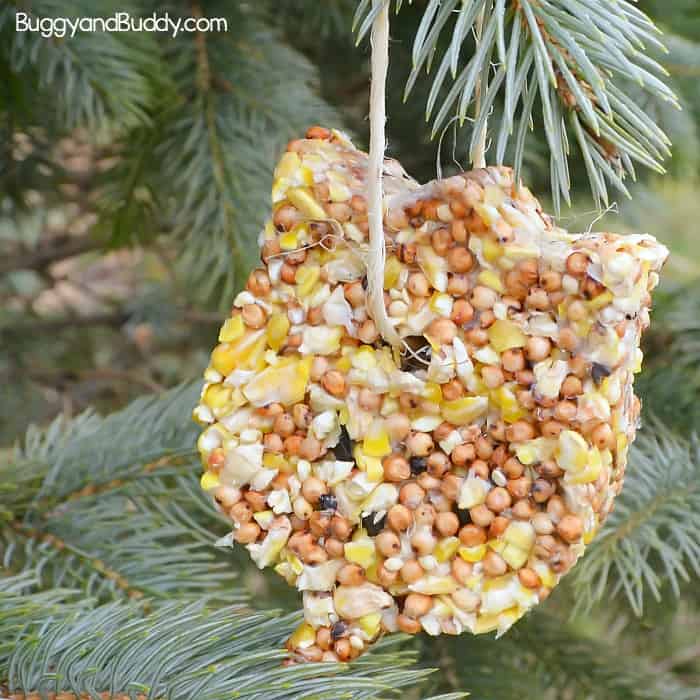
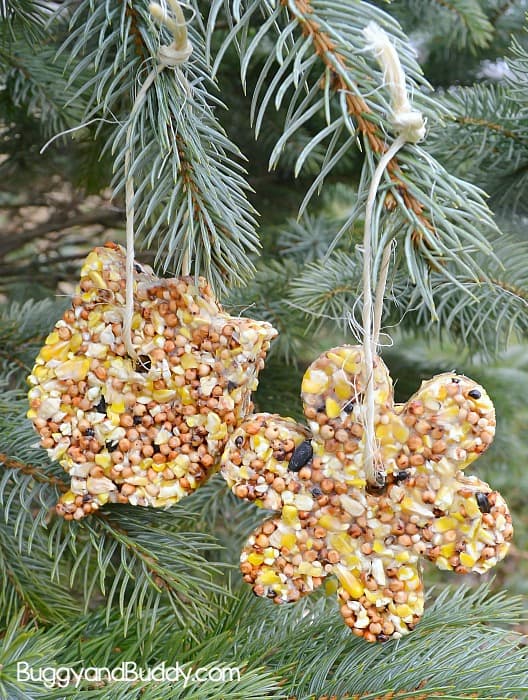
The bird feeder is ready to hang outside. Make sure you hang it near other branches so the birds have a place to rest while eating. Enjoy watching your backyard birds come visit!
Tips and Other Ideas
- Use a silicon mold rather than cookie cutters to place your birdseed mixture in. Be sure to spray it with cooking spray before placing your mixture inside each mold.
- If you make an open shape, like a heart or circle, you don’t need to poke a hole for the string. You can simply tie it right through the center of the shape.
- If giving as gifts or party favors, place them in a little plastic or paper bags and tie with twine or ribbon.
- Younger children might enjoy making these birdseed-filled plastic eggs made to look like birds. These cute bird eggs are fun shakers to make music with, and when the children are done playing with them, they can sprinkle the birdseed around outside!