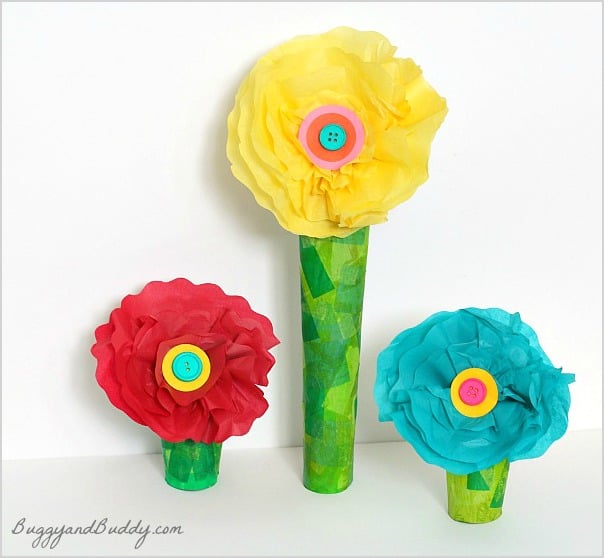
Here’s a bold and cheerful flower craft for kids using tissue paper and a cardboard tube. What’s really unique about these flowers is that they can stand completely on their own and are the perfect size for little hands to hold.
These bright, tissue paper flowers would be perfect for Mother’s Day, spring, or just any day you’d like to brighten up your home or classroom!
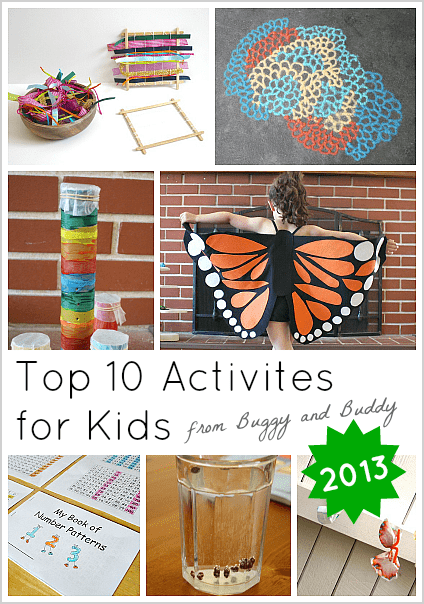
Follow our Crafts for Kids Pinterest board!

(This post contains affiliate links.)
My favorite thing about these tissue paper flowers is the stem! I love how the paint and tissue paper give the stem of the flower a really unique look.
And what’s really cool about these flowers is that they can stand all on their own! You can set them up along a windowsill to brighten up a room, and the sturdiness and size of the stem is just right for little hands- perfect for children to hand deliver their special creations to a loved one.
See them in action here!
Tissue Paper and Cardboard Tube Flower Craft for Kids

Materials for Flower Craft
- Paper towel roll (or toilet paper roll for a shorter flower)
- Green tempera paint and paintbrush (This is our absolute favorite tempera paint!)
- Tissue paper squares in various shades of green (I used squares similar to these and these tissue paper rectangles.)
- Tissue paper sheets in any color you’d like your flower petals to be
- Scissors
- Glue
- Stapler
- Optional: Glue dots
- Optional: Construction paper or cardstock circles and buttons for the center of the flower
Directions for Flower Craft
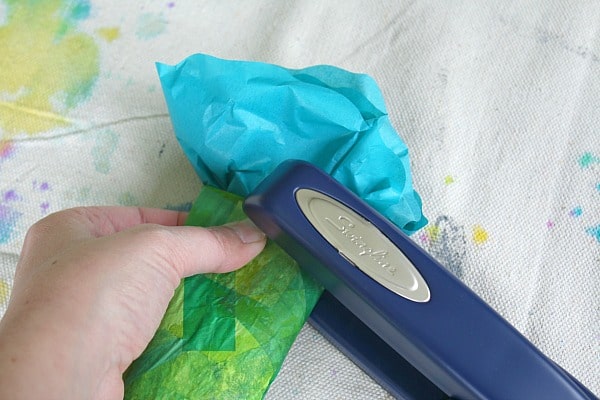
1. Start by painting your cardboard tube with the green tempera paint. (We mixed some yellow into our green to brighten and lighten it a bit.)
2. Glue tissue paper squares all over your stem using a paintbrush and liquid glue. Simply place a tissue paper square onto the stem and gently use the brush to spread glue over the entire square.
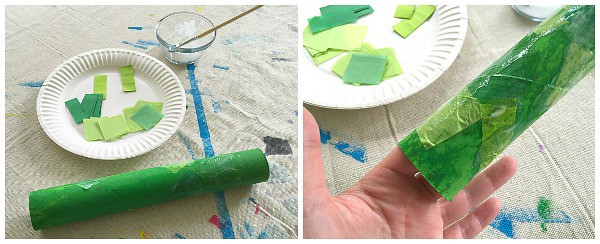
3. Set the stem aside and let it dry completely.
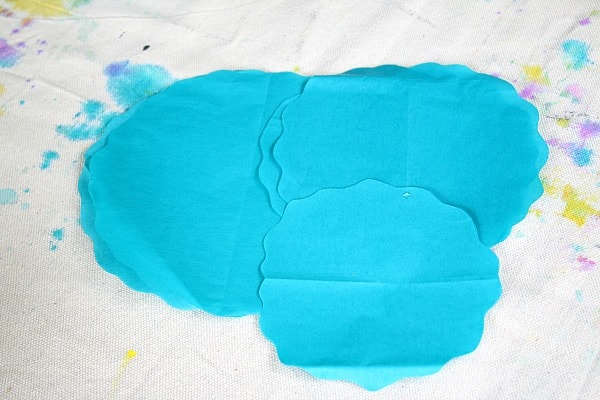
4. Now it’s time to make the tissue paper petals. Cut out 6 tissue paper circles from your large tissue paper sheets: 2 large, 2 medium and 2 small. (I cut mine with wavy borders, but you can simply cut them with a regular border as well.)
5. Stack them on top of one another.
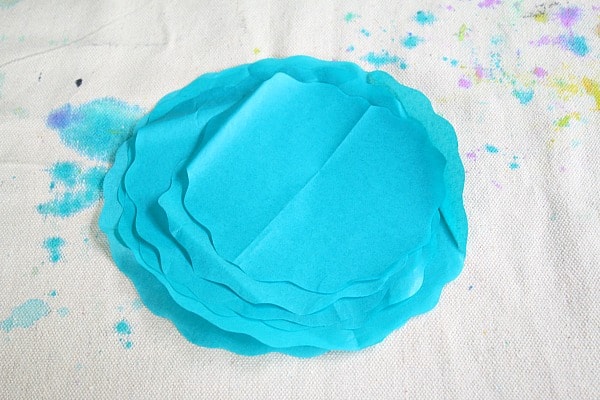
6. Grab the center all the circles at once from below the stack and pinch the paper together.
7. Stuff it gently into the flower stem and staple in place.
8. Gently pull out and manipulate the tissue paper petals until you’re happy with the look.
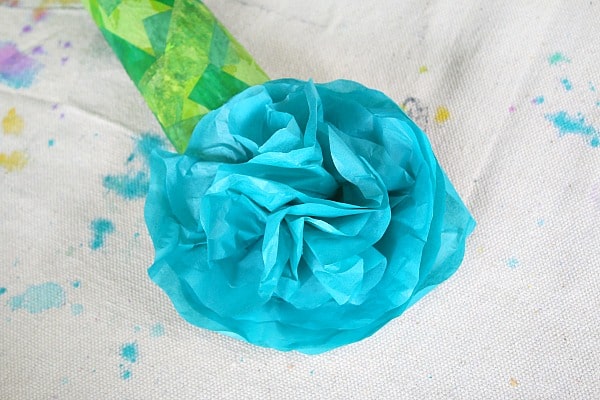
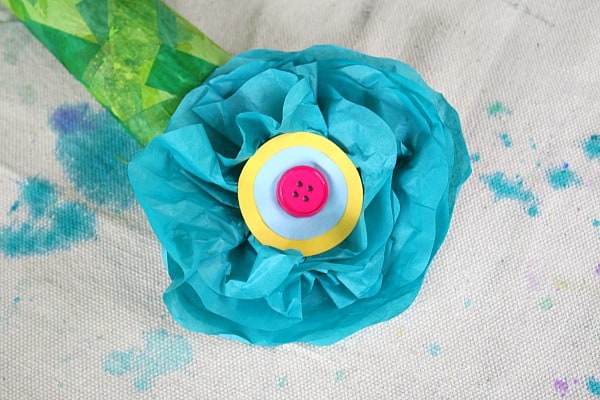
9. I think they look beautiful just as they are, but you can also add a cute, little center to your flower.

To make centers for your tissue paper flowers, cut out some different colored circles from construction paper and glue them together. Glue a button in the center of the little circles.
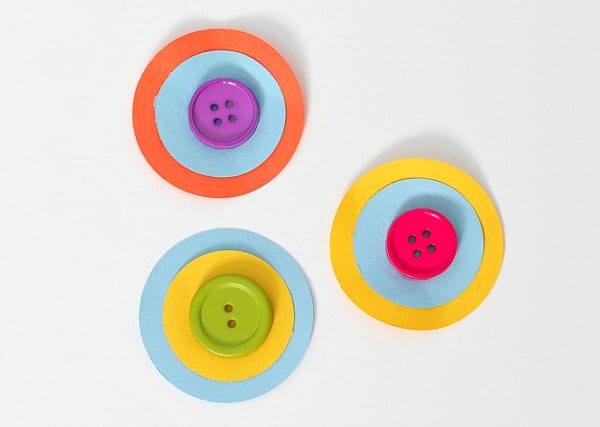
Use a glue dot to attach the circles to the tissue paper flower.
Tips
- If you want to complete this craft all in one sitting, skip the tissue paper and glue step. The tempera paint dries fairly quickly so there’s no need to wait long to attach your tissue paper flower to the top.
- Don’t worry about younger children bunching up the tissue paper squares or crinkling them as they’re gluing them onto the stem. The wrinkles add a fun texture to the finished project!
- Leave the stapling portion to the adult. You’re working with a small space when stapling the petals to the cardboard tube, and you don’t want to risk kids hurting their fingers.