This painted rock photo holder craft for kids is perfect as a homemade gift for Mother’s Day, Father’s Day, Christmas, and also makes a great summer camp craft! This creative craft using stones of various sizes can be adapted for just about any age. I’ll share tips for adapting this craft for each of the directions below.

Painting rocks has become quite the trend recently… and for good reason! There are so many creative ways to paint rocks, and there’s just something super special about creating with items from the outdoors.
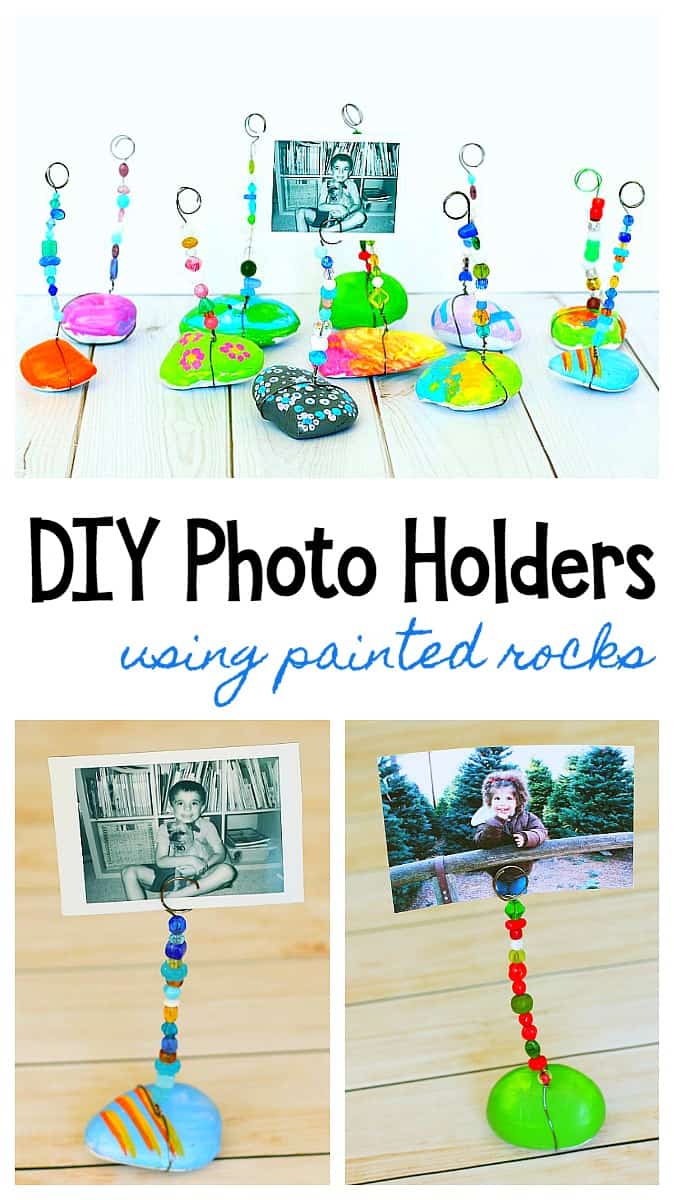
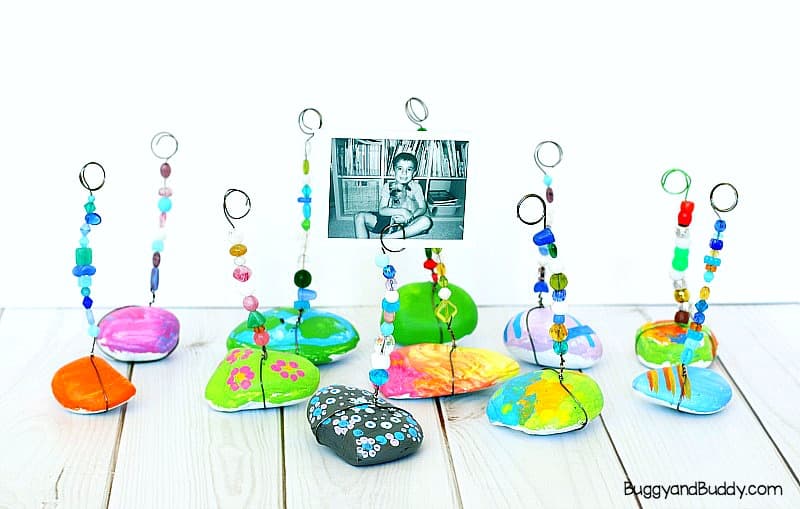
Why not turn your painted rocks into a special keepsake? In this tutorial I’ll show you how to use your painted rocks to make special photo holders you can display at home or give as gifts to those special people in your life.
Don’t be hesitant to do this craft with young children. With a few modifications, which I’ll share below, even preschoolers can take part in this special rock craft for kids!
Painted Rock Photo Holder Craft for Kids
Materials for Painted Rock Photo Holder
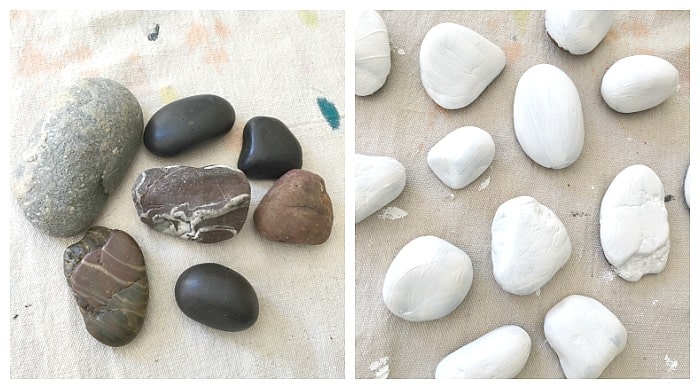
- Rocks or stones (You can collect your own from outside, or purchase them from a craft store or online. Just be sure not to get rocks or stones that are glazed. The paint will have trouble adhering to the surface.)
- Acrylic paints in various colors and paintbrushes
- A sealant- like Mod Podge or Krylon Satin Finish
- Craft or floral wire (similar to this)
- Beads
- Bead tools like wire cutter and pliers (I have a kit similar to this one that works well.)
- Special photos to display (We used an Instax Mini Camera to take instant pictures that were about 2 x 3.5 inches, but you can also use regular phots and trim them to any size you’d like. Here’s the paper cutter I have at home to help with trimming.)
Directions for Painted Rock Photo Holder
1. Start by washing your rocks with water and letting them dry completely. This is a fun task for the kids to do!
2. Set up an area to paint your rocks or stones. You can use newspaper to cover your table, or I’ve invested in a few drop cloths. These last quite a while and protect tables really well. If you have a classroom, you can get one per table group. I also place a jar of soapy water on the table for used brushes to be placed in. That makes clean up super easy!

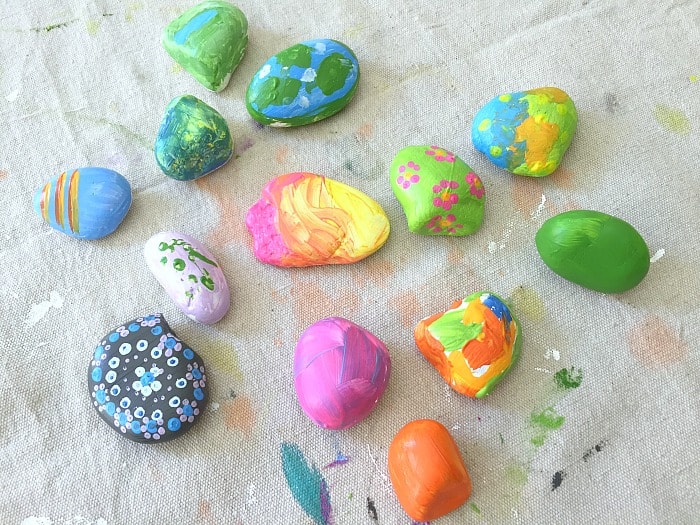
3. Depending on the darkness of your rocks, you might want to paint them white first so you’ll have a nice, blank canvas to work with. We painted ours with white acrylic paint and let them dry. You could do this ahead of time (even spray paint them white if you’re doing this with a large class) or let the kids do it on their own.
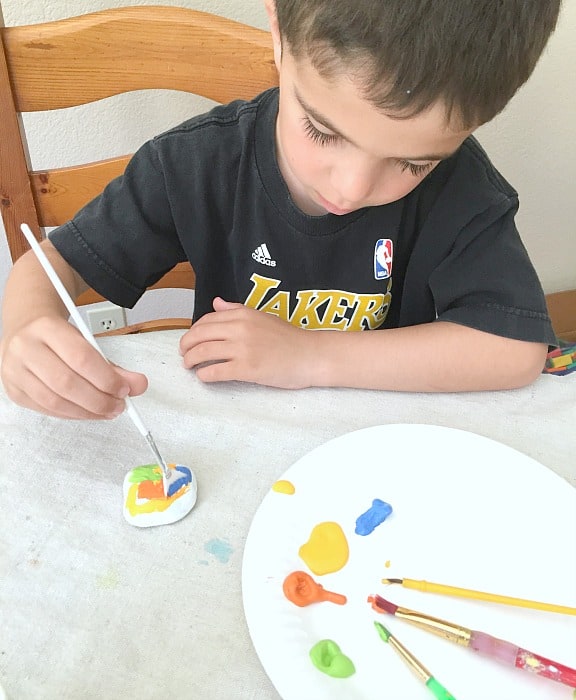
4. Use various colors of acrylic paint and get busy creating. You can paint designs, mandalas, pictures, flowers, just about anything on your rocks. We like to use various sized paintbrushes and even cotton swabs to make dots. (I usually have the kids choose about 3-4 colors of acrylic paint and squirt a bit of each on their own paper plate to use as a palate. I also have a selection of various sized brushes available to them.)
5. Once your rocks have dried completely, it’s a good idea to seal them with a sealant. We usually use Mod Podge or Krylon Satin Finish. If you’re using the Krylon Satin Finish, you’ll definitely want an adult to do this step.
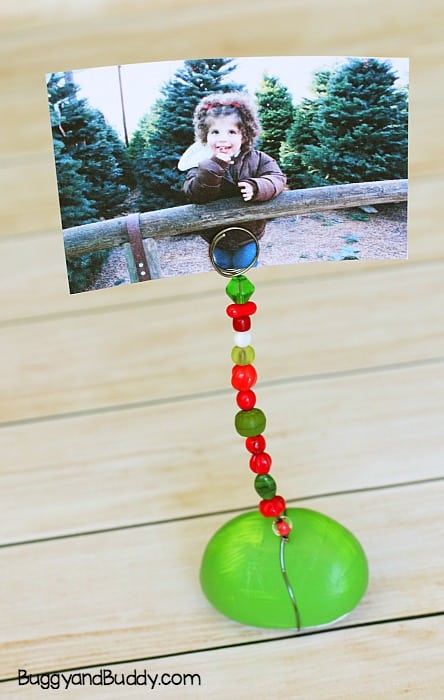
6. The next day after the sealant has had a chance to dry completely, it’s time to add the wire to your rock. There are various gauges of wire available and any will work as long as you make sure the wire you choose will fit through your selected beads. For our photo holders, we used 20 gauge wire.
I dislike giving exact ages because every child is different, but I’d say probably any child younger than 4th grade will need assistance with this step. And if doing this with preschool, kindergarten, first, or even second grade, I might actually just have an adult do this step for the child.
Take the end of the wire and hold it on top of the rock. Wrap the wire around the rock one time (sometimes you have to be creative and pick which directions will hold the wire best). Twist the wire together with your fingers first and then carefully tighten with pliers so the wire doesn’t slip off.
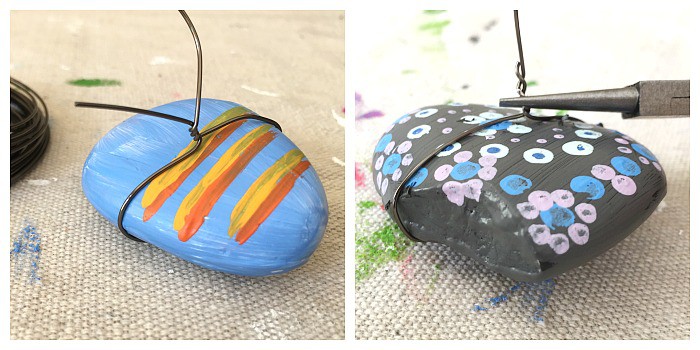
7. Cut the wire so you have about 7-8 inches left sticking straight up from your rock.
8. String beads onto the wire until you have about 3 inches left at the top. Younger children will definitely want to use beads with a larger center like pony beads. Older children can use smaller beads. Like I said before, just be sure to check that the beads you’ve chosen for the project fit onto the size of wire you are using beforehand.
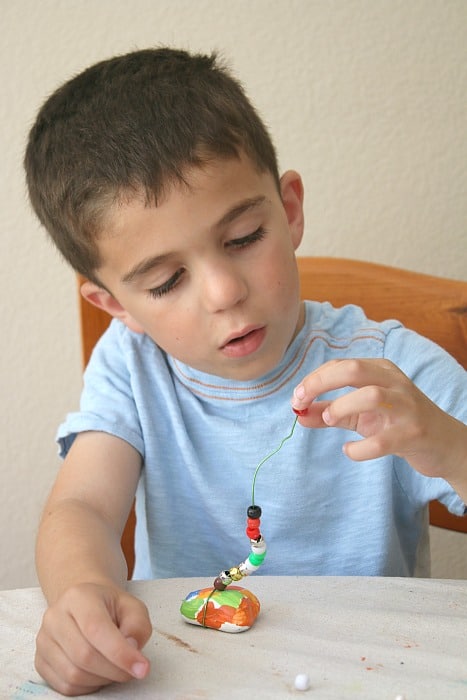
9. Now it’s time to create the loop to hold the photo. Any child younger than 4th grade would most likely need an adult to do this step. Take a Sharpie or thicker marker, and wrap the remaining wire around it securely about 2-3 times until it reaches the beads. Use your pliers to adjust the loop so it’s sticking up straight.

Look at all the DIY painted rock photo holders together- so colorful and fun!
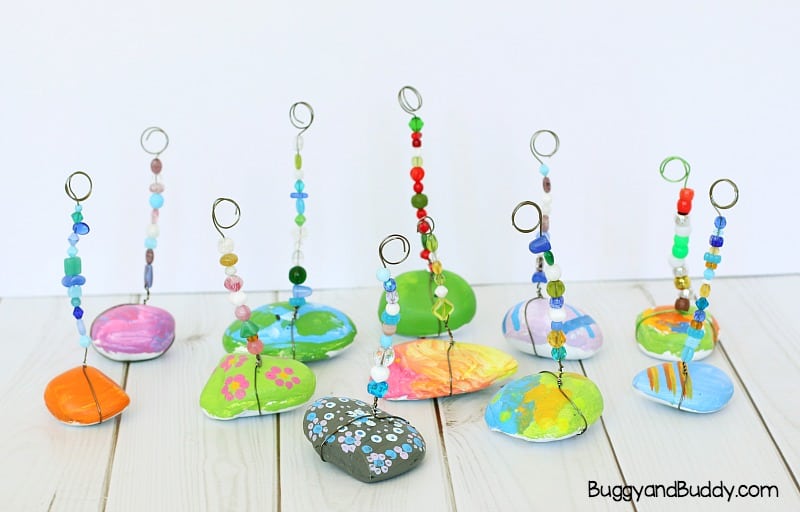
10. Place a special photo inside the loop to display! For Mother’s Day or Father’s Day, it could be a special photo of the child with his or her parent.
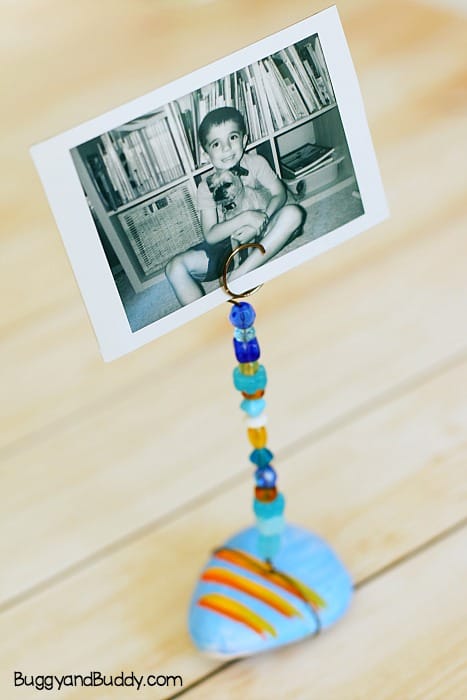
For Christmas you could use a photo of a child in a Santa hat. If you want the photo to remain in the rock photo holder permanently, you can hot glue it to secure it. Otherwise, the photo can be changed out.
Children might also want to take their own photos to display. My daughter loves using the Fujifilm Instax camera to take her photos. She loves how they come out immediately and there’s all kinds of different film types available like monochrome, film with rainbow borders, and more!