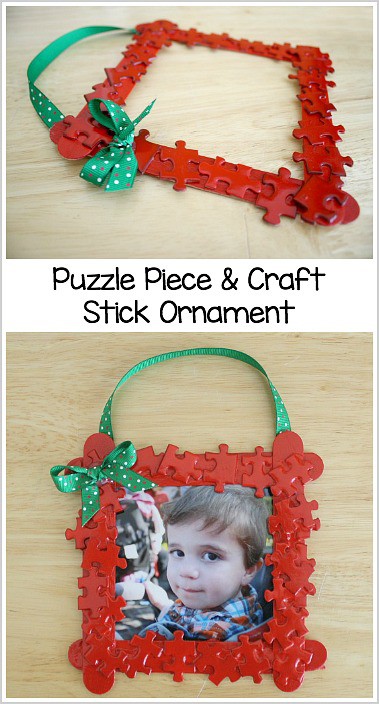
We love making homemade Christmas ornaments! This cute puzzle piece frame Christmas ornament is such an easy craft for kids and only uses a few materials. It’s also a great way to use up all those old puzzle pieces!
Follow our Christmas for Kids and Family Pinterest board!
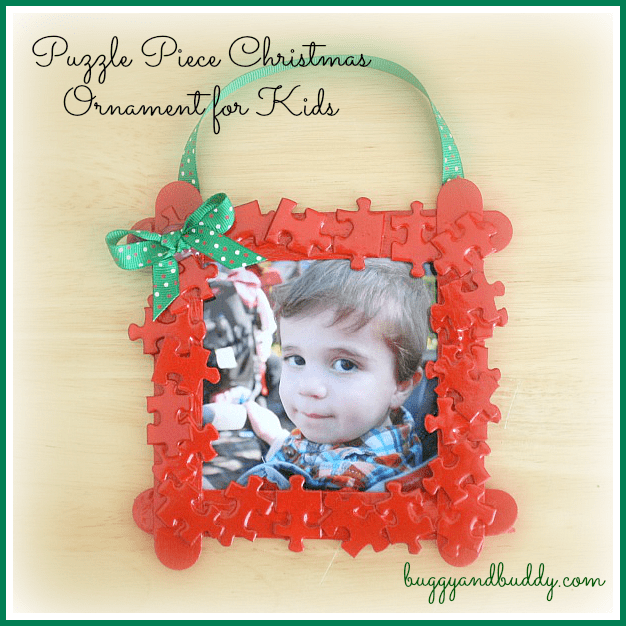
Don’t you just love hanging up homemade Christmas ornaments each year? This one is extra special because not only is it kid-made, but it also holds a photo of your child.
Puzzle Piece Frame Homemade Ornament for Kids
I can’t take full credit for this adorable puzzle piece Christmas ornament. I was first introduced to it by my awesome Kindergarten teaching partners back when I was a classroom teacher. We used to do it with our Kindergarten students each year, and now I love doing it with my own kids at home! It’s very simple and requires just a few common crafting supplies. (This post contains affiliate links.)
Materials Needed for Puzzle Piece Christmas Ornament
- Popsicle sticks (You can use any size. I used jumbo craft sticks
.)
- Puzzle pieces
- Liquid glue
- White spray paint (optional)
- Red paint (The kids can paint it on their own with red tempera paint or acrylic paint and a paintbrush, or you can spray it with red spray paint
.)
- Craft ribbon
- Glue gun
or strong liquid glue
- Photo of your child or student
Directions for Puzzle Piece Christmas Ornament
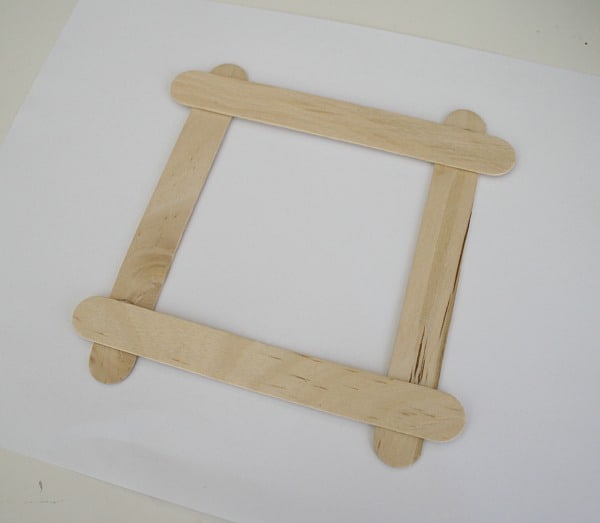
1. Glue together 4 popsicle sticks to create your frame shape. Be sure to do this ahead of time so it’s dry and ready for the kids to use. I used a hot glue gun so I wouldn’t have to wait too long for it to dry.
2. Have your child or student glue puzzle pieces around the the frame. There’s no right or wrong way to do it. Some kids like one single layer. Other kids will go around and around!
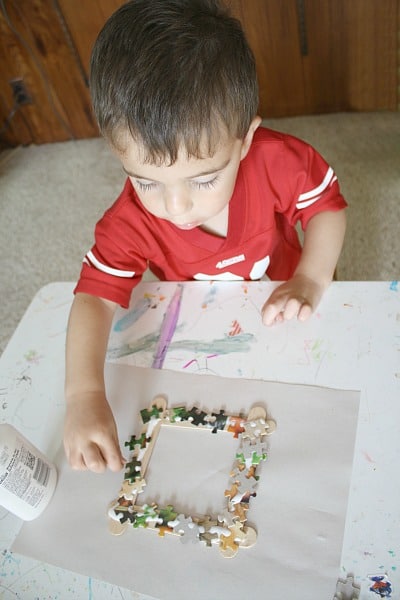
3. Let the puzzle pieces dry completely.
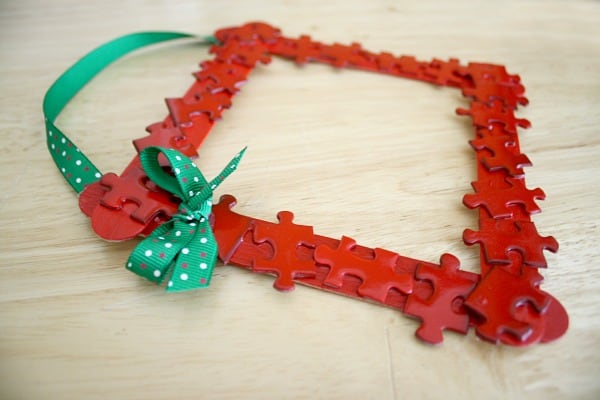
4. Optional: Paint your ornament with white paint to give it a good base coat. This is helpful if your puzzle pieces are a darker color. Paint your ornament with red paint. It’s fun to let the kids do this on their own with some kid-friendly paint, or you can spray them red with spray paint.

5. Once the paint is dry, it’s time to add the ribbon. Tie one piece of ribbon into a little bow and glue on your frame. To hang the ornament, I cut a piece of ribbon and glued it to the back of the frame.
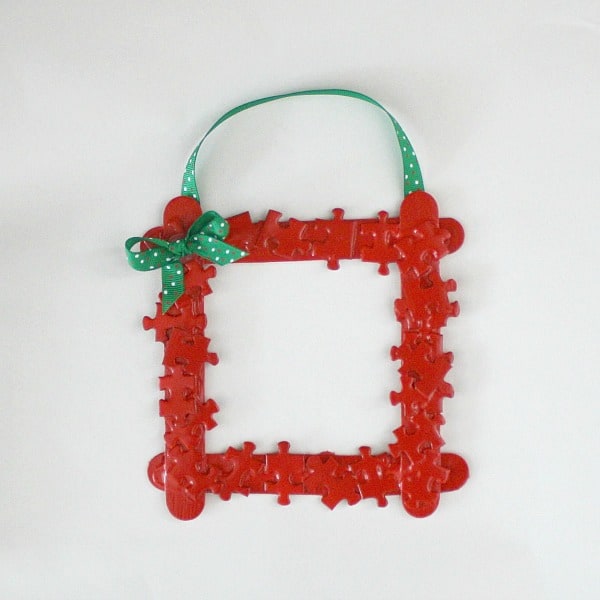
6. Find the perfect photo of your child or student and glue it to the back of the frame. I know some teachers like to take pictures of the kids wearing a Santa hat or reindeer antlers for the finished frame. Those always turn out so adorable.
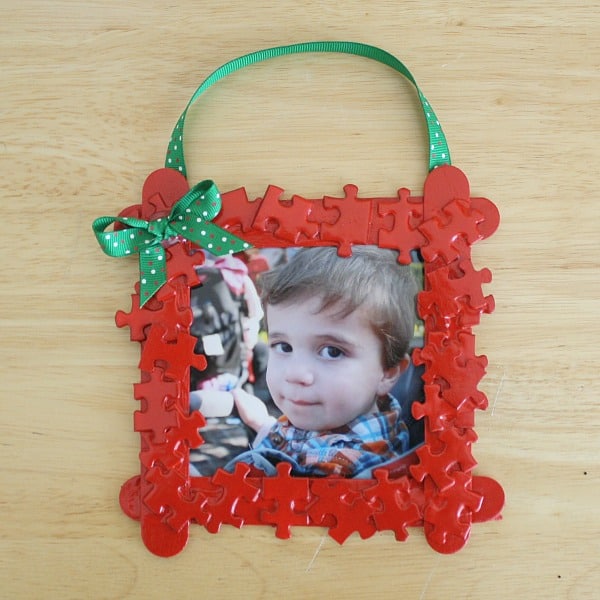
7. Hang them on your tree year after year to enjoy!