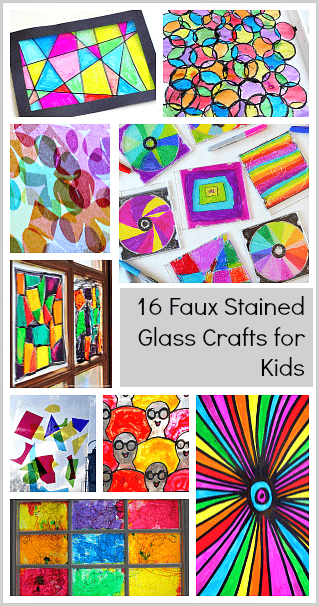
Here is a simple tulip flower bouquet craft for kids with an optional free template. This craft is super cute, and it is also really simple to make as it only requires a few materials you probably already have at home or in the classroom. The tulip craft is perfect for spring, Mother’s Day, a unit on plants or just to do on a rainy day to brighten up a room.

Free Printable Tulip Template
You can print this free tulip template onto white paper for kids to color themselves or onto colored paper.
Materials
- White Copy Paper or Colored Copy Paper 8.5 x 11 inches (This is the colored paper we used.)
- Free Template (see above)
- Scissors
- Glue Stick
- Glue Dots
- Yarn or Ribbon
Video Tutorial
You’ll find written directions with photos below this video.
Directions for Tulip Bouquet Craft
Print out the free printable tulip template onto 8.5 x 11 copy paper. You can use white if you’d like your child to color it or print the template out on a variety of colored paper.

We used all four tulip tops on the template to create one 3D flower so print one sheet per flower. We used three flowers in our bouquet.

1. Cut out all four tulip shapes.
2. Fold them all in half vertically.
3. Use your glue stick to put glue on the outside of one side a folded tulip. Press it to the side of another folded tulip so you now have two tulip shapes glued together. You should be able to open the tulip shapes like a book.
4. You can stop at two or glue together three or all four like we did. Now you have one completed tulip head.
5. Make as many as you’d like. We found 3 fit nicely when using the 8.5 x 11 inch green paper folded vertically as you’ll see below.
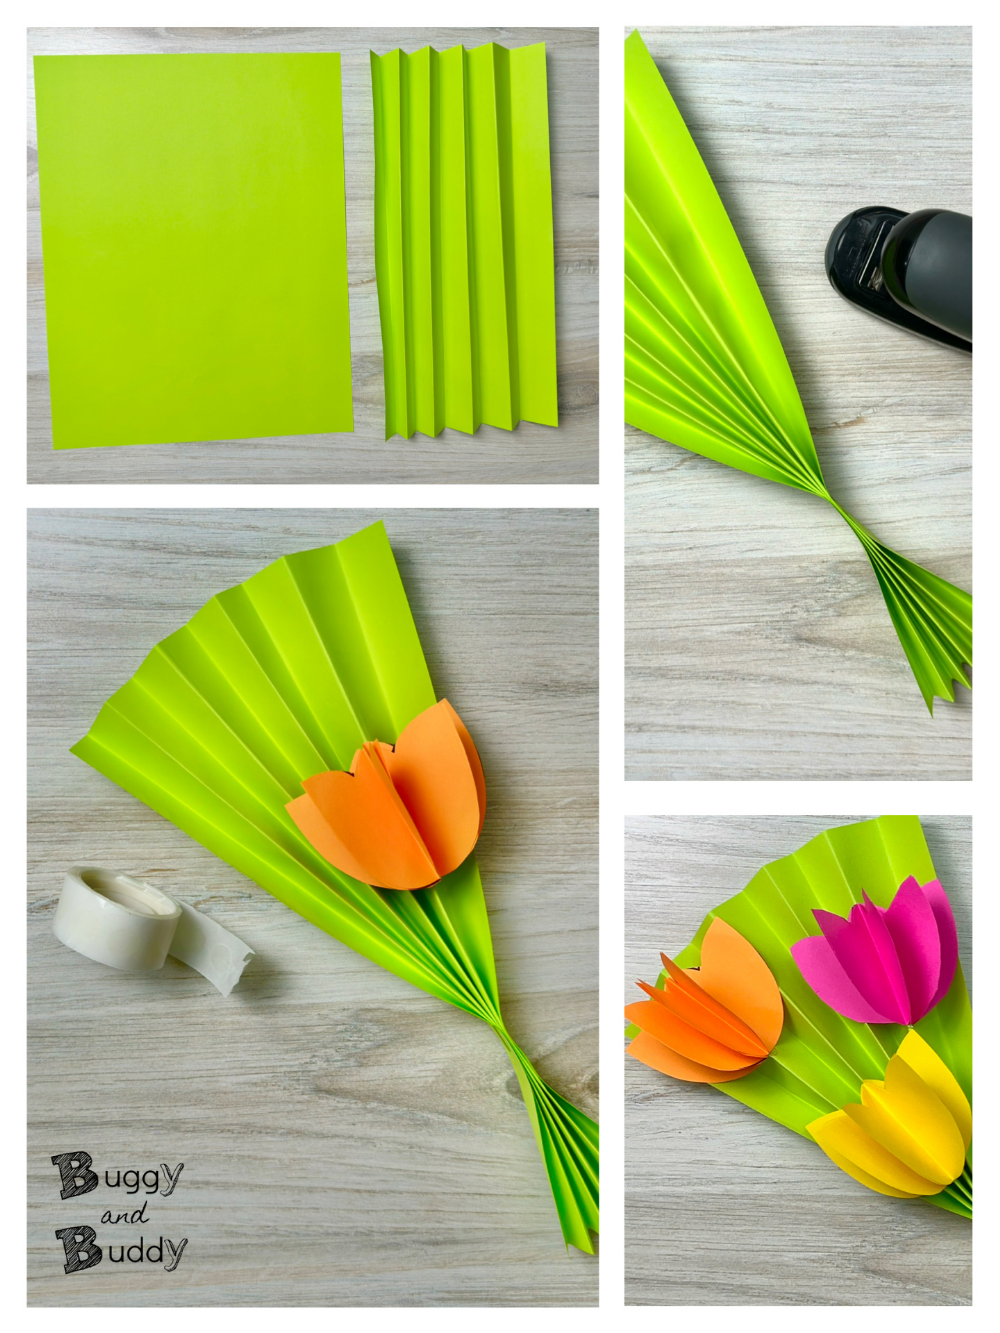
6. Set the completed flower tops aside.
7. Take a piece of 8.5 x 11 inch green paper and accordion fold it vertically. (To accordion fold you simply fold a portion of the paper forward, then back, forward, then back and contine until the entire paper has been folded. When you unfold it it will look as it does above.)
8. Staple the paper a few inches up to create a stem.
9. The top should look like a fan.
10. Now it’s time to use the flowers you set aside. Lightly place them around the green fan-like top until you are happy with their placement. Use a glue dot to attach each flower where you’d like it.
11. Tie a piece of yarn or ribbon around the stapled portion and create a bow.
12. That’s it!
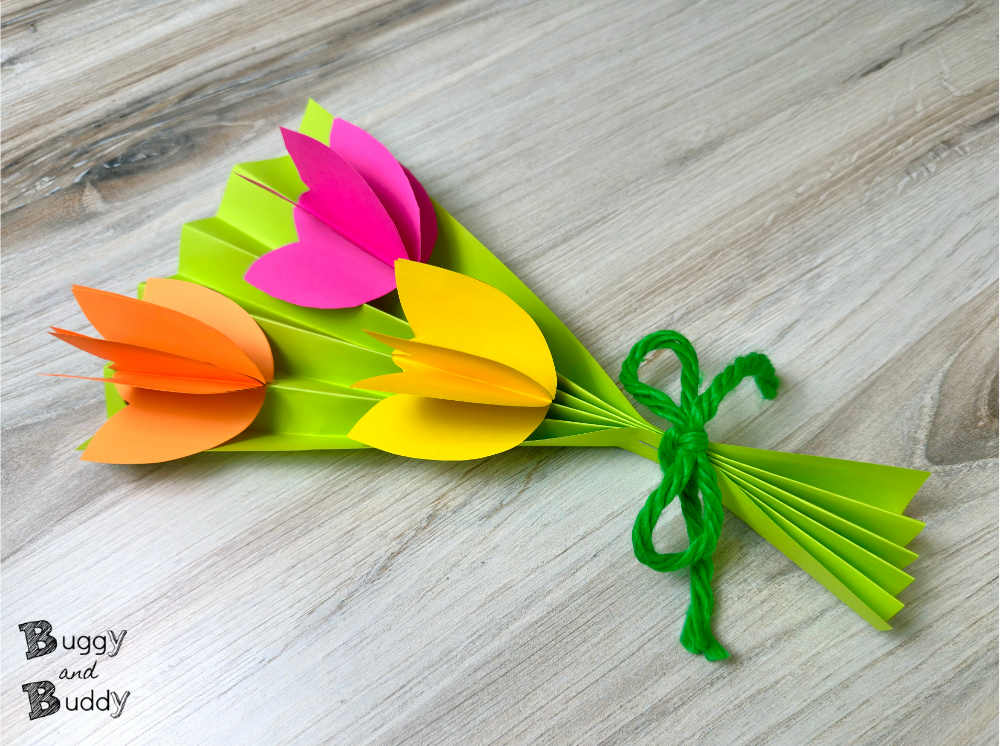
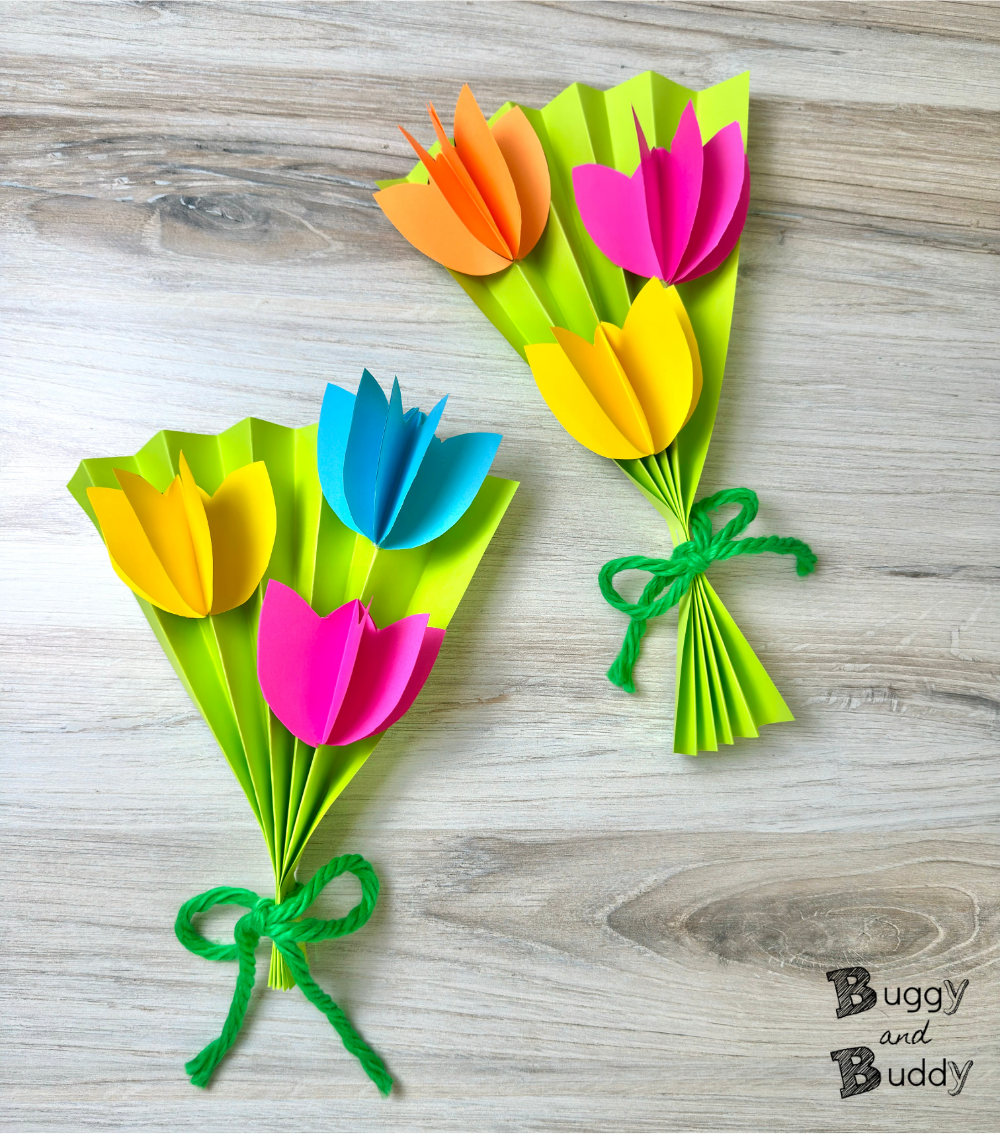
You can make a variety of bouquets with different color flowers. These make such sweet, little gifts for someone special or festive decorations to place around your room or classroom.
Ways to Modify the Paper Tulip Craft
- You can use the tulip heads in other ways: glue them on a folded piece of paper to make a greeting card, glue them onto the top of a straw or popsicle stick to make a single flower etc.
- For younger kids: Cut out the tulip heads, but do not make them 3D. Glue them onto the folded paper. If they are too young to accordion fold, have the younger children glue the paper tulip head onto a piece of green paper and then draw a stem and leaves below each one.
- Instead of a bow add a tag listing who the bouquet is to and from.
- Encourage children to design their own flowers rather than use the tulips. You’ll be surprised with all the designs they’ll create!