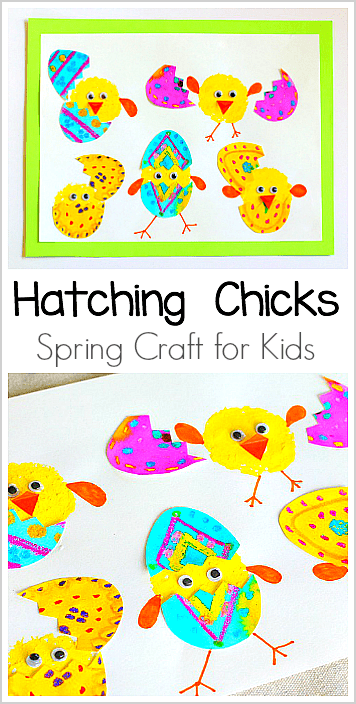
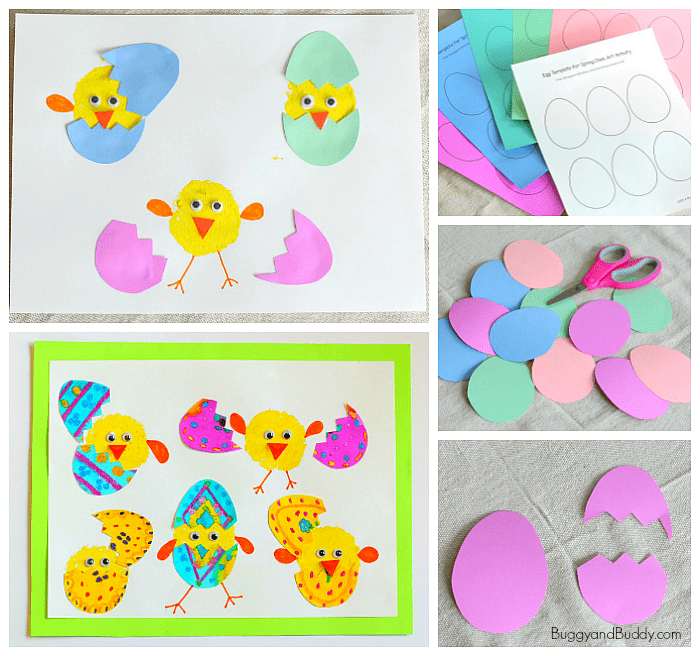
This hatching spring chicks craft is just the cutest and is so fun to make! You’ll just need a few craft supplies, and the post even includes a free egg template to make creating this project even easier.
This hatching spring chicks craft was always one of my favorites to make with my kindergarten, first and second grade classes during spring or around Easter. (The project is also perfect for preschool.) I loved seeing all the creative ways the kids would come up with to make their baby chicks hatch out of their eggs!
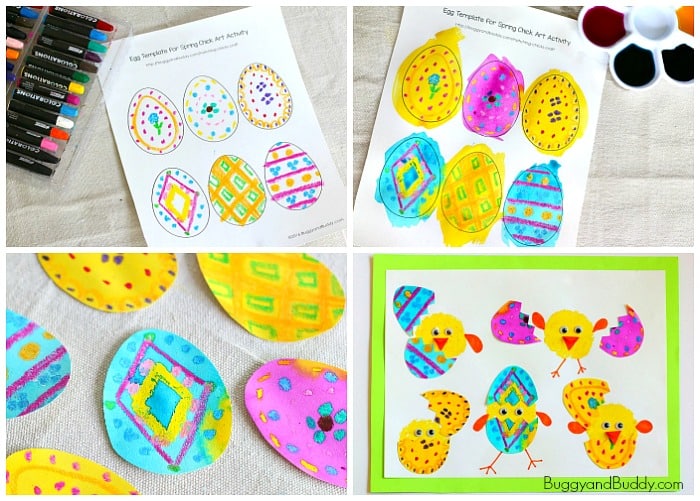
You can make this a one day project, or add an oil pastel and water color resist activity to the project and do it over two days. I’ll provide directions for both methods below.
If you’re looking to tie in some literature, Rechenka’s Eggs by Patricia Polacco makes the perfect children’s book addition. It’s one of our absolute favorite stories and also includes some illustrations to inspire the kids when decorating their eggs.
Hatching Spring Chicks Craft for Kids
Materials for Hatching Spring Chicks Craft for Kids
- Art paper or other thick paper (I love this ultimate art paper. It’s inexpensive and works well with all kinds of paints!)
- Yellow tempera paint
- Kitchen sponge
- Scissors
- Markers
- Construction paper or cardstock in various colors
- Glue
- Optional: Googly eyes, oil pastels, watercolor paints
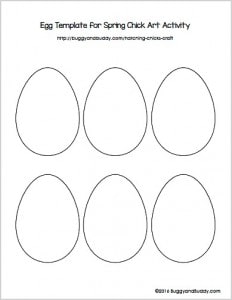
- Free egg template
Directions for Hatching Spring Chicks Craft for Kids
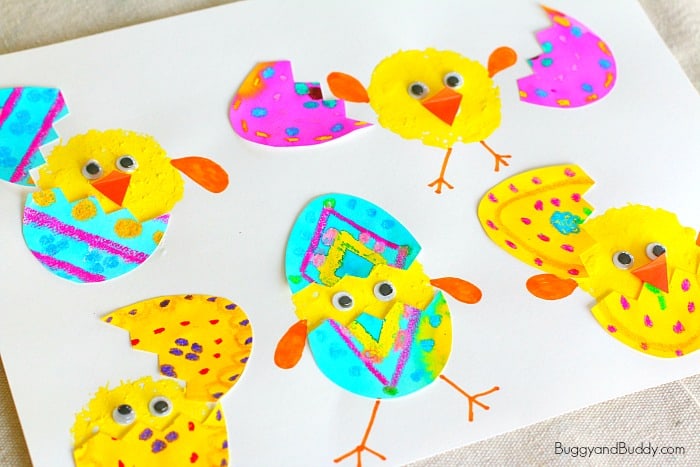
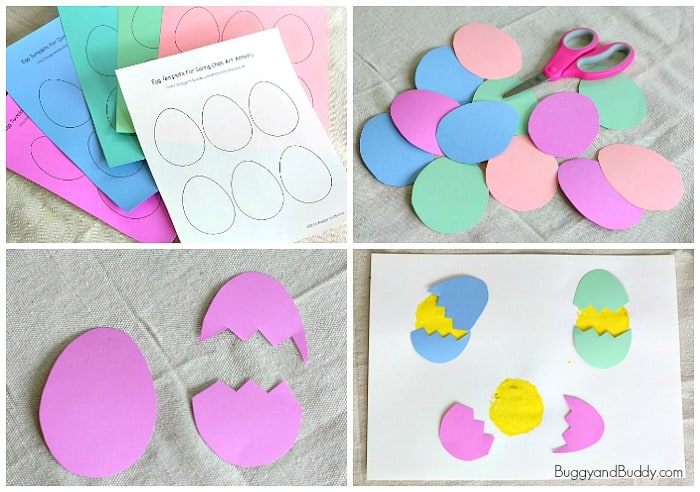
1. Cut out a circle shape from a kitchen sponge.
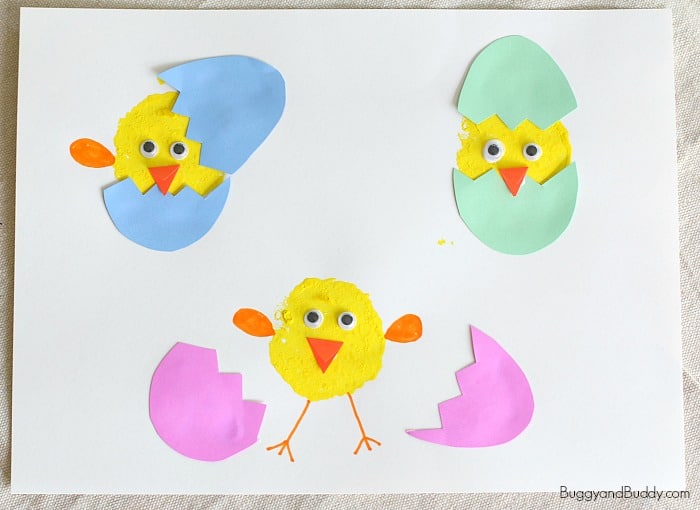
2. Dip the circular sponge into yellow tempera paint and stamp it onto your white art paper. Do this as many times as you’d like, saving some room to add your eggs nearby. (These yellow circles will be your chicks.) Set aside to dry.

3. While your paint is drying, it’s time to make your eggs. You can print out my free egg template right onto colored construction paper or cardstock and have the kids cut them out with scissors. You can also print the egg template onto white paper and have your students decorate them with crayons before cutting them out.
4. After you cut out your eggs, cut them in half using a zigzag pattern. (Younger children might need to draw their zigzag with a pencil first to have a line to cut on.)
5. Glue the egg pieces onto or near your yellow chicks.
6. Use your marker to add some wings and legs to your chicks. Glue googly eyes onto your chicks.
7. Display your artwork!
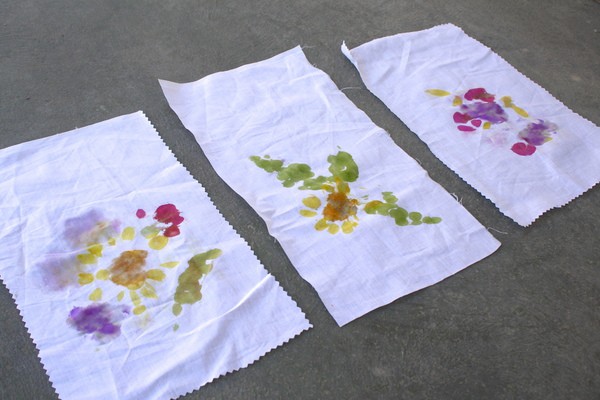
Hatching Chicks with Oil Pastels and Watercolor Paint
Print your eggs out onto art paper.
Use oil pastels to draw designs on your eggs.
Paint over the eggs with watercolor paint.
Once the paint has dried, cut out the eggs and follow the same directions as above.