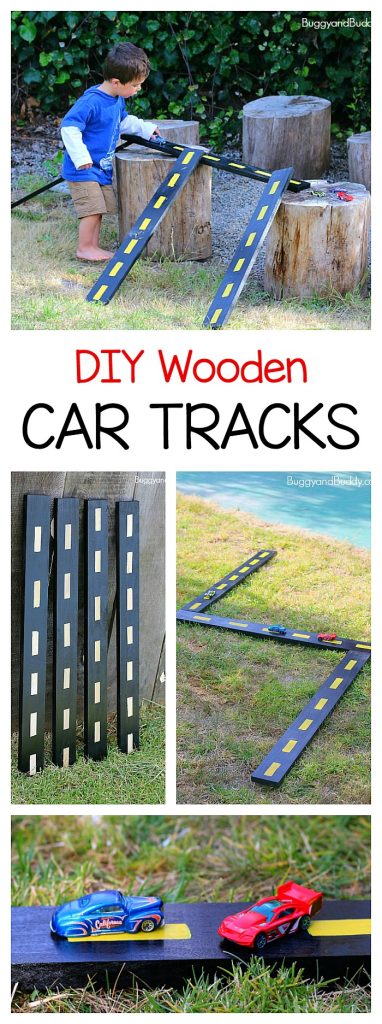
Here’s how to make wooden roads and ramps for toy cars. These DIY car tracks are perfect for both indoor and outdoor play and is super easy to make!
Follow our Cars, Trucks, and Trains Pinterest board!
My son’s most favorite toy in the world is Hot Wheels. I don’t think a day goes by where toy cars are not involved in his play. So Lucy and I decided to make Theo his own wooden toy car roads and ramps for his birthday!
These wooden toy pieces were so easy to make and so so fun to play with! You can move them in any formation you’d like, creating ramps and roads to play with in just about any setting! (This post contains affiliate links.)
See them in action here!
How to Make Wooden Toy Car Ramps & Roads
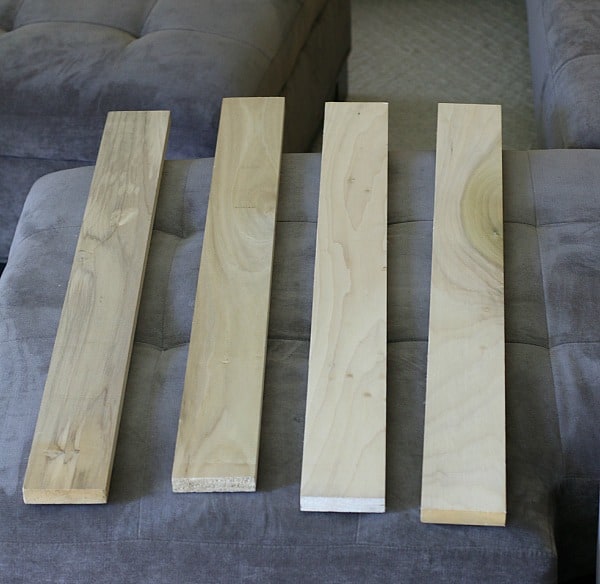
Materials for Wooden Roads and Ramps for Toy Cars
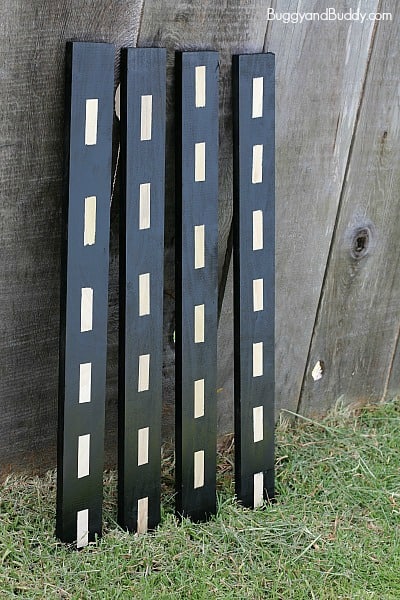
- 4 wooden boards (We used poplar boards measuring 36 in. x 3 1/2 in. x 3/4 in. from our local home improvement store.)
- Black spray paint (We used this spray paint.)
- Masking tape
- Yellow paint (optional)
Directions for Wooden Roads and Ramps for Toy Cars
1. Use masking tape to mark off where you want your yellow road lines to be on your boards.
2. With the masking tape still on, spray the entire board black and let it dry. (We did two coats.)

3. Once the paint has dried, remove the masking tape to reveal the wood-colored lines.
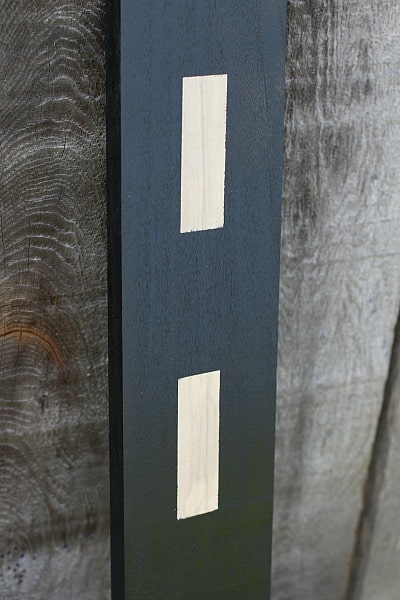
You can leave it as is or continue to step 4.
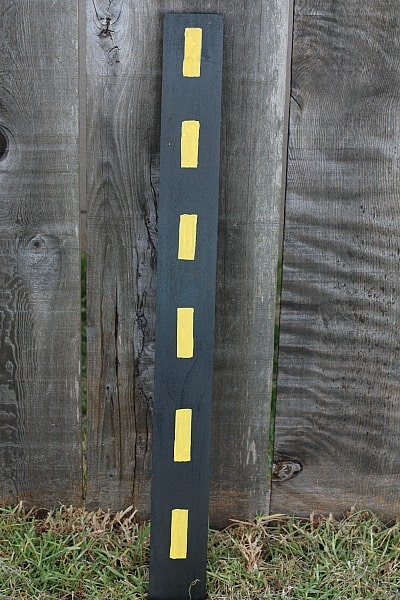
4. Paint the lines yellow and let dry. (We painted ours by hand, but if you want them to be perfect, I’d recommend creating a stencil and using this spray paint for your lines.)
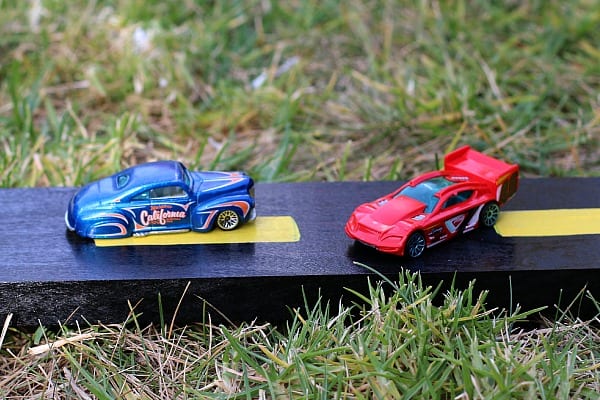
Now you’re ready to play!
Playing with the Wooden Car Ramp & Roads
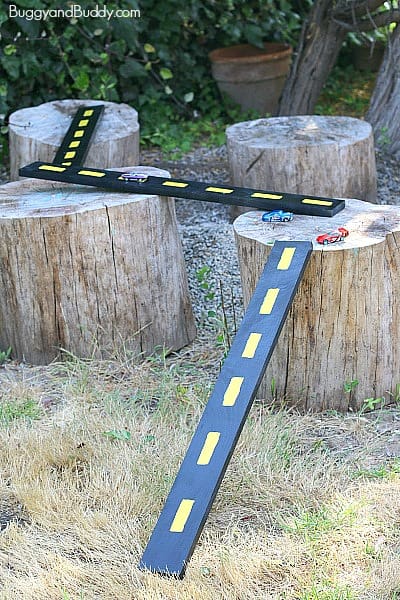
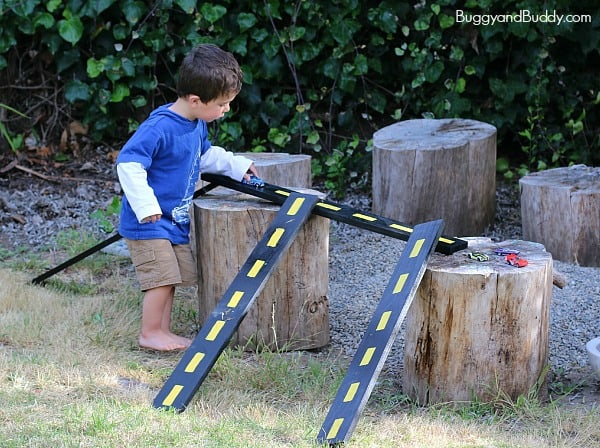
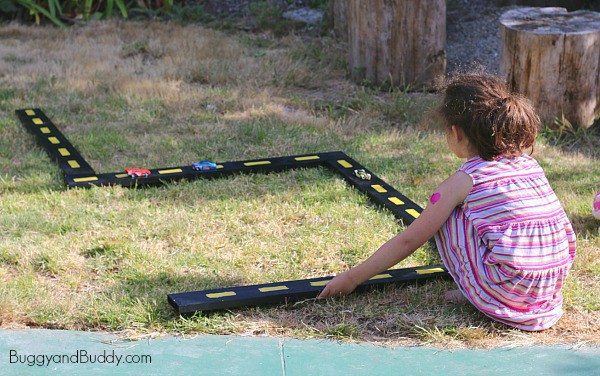
We’ve been using our homemade roads for toy cars outside. Sometimes the kids prop them up onto some stumps in our back yard to make ramps.
They also love to set up a little track on the grass using the boards.
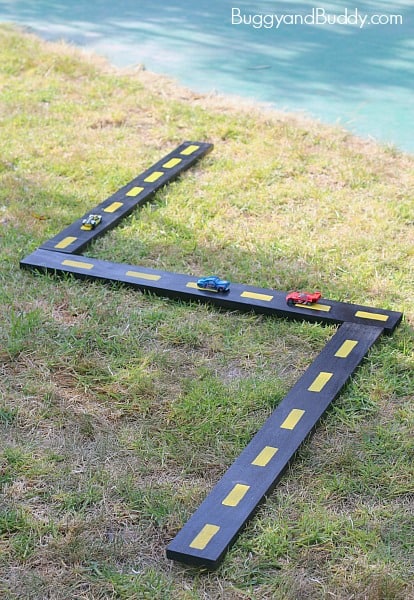
I love that the kids can move the boards all on their own to create roads and ramps in any formation they’d like!
We are definitely loving our new outdoor toy, and Lucy especially loves that she was able to help make it for her little brother!