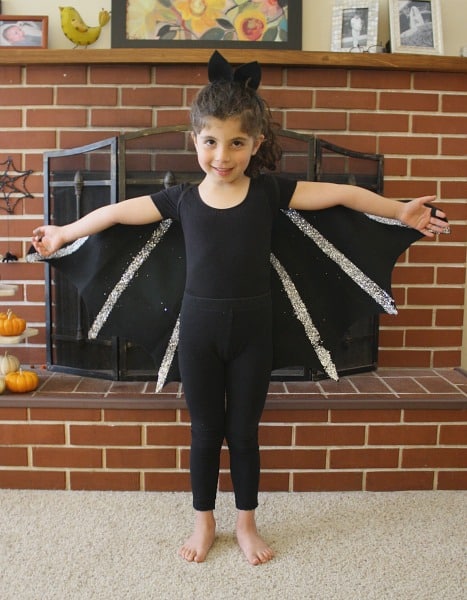
Here’s a simple DIY bat costume you can make from just a few materials. The felt bat wings and headband ears are a perfect Halloween costume or can be a fun prop for imaginative play!
A few weeks ago I made some monarch butterfly wings from felt. I had some black felt leftover and thought it would be fun to try to make some bat wings. And to complete the bat costume, I felt we needed a cute bat ear headband.
There’s a few different variations on the wings based on what you’ll be using them for so be sure to read the pros and cons to each option before deciding which you’d like to make. As with the monarch butterfly wings, there’s very little sewing, just a few stitches to secure on the elastic loops for wearing.
Homemade Halloween Costumes: Bat Wings & Ears
Materials for Plain Bat Wing Costume
- Black felt (36 inches x 36 inches- similar to this)
- 1 Sheet of poster board (any color- it’s just for making a template)
- Pencil
- Pins
- Scissors
- Black elastic- 3/8 inches wide
(Cut into: 2 pieces 15 1/2 inches long, 2 pieces 4 inches long)
- Black sewing thread
- Sewing machine or sewing needle
Option #2: For Glitter Wings You’ll Also Need:
- Black glitter
or silver glitter
- A spray adhesive like this.
or Aleenes All Purpose Tacky Adhesive Spray
- Masking tape
Option #3: For Duck Tape Wings You’ll Also Need:
Materials For Headband Bat Ears
- Black felt (I used the scraps from cutting out the wings.)
- Black headband
- Hot glue gun (or strong glue like Fabri-Tac
or Tacky Glue
)
Directions for All Bat Wing Options
1. Draw half of a bat wing shape on the posterboard using pencil and cut it out. (I measured from the center of Lucy’s back to the edge of one hand. This distance was just under 22 inches.)
2. Take your piece of black felt and fold it in half. I had to fold mine in half diagonally for the wing to fit. Place the center edge of the wing template along the folded edge of the black felt. Pin it in place.
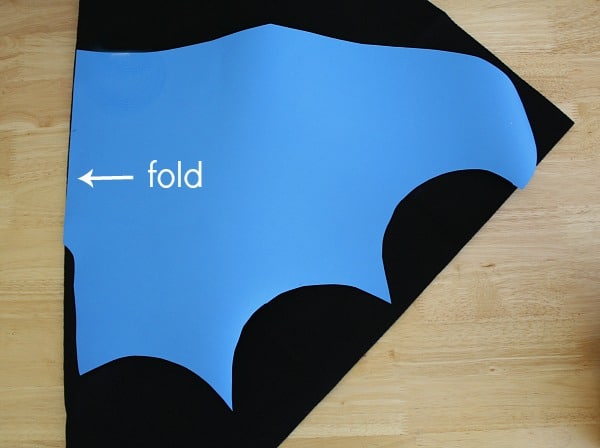
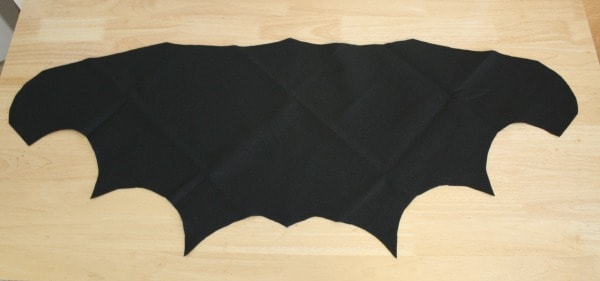
3. Cut the black felt around the template. Unpin the cardboard and unfold the black felt to reveal your bat wings.
4. Now it’s time to sew on the elastic. We’ll be making two large loops in the center of the wings to place arms through and a small loop for the tip of each wing to place the thumbs through.
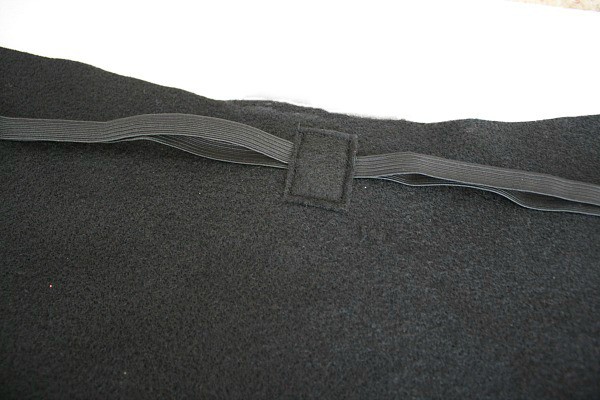
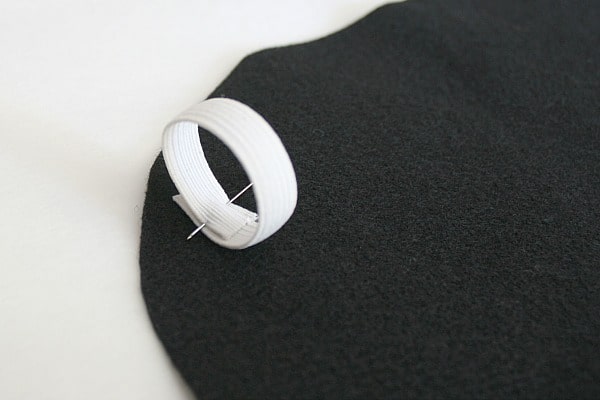
5. Take your two long pieces of black elastic (each 15 1/2 inches long) and fold them in half forming a loop with each one. Pin them to the wings with the cut edges in the center top of the bat wings. (I’m using white elastic in the photo below so you can see it more clearly.

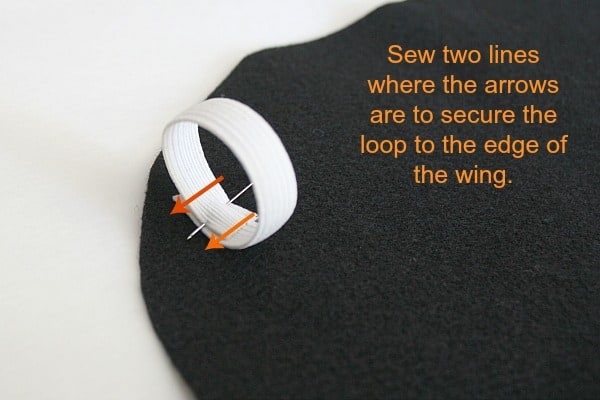
6. Cut out a small rectangle from your leftover black fabric. Place it on top of the elastic ends to cover them up. Sew around the entire rectangle, securing both elastic pieces in place.
7. Now that the arm loops are sewn in place, it’s time to attach the thumb loops. (Again, I’m using white elastic for you to see it more clearly. The actual wings use black elastic.) Take one of the 4 inch pieces of black elastic and form it into a loop. Pin it at the end of one wing. (You can hold the wings up to your child to estimate about where his/her thumb will be.) Pin the loop in place. Do this for the other loop on the remaining side.
8. Sew the loops in place.
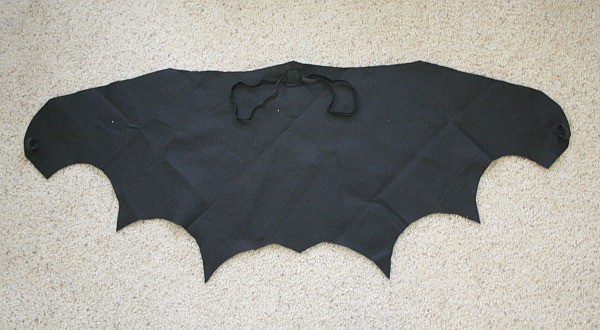
This is how the inside of the finished bat wings look.
9. Now that the elastic loops are sewn on, it’s time to decorate the bat wings! There are 3 options…
OPTION #1: Leave the bat wings plain (as they are now).
Pros
-Will last for a long time. (Great if you’ll be using these for dress up play.)
– No need to buy additional materials
Cons
– Not as fancy as the other two options
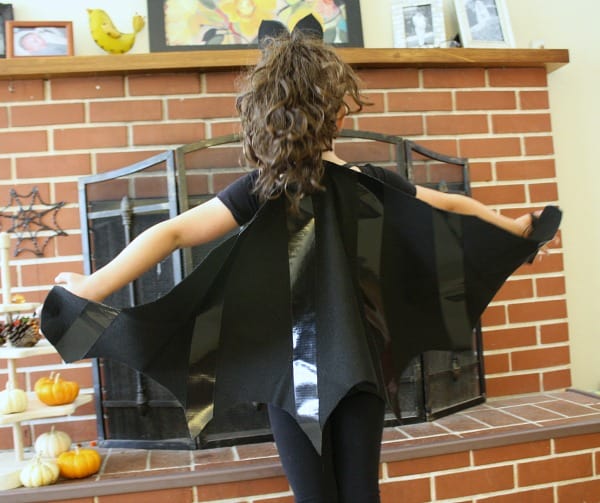
OPTION #2: Duck Tape Bat Wings
Pros
– Simple to make
– Look awesome!
Cons
– I’m thinking eventually the tape will start peeling off over time (although ours are still intact). If this happens, you could just peel it off and leave the bat wings plain.
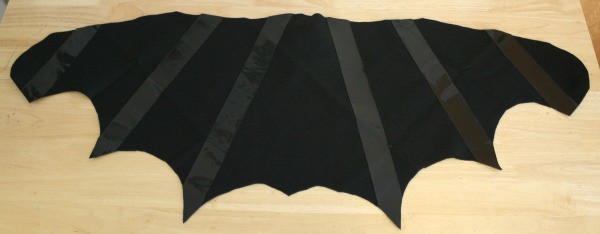
Directions for Duck Tape Bat Wings
1. Place strips of duck tape on the bat wings where you’d like the lines to be. Make sure the strips of tape are hanging over the edges of the felt.
2. Once you’ve finished, trim off the tape that’s hanging over the edges.
3. Press the tape firmly into place.
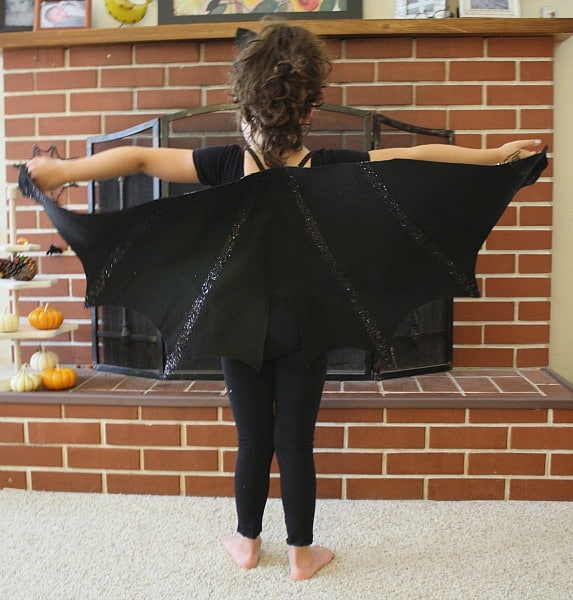
OPTION #3: Glitter Bat Wings
Pros
– Very cute and bold looking!
– Perfect if you’re planning on just wearing a few times (like for Halloween).
Cons
– Glitter. Glitter is sure to constantly fall off the wings as your child is wearing them.
– I don’t think the glitter will outlast lots and lots of wear.
Directions for Glittery Bat Wings
1. Use masking tape to outline the area where you’d like your glitter lines to be. Make sure to press the tape down firmly.
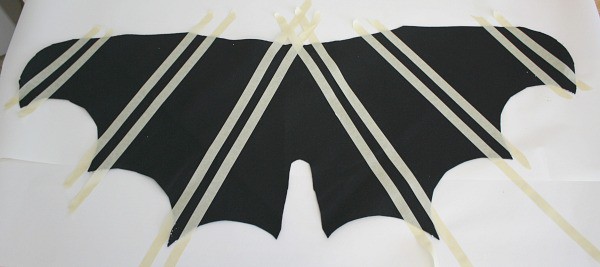
2. Spray the adhesive glue liberally between the taped lines.
3. Sprinkle your glitter liberally over the glue. Use a small piece of paper to press down the glitter into the glue.
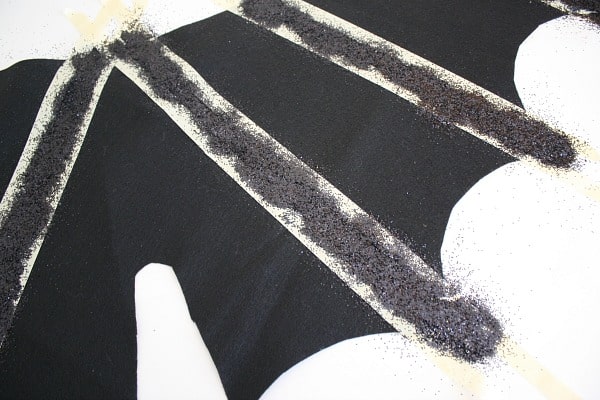
4. Carefully peel off the tape to reveal the lines of glitter.
We made black glitter lines on the outside of the wings and silver on the inside. The silver definitely stands out more. If I were to make another pair, I’d probably only use silver glitter and only do the outside of the wings. The glitter on the inside has to withstand a lot of rubbing when being worn.
Directions for Bat Ear Headband

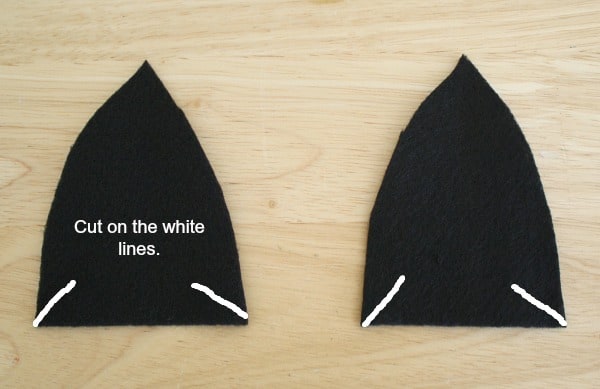
1. Cut out two bat ear shapes from your black felt scraps leftover from the wings.

2. Make two snips at the bottom of each ear about 3/4 inch-1 inch long. (See white lines in photo showing where to cut.)
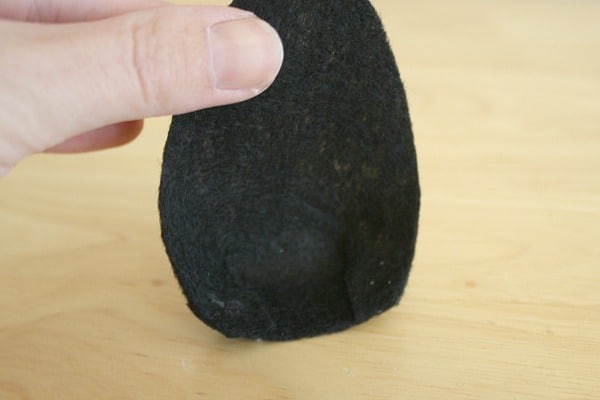
3. Fold the snipped edges over and glue in place to make the ears stand.
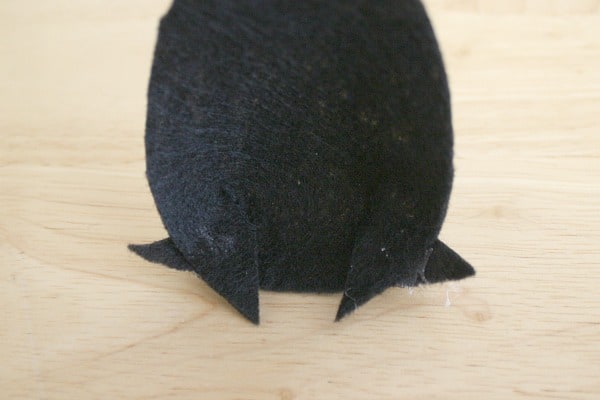
4. Trim off felt hanging over the edges.
5. Glue ears onto the black headband.
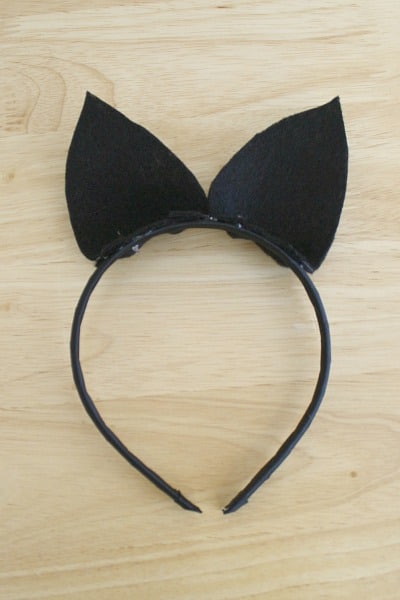
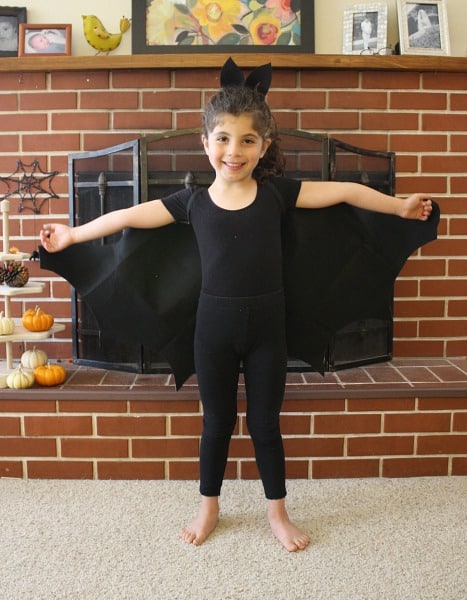
These wings and ears make a great bat costume. You can pair them with some black leggings or pants and a black top, and you’re ready to go!

 - Buggy and Buddy")