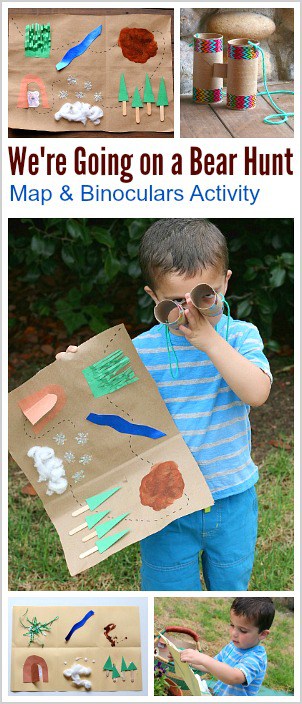
Here’s a fun binocular and map craft inspired by the popular children’s book, We’re Going on a Bear Hunt! This kids’ activity is a great way to bring the story to life for kids of all ages. The post also includes a free printable sequencing sheet for kids.
Follow our Children’s Book Activities Pinterest board!
(This post contains affiliate links.)
The Preschool Book Club is back this week with creative activities for kids inspired by the story, We’re Going on a Bear Hunt! Every other week we’ll all be sharing some fun activities for kids all based the book of the week.
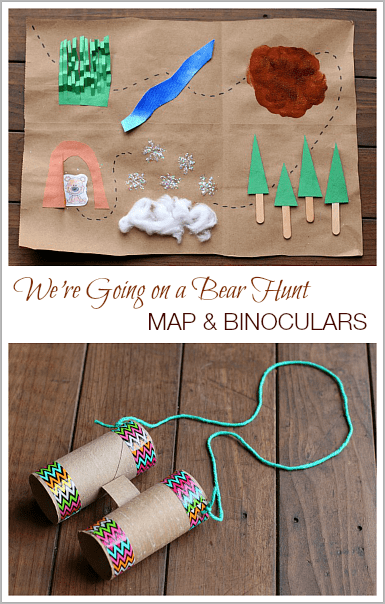
We’re Going on a Bear Hunt Map & Binoculars
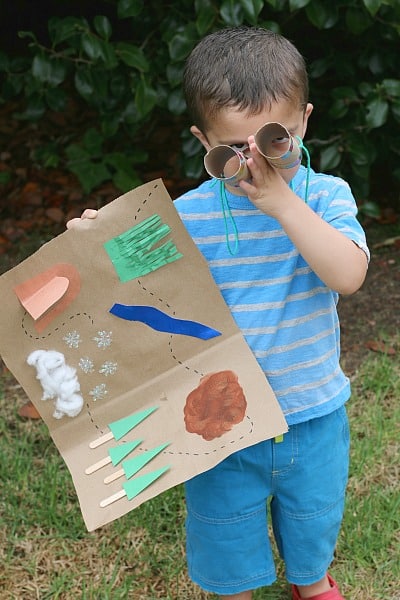
We’re Going on a Bear Hunt is one of my favorite books to read to children. It’s impossible for kids to resist participating in the repetitive text, and the book lends itself to all kinds of imaginative play. We created our own maps and binoculars so we could bring the story to life right at home!
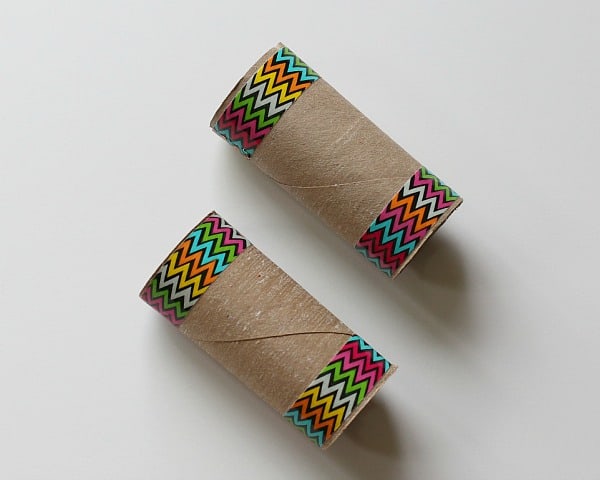
Making the Binoculars
Start by decorating two empty cardboard tubes (we used toilet paper rolls). (I found a mini roll of duct tape (similar to this one) at our local craft store and used it to decorate the two tubes.)
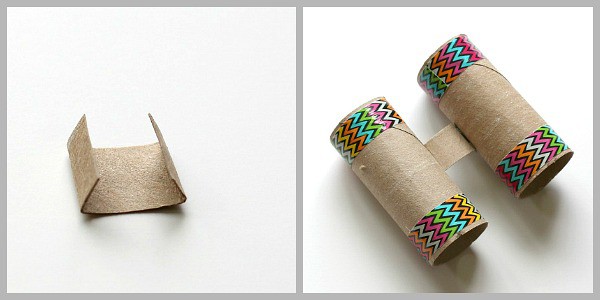
To create a space between the two tubes, cut a small piece of cardboard from an empty cardboard tube you aren’t using. Fold the sides of the small piece of cardboard down.
Glue or tape each folded side to each cardboard tube to form your binoculars.
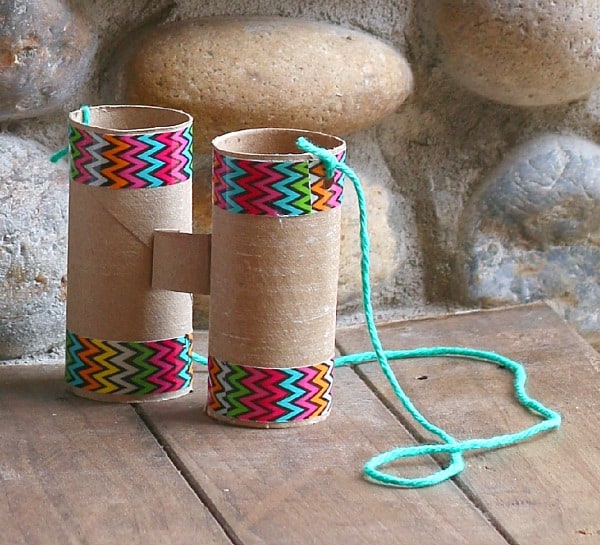
Punch one hole into either side of your binoculars. (This is my favorite single hole punch. It easily punched a hole through the cardboard!) Tie a long piece of yarn through the holes, and you’re done!
Making the Map
This map activity is a great way to create art while retelling the events from the story. We made our map using art and craft supplies we already had at home. I’ll describe to you how we made each section, but you can easily modify the map based on supplies you have readily available to you.
What We Used for Our Maps
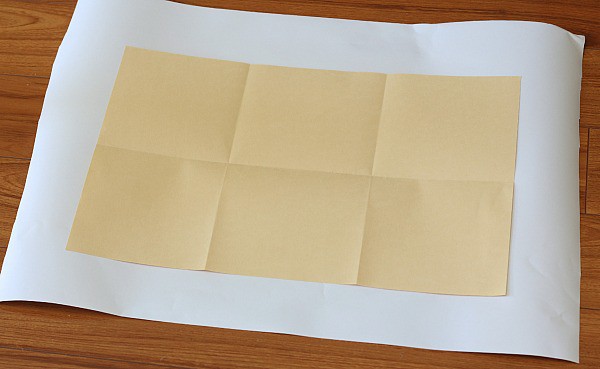
- Large sheet of paper (For one map we cut up a brown grocery bag!)
- Construction paper in green and brown
- Shiny blue paper
- Brown tempera paint
- Small bit of sand
- 4 Mini popsicle sticks
- Cotton balls
- White, iridescent glitter
- Glue
- Crayons
- Black marker
How We Made Our Maps
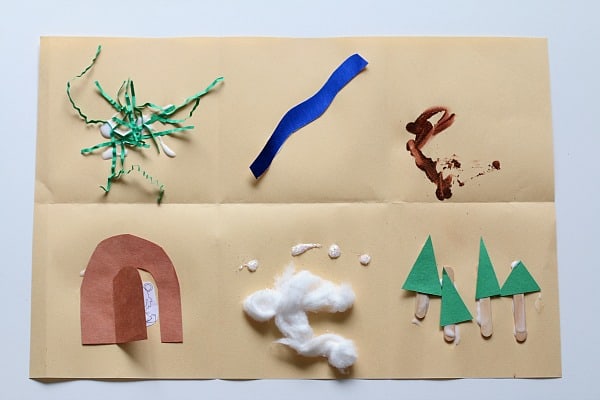
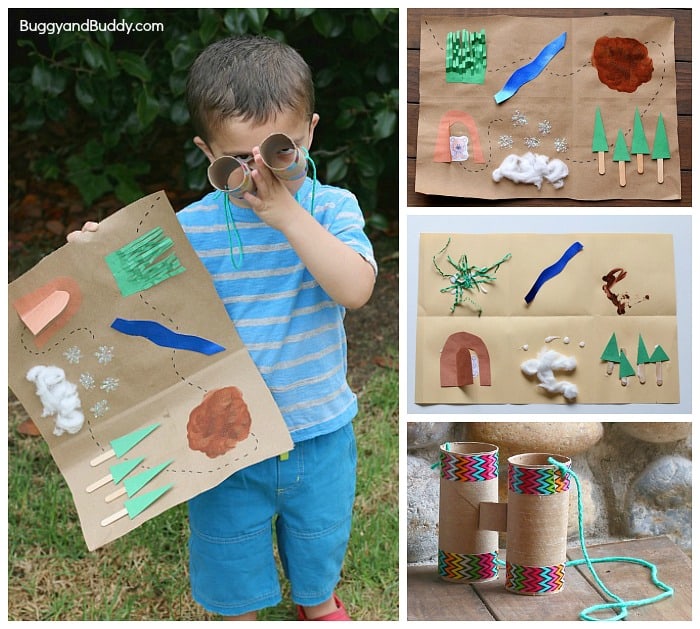
1. You’ll be making six little pictures on your map. Older children can probably visualize where to put the pictures, but I found it was easier for my 3 year old to already have the paper divided into six sections. To make the six sections, I folded the paper in half horizontally and then folded each side in to create thirds. When you unfold it you have 6 spaces.
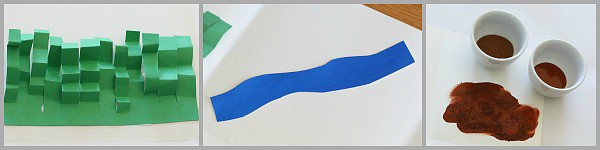
2. In the first space we created the “long, wavy grass”. To create my grass, I cut out a small rectangle from green construction paper. I then cut lots of tiny slits to create the grass and glued it onto my paper. (My 3 year old found it easier to glue green crinkle paper for grass rather than cut his own from construction paper.)
3. Next we made the “deep, cold river”. I had a sheet of shiny, blue scrapbooking paper that was perfect. We cut our rivers out of the paper and glued them onto our maps.
4. The “thick, oozy mud” was the kids’ favorite part of the map! We dipped our fingers into some brown tempera paint and used our fingers to paint mud onto our maps. We then sprinkled some sand onto the wet paint to really make it look muddy!
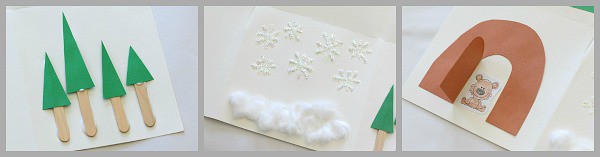
5. Up next was the “big, dark forest”. We used mini popsicle sticks and green construction paper to make our forests. (I pre-cut the treetops for Theo.)
6. To make the “swirling, whirling snowstorm” we pulled apart cotton balls and glued them down as snow. We also drew snowflakes with liquid glue and sprinkled some snow-like glitter onto the glue. (Younger children will find it easier to make snowflake dots with the glue rather than draw snowflakes.)
7. The last section of the map is the “narrow, gloomy cave”. We cut out our caves from brown construction paper and cut a door into the caves that can open and close. We cut out the bears from our free printable (which you can find at the end of the post) and glued them inside of our caves.
8. For the finishing touch, we used a black Sharpie to create a path on our maps.
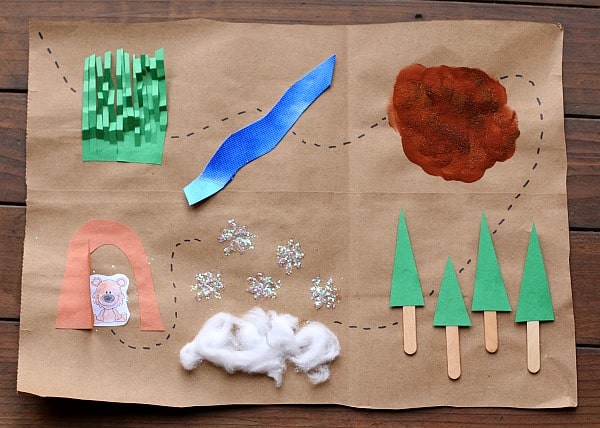
Here you can see my three year old’s map. He used crinkled paper for the grass and made glue dots rather than flakes for the snow.
Bringing the Story to Life
Prior to making our maps and binoculars, we had read We’re Going on a Bear Hunt over and over during the previous few weeks. (There’s even a song on this Greg & Steve CD where you can act out the story as it’s being recited. My kindergarteners used to LOVE this!)
After becoming familiar with the story and having acted it out with our Greg & Steve CD, we took our maps and binoculars outside and went on our own bear hunts in the backyard!
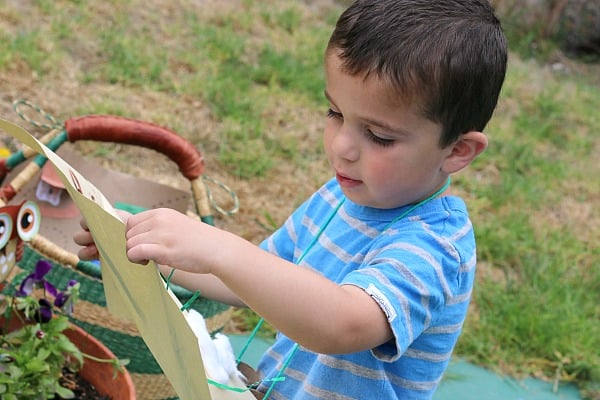
Theo designated different parts of our yard to be places from the story (a corner of the yard with trees was our forest, our sandy area was the mud, etc.). Once we got to the end of the map and discovered the bear, we’d reverse our path and run all the way back home! (Kids always seem to love how the journey to the bear is done at a slow pace and then the trip back is super fast!)

When we were done going on our bear hunts, we put our maps and binoculars (along with the book) in a basket right by our backyard to be enjoyed again and again!
Free Sequencing Printable
I created this free printable to be used with retelling the story. In each square your child can draw all the places the characters went along their journey to the bear cave!
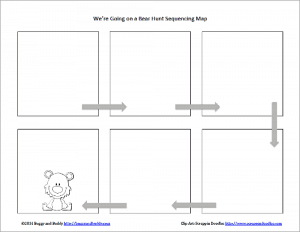
We’re Going on a Bear Hunt Sequencing Page
*Clipart from Scrappin Doodles
More We’re Going on a Bear Hunt Activities
Be sure to check out all the creative We’re Going on a Bear Hunt activities created by the other members of The Preschool Book Club Series!
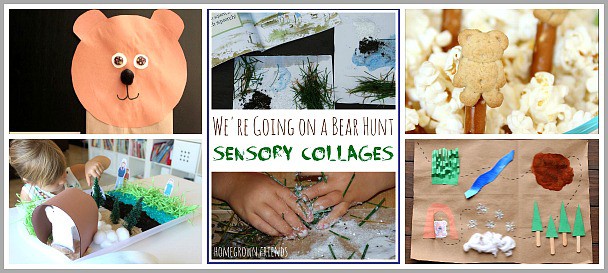
Bear Puppet Snack from Sugar Aunts
We’re Going on a Bear Hunt Sensory Tray from Mama Papa Bubba
Paper Bag Bear Puppets from Frogs and Snails and Puppy Dog Tails
We’re Going on a Bear Hunt Sensory Collages from Homegrown Friends
*This activity was originally published on September 22, 2014 and has since been updated.
Love using children’s books to encourage a love of learning and creating? Be sure to check out our book, Exploring Books Through Play!
