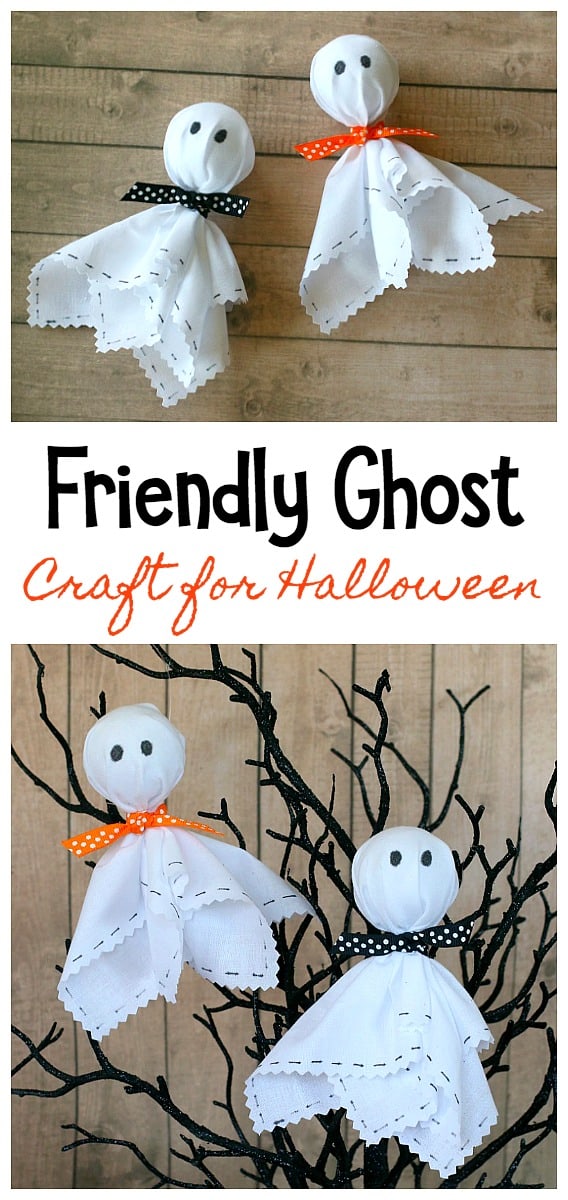
Here’s how to make an adorable and easy ghost craft for Halloween using fabric. These are super simple to make, and the craft can be modified to be done with kids of various ages too. Perfect for a Halloween party to decorate your home for the upcoming holiday!
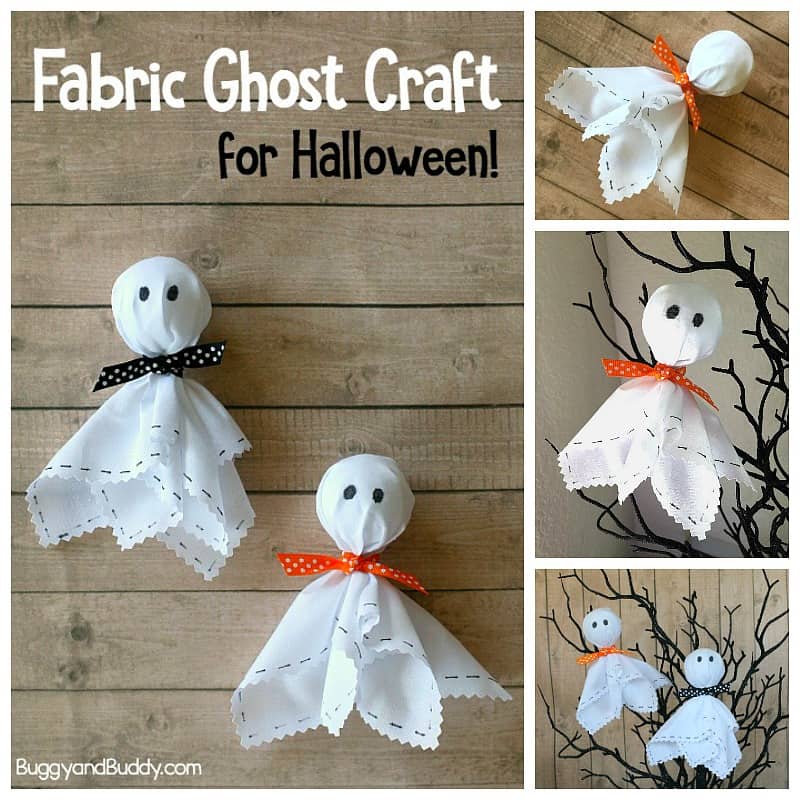
Have you ever made fabric ghosts? This classic Halloween craft is so easy to make, very inexpensive, and always a hit with the kids. We added some cute details to our fabric ghost craft using some markers and ribbon for a unique twist.
Because these homemade ghosts are made of fabric, you can save them to hang up and decorate your home or classroom year after year.

Easy Fabric Ghost Craft for Halloween
Materials for Fabric Ghost Craft
- Inexpensive, white fabric (We used muslin from our local fabric store.)
- Scissors (You’ll need some good ones to cut fabric and ribbon. This is the pair I have and love, but very sharp- so not good for young kids.)
- Optional: Pinking Shears
- Styrofoam balls (We used balls with a 1.5 inch diameter.)
- Black Marker (I listed two below in the directions that didn’t seem to bleed into the fabric much at all.)
- Festive ribbon
- Clear string for hanging your ghosts
Directions for Making Fabric Ghosts
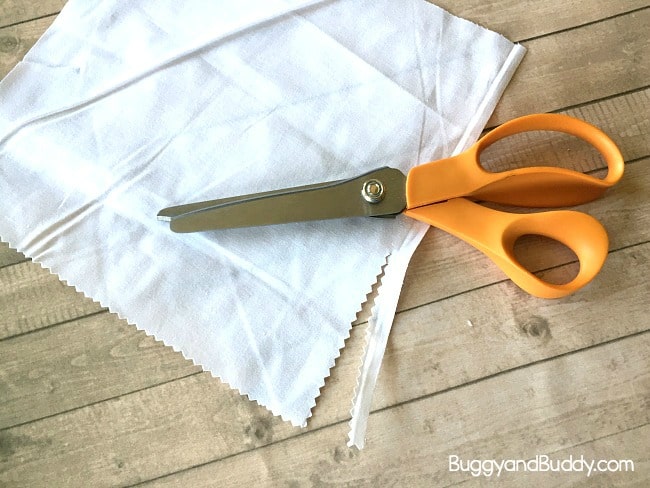
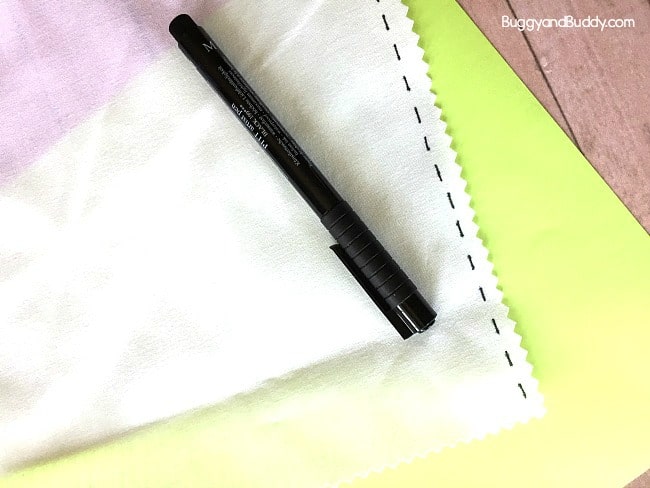
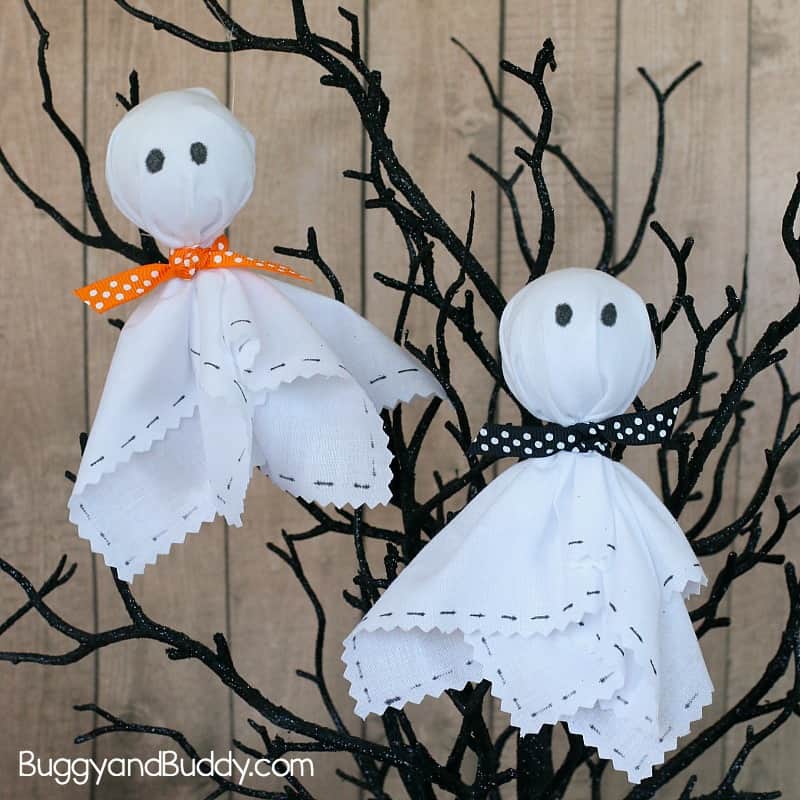
1. Cut your fabric into a square. (Our squares were 9 inches x 9 inches). You can cut them using regular fabric scissors, but realize the ends will fray eventually depending on the fabric. You can cut the fabric squares out using pinking shears to prevent fraying. (Plus, the zig zag edge gives the ghosts a unique look).
2. If you’d like to let your child cut out the edges themselves with the pinking shears, you can provide them with the pre-cut square and have them go around the edges like in the photo below. Older children can even measure and cut the squares out themselves. (If doing this activity with very young children, I’d recommend having the squares prepped and ready to go.)
3. Draw short dashes around the edges of the fabric. (Or try other patterns or designs like polka dots etc.)
Depending on your marker and fabric combo, the marker might bleed quite a bit, so be sure to test the marker out on the fabric before making your ghosts. We used inexpensive muslin fabric. I found that Sharpies bled quite a bit on our particular fabric, but black Flair pens worked fairly well, and these artist pens worked even better.
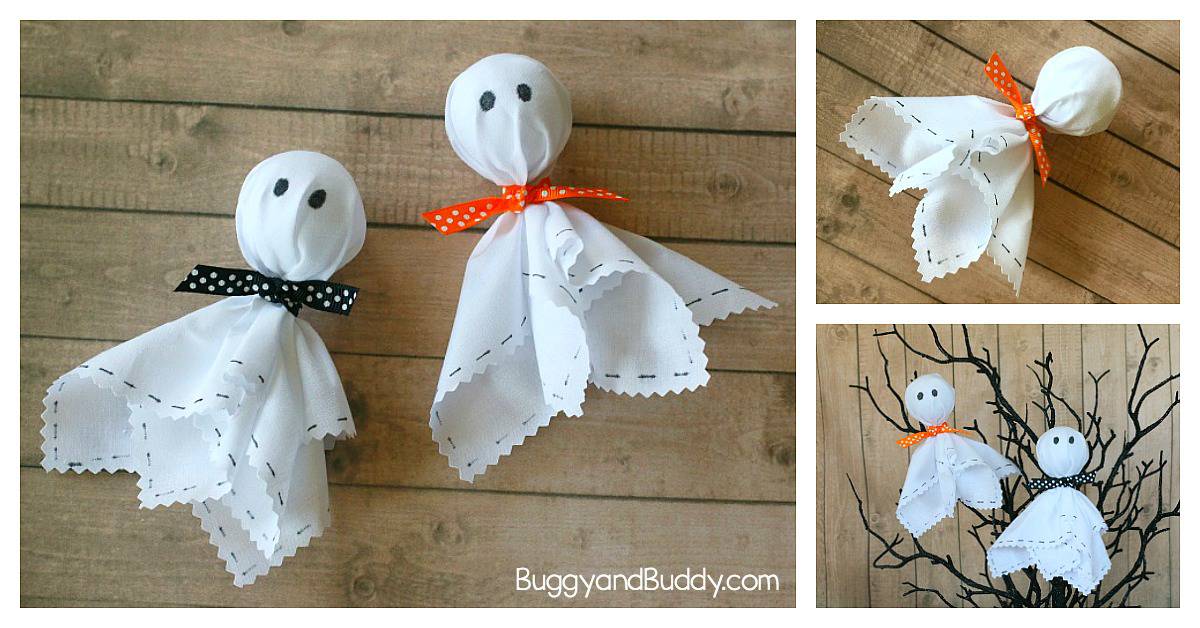
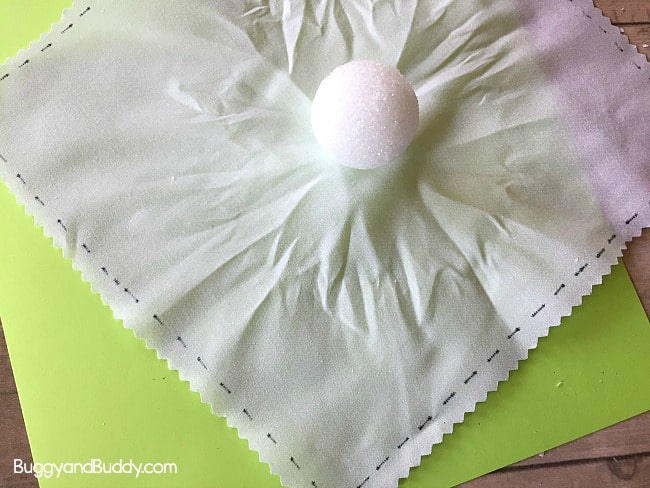
4. Flip the fabric over. Place a styrofoam ball in the center of the fabric, and gather it around the ball to form the head of your ghost.
5. Tie a piece of ribbon around the neck to secure. (For young children you can hold the ghost in place and let them tie the ribbon, or they can hold the ghost for you while you tie the ribbon.)
I bought this set of ribbon, but if you’re planning on doing a large amount of ghosts with only black and orange colors, this set won’t provide enough ribbon. (Although it is plenty of ribbon if you want colorful ghosts.)
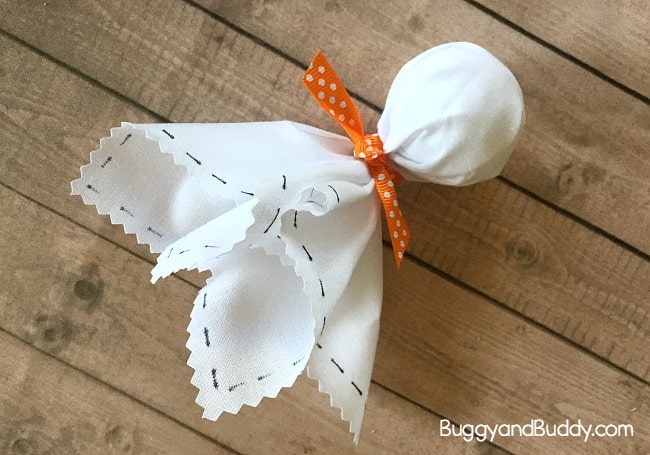
6. Draw eyes on your ghost with a black marker.
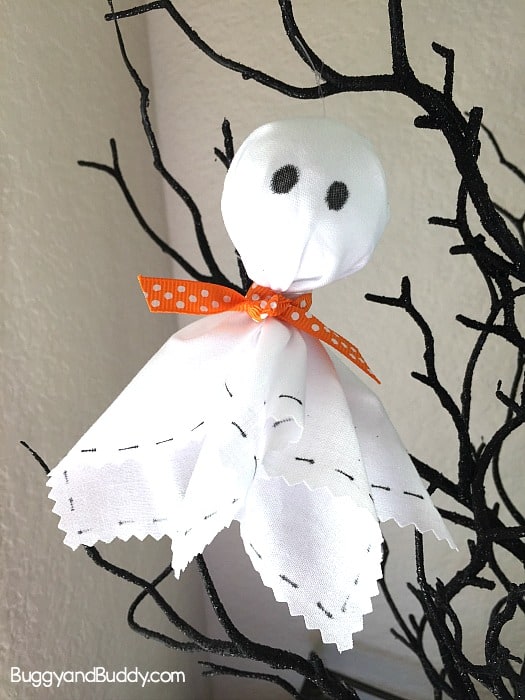
7. Tie some clear string (illusion cord) around your ghost to hang from a decorative branch or anywhere around your house or classroom!
Check out all kinds of fun Halloween STEM ideas in our STEAM Kids Halloween Ebook!

50+ pages of spooky fun STEAM (Science, Technology, Engineering, Art & Math) activities that will wow the boredom right out of your kids!