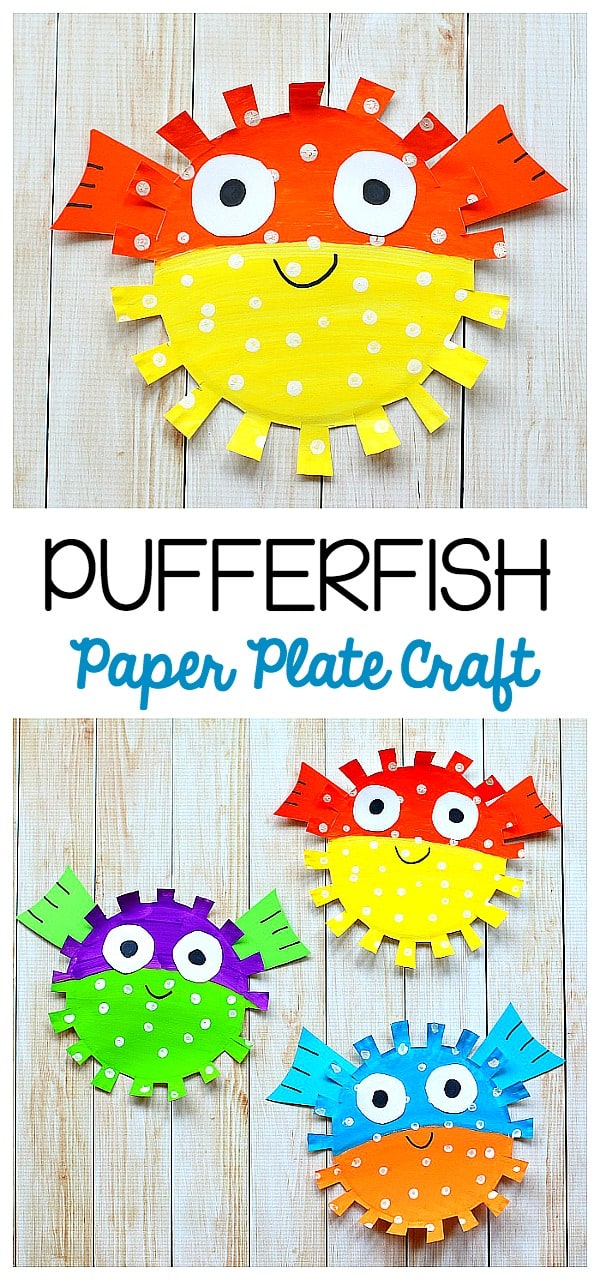
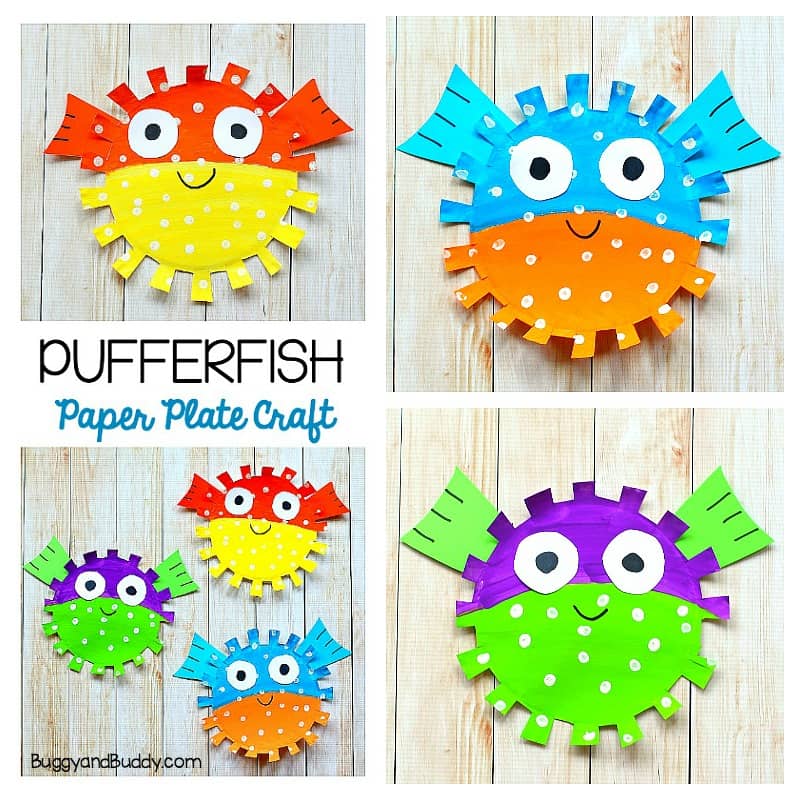
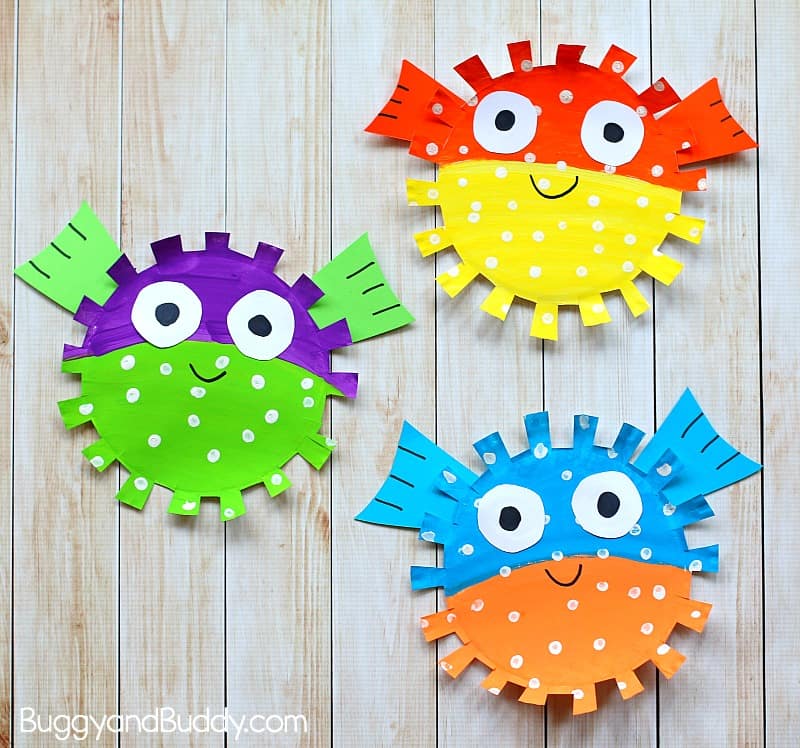
This paper plate pufferfish craft for kids is super cute and easy to make! It makes a perfect addition to your unit on fish, oceans, and sea life, or simply do it just for fun. This art project for children also provides lots of cutting practice for little hands!
Follow our Crafts for Kids Pinterest board!
This post contains affiliate links.
We’ve been on a paper plate crafting kick- especially when it comes to sea animals! We’ve made a paper plate octopus and just recently a paper plate sunfish. We just always seem to have paper plates around the house and get inspired to turn them into all sorts of crafts and art projects.
Most recently, we used paper plates to make a pufferfish craft. I love how the edges of the paper plate look just like the little spikes on the pufferfish, and making those spikes provides lots of lots of scissor cutting practice too!
The kids and I looked at images of different pufferfish online to inspire us to when deciding on colors and shapes to make our pufferfish crafts. I also incorporated some fun painting techniques into the project that the kids loved!
Check out even more fun crafts in the video below!
Paper Plate Pufferfish Craft for Kids
Materials for Pufferfish Craft
- White paper plate
- Tempera paint (This is our very favorite tempera paint. I love the vibrant colors, and the paint doesn’t have the strong tempera paint odor other brands sometimes do.)
- Paintbrushes
- Cotton swabs (Q-tips)
- Scissors
- Glue
- Scraps of construction paper
- Marker or crayons
Directions for Making Pufferfish Craft
1. Start by painting your paper plate with tempera paint. This will be the body of the fish. You can use just one color or paint the body a variety of colors.
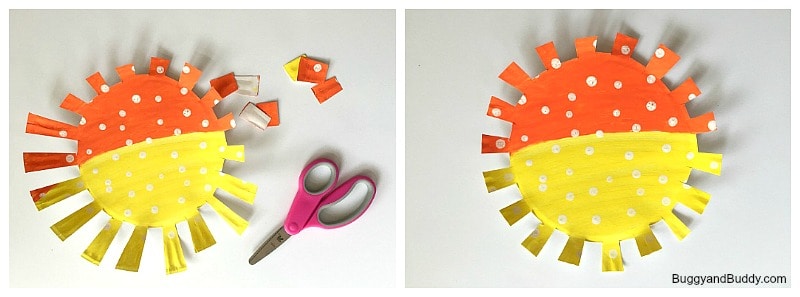
2. When looking at images of pufferfish online, we noticed some were spotted. We used cotton swabs to dot paint details onto our painted plates.
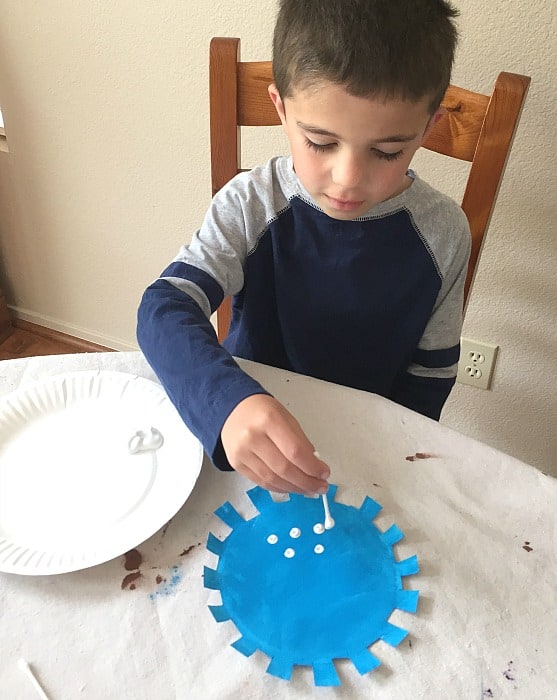
3. Use scissors to cut slits all around the edge of your paper plate. We cut our slits from the edge of the plate to the inner circle ridge.
4. Use your scissors to cut off every other resulting tab along the edge of the plate so you have spaces between each spine.

5. Now trim each spine a bit shorter. *
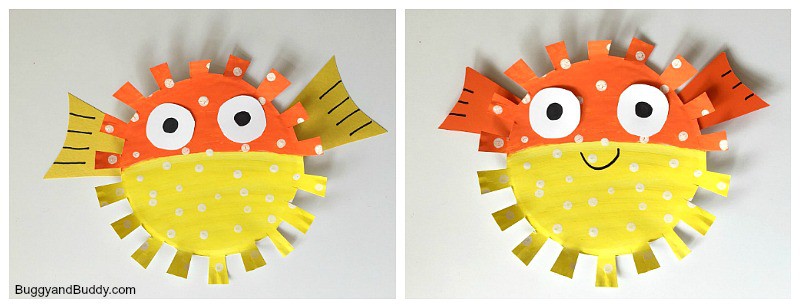
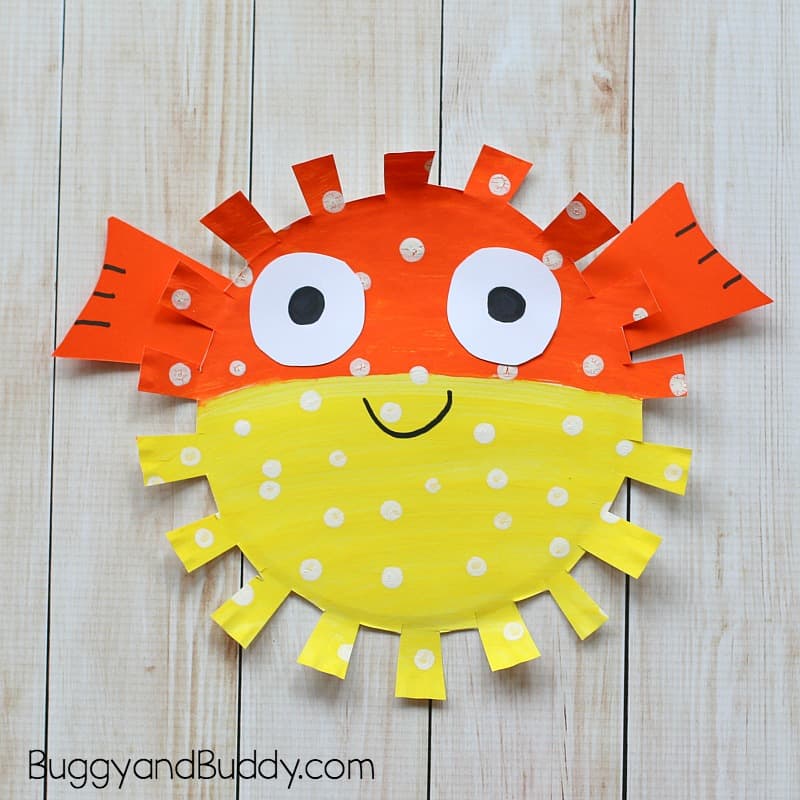
6. Cut out two fins from your construction paper and glue them to your pufferfish.
7. Cut out two eyes and glue them onto your pufferfish face. Draw a mouth for your fish.
* You could eliminate step #5 by originally cutting the slits much shorter. Older kids may be able to do this, but I find younger kids need that stopping point provided by the inner circle ridge in the plate. They also do love giving the spikes a “haircut” at the end.
That’s it! Aren’t they cute?
More Sea Animals Crafts and Activities to Check Out!
- 18 Jellyfish Crafts for Kids
- 10 Unique Ocean Crafts and Activities
- 40 Children’s Books about Sea Life