One of my favorite Halloween crafts for kids when I was a classroom teacher was this jack-o-lantern paper craft using the art technique of positive and negative space. It’s a simple Halloween project to prep and always ends up looking so stunning!
Follow our Halloween for Kids Pinterest board!

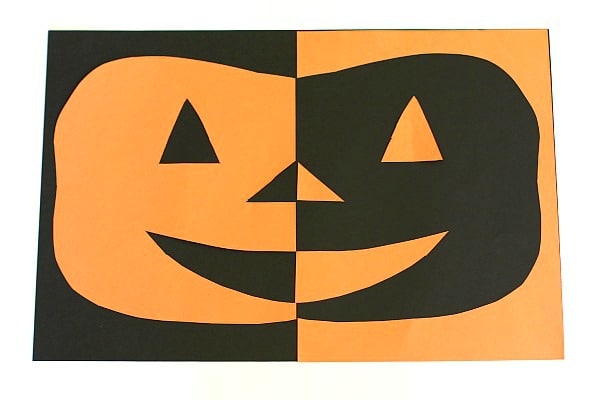
This Halloween craft is so much fun, and kids always love seeing how their finished projects turn out! It’s also a great project for discussing positive and negative space, as well as symmetry.
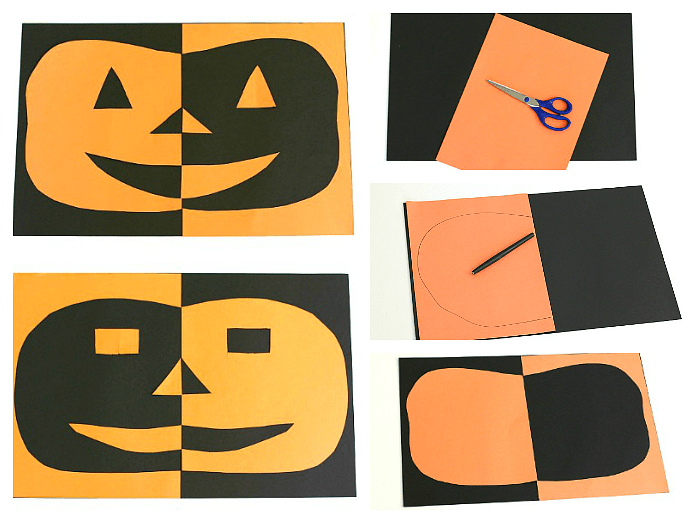
I’ve done this Halloween craft with kids in Kindergarten and older. You can keep it simple for younger children (like the examples in this post), while older children might enjoy adding all kinds of details with their cutting.
These positive and negative space pumpkins remind me of a puzzle in a way. Some kids seem to have a great sense of spatial awareness and easy create their pumpkins, while other kids really need time to figure out where to place pieces to finish the project. It’s always fun to observe how each child approaches the activity! (This post contains affiliate links.)
Positive and Negative Space Jack-O-Lanterns
Materials for Halloween Craft
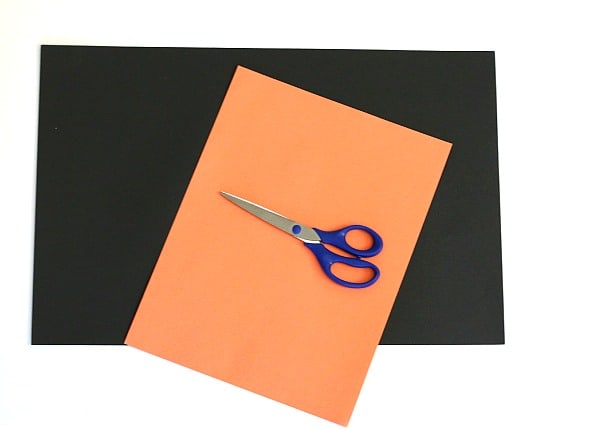
- One sheet of 12 inch x 18 inch black construction paper
- One sheet of 12 inch x 9 inch orange construction paper
- Scissors
- Pencil
- Glue
Directions for Halloween Craft
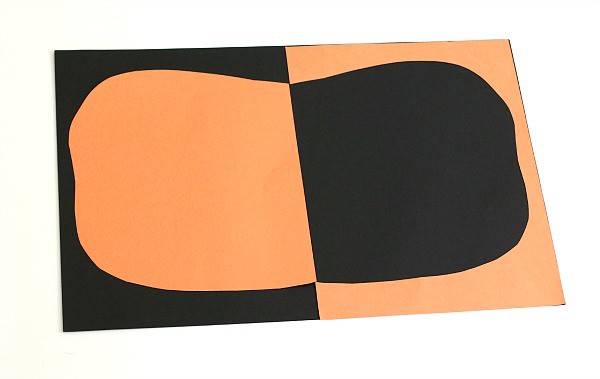
1. Start by drawing half a pumpkin on your orange sheet of paper. Make sure your orange paper is vertical. (Older kids can probably freehand this.)
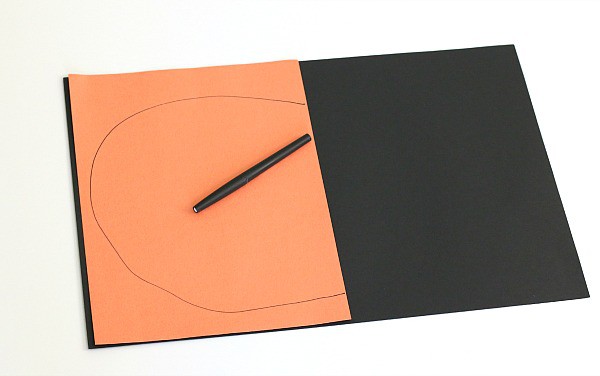
2. Cut out the pumpkin shape. Flip the outline of the pumpkin over onto the other side of the black paper.
3. Draw an eye, half a nose, and half a mouth onto your orange paper.
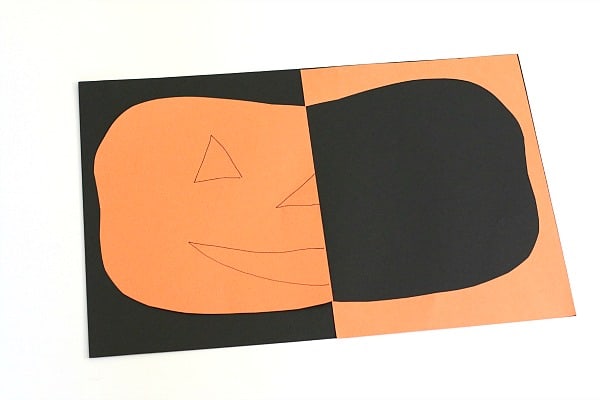
4. Cut them out and flip the cut pieces over and place them onto the black paper. (The eye is the most challenging to cut out for children. I show them how to lightly fold the paper where they want the eye to be and then make a small snip with their scissors. Unfold the paper and stick your scissors in the resulting hole. When you glue the cut-out eye onto the black paper, the poked hole is not very noticeable.)
5. Glue all your pieces down. You’re done!