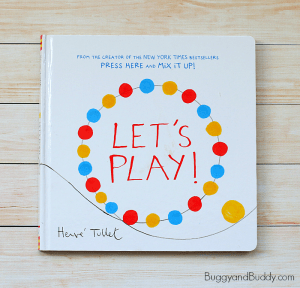
This magnet activity inspired by Herve Tullet‘s popular children’s book, Let’s Play, is super fun to use and really fun to make! Kids will love creating different scenes and paths for their magnets to travel on- gaining fine motor practice, while also exploring the science of magnetism.
I received the book Let’s Play! and Do-a-Dot markers for free and am excited to share my experience using them with you!
Follow our Children’s Book and Activities Pinterest board!
This post contains affiliate links.
Herve Tullet’s books are always a hit with both my children, and I especially love how they help the kids gain creative confidence, as well as foster their love of reading.
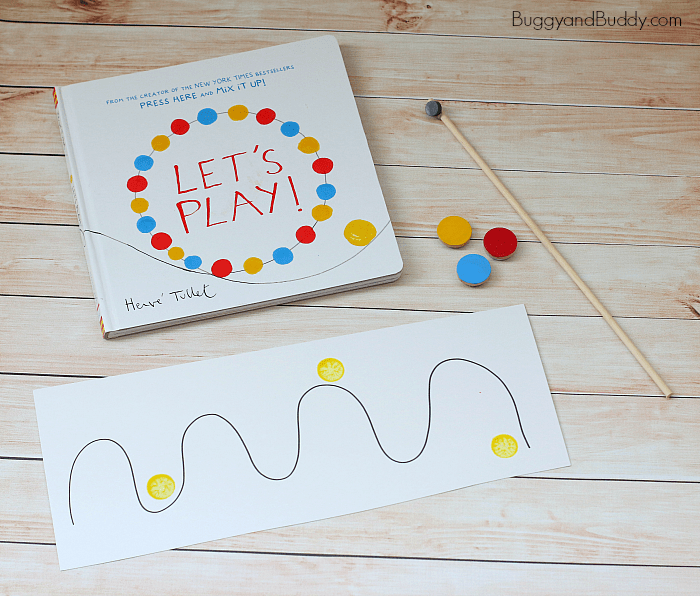
In Let’s Play! readers follow a yellow dot as it goes on all kinds of adventures. Theo (my preschooler) loves tracing the path the yellow dot follows as we read each page, so I decided to bring the book to life using magnets!
In this activity kids will create their own adventures for the colored dots and drag them all through their creations using magnets! This activity provides lots of fine motor practice and also provides children with the opportunity to explore magnetism. The art aspect of this project is also great for helping to develop creative confidence.
Important: Not only are small magnets choking hazards, but magnet ingestions pose a serious threat to the health of children. NEVER leave any child unattended with magnets. Never allow any child under 3 to use magnets.
Magnet Activity Inspired by Herve Tullet’s Let’s Play!
Materials for Magnet Activity
- Dowel rods
- Strong, ceramic magnets
- Hot glue gun (or strong liquid glue)
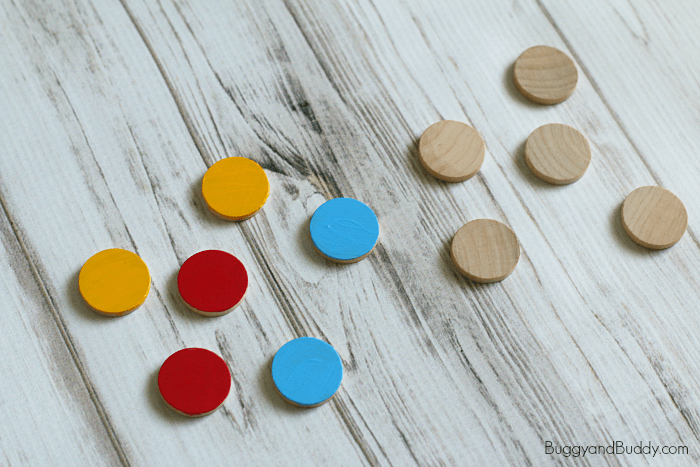
- Wooden circles with a 1-inch diameter (like these)
- Acrylic paint and brush
- Small sheets of poster board
- Sharpies, paints, and/or Do-a-Dot markers for creating artwork
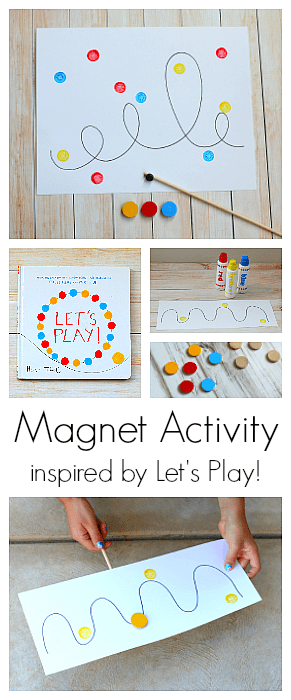
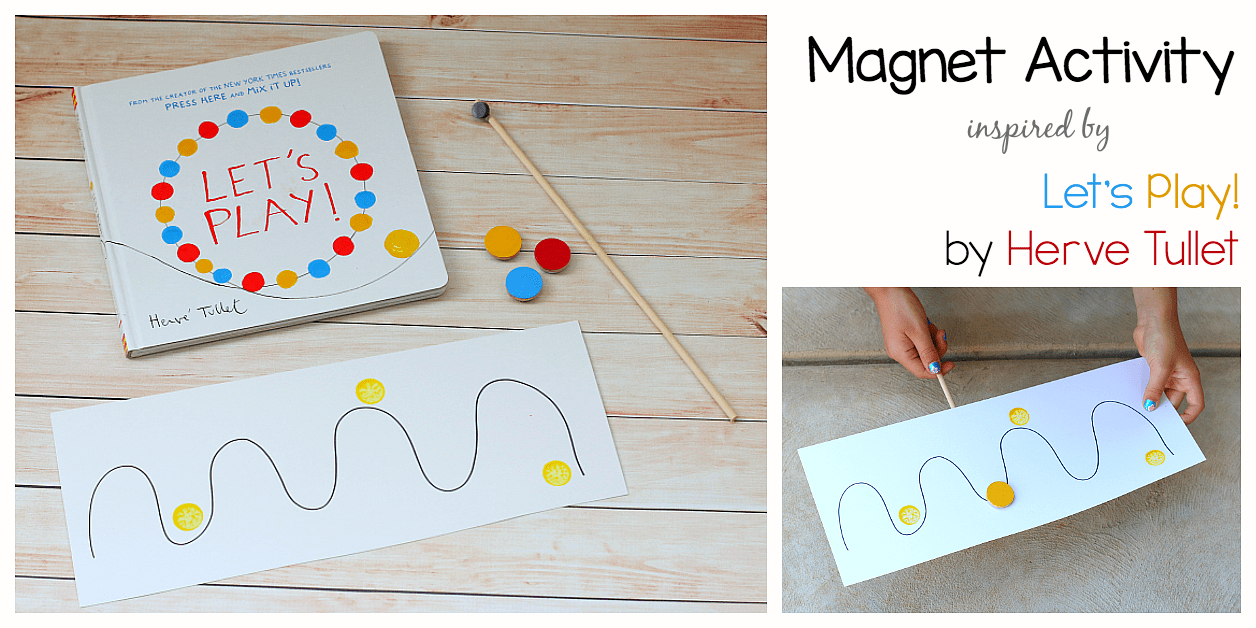
How to Build the Magnet Activity
1. Paint your wooden circles yellow, red, and blue. Set them aside to dry. (This is my favorite acrylic paint for crafts. I love the colors, and the paint is great quality.)
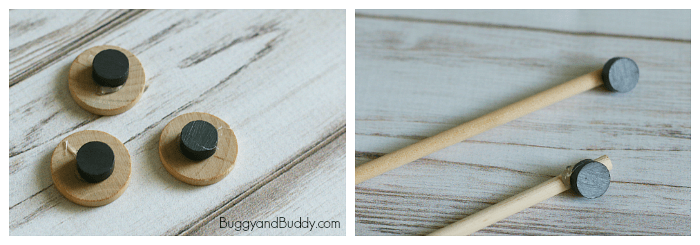
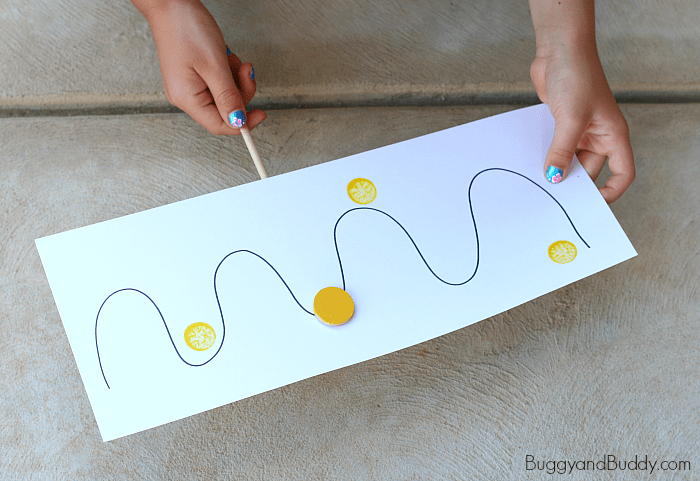
2. Use your hot glue gun to glue a small magnet to one end of your dowel rod. (We bought magnets similar to these at our local craft store.)
3. Glue another magnet to the back of each colored, wooden circle. Important: Make sure you glue opposite sides of the magnets to the dowel rod and wooden disc so they attract each other rather than repel. Let the kids help you figure out which sides to glue down.
Creating the Artwork
After reading the story, talk about all the adventures the yellow dot goes on in the book. Brainstorm ideas for your own scenes and paths for the dot to go on.
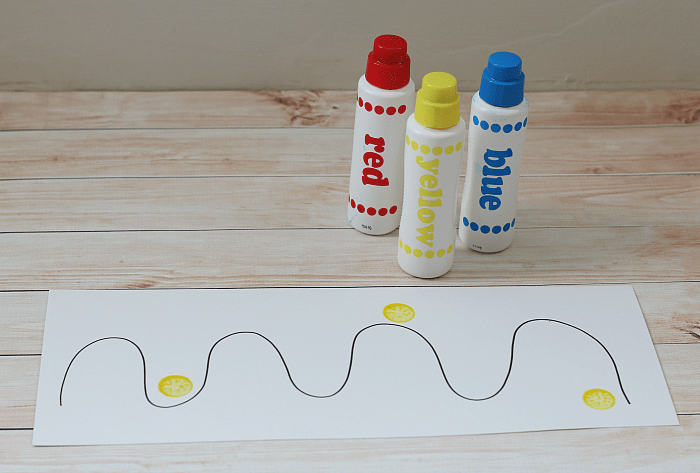
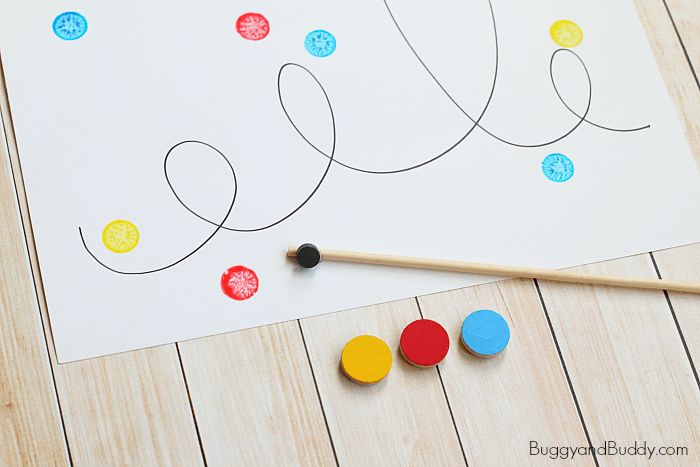
Create your own scenes on small pieces of poster board. (We used this pack of 25 sheets. Each sheet measured 11×14 inches- small enough for the kids to hold during the activity. We even cut some sheets down to a smaller size.) We used Sharpies to draw paths and details onto the poster board and Do-a-Dot markers to stamp dots onto our artwork. You could also use colored circle stickers to decorate your creations.
Playing with the Magnet Activity
Now you’re ready to take your magnetic dots on some adventures. Place your magnetic dot on top of the poster board, and place your magnetic dowel below the poster board. Use it to drag your dot around your maze and over paths!
My kids loved doing this activity here at home. It would also make a great center for a preschool or kindergarten classroom!