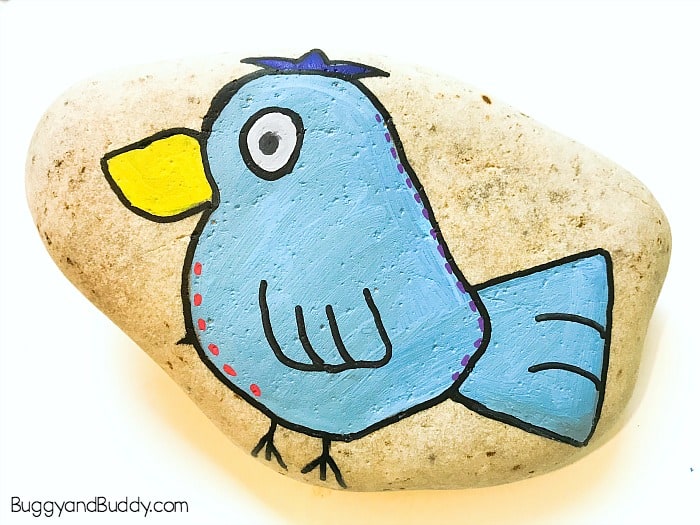
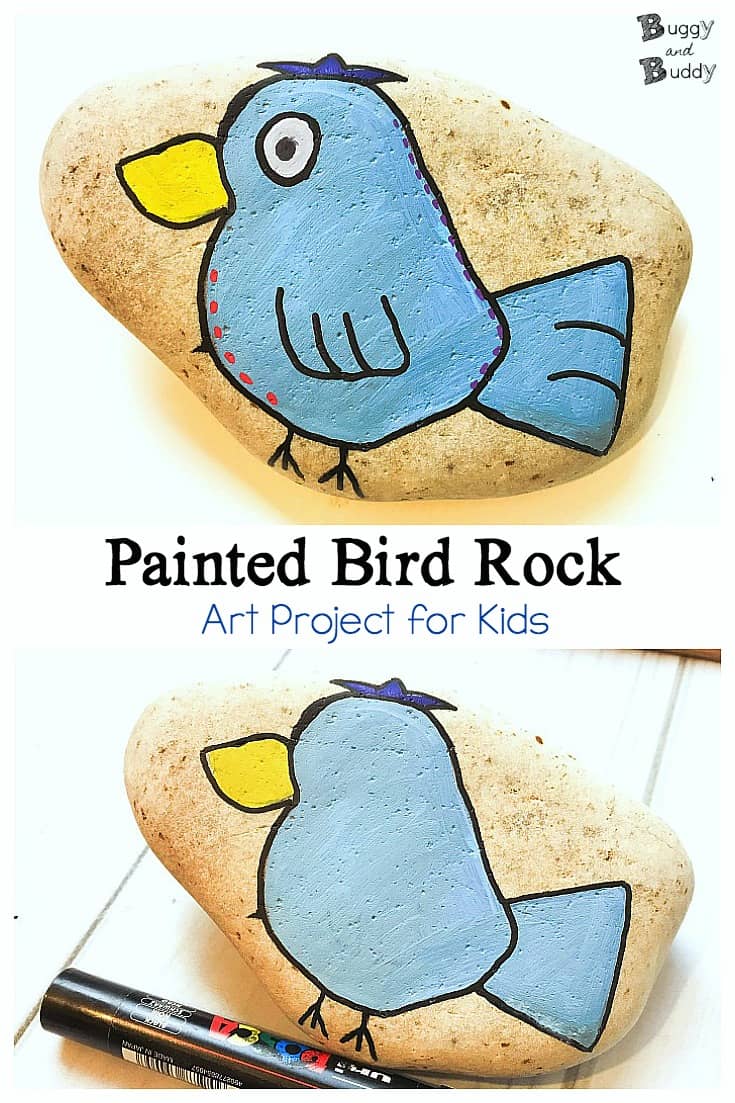
Here’s how to make a super cute painted bird rock with step-by-step instructions. I’ll also share some supplies that are great for rock painting and some tips for making the painted birds last on your rocks. Such a fun activity to do with the kids or grandkids this summer!
This post contains affiliate links.
So I absolutely LOVE birds, and the kids and I have had a blast painting rocks in the past, so I couldn’t wait to share this tutorial for making your own painted bird rocks with you! It’s perfect for adults and children and would be such a fun activity to do together with your child, grandchildren or students. It would also make a great activity for summer camp.
Are you a fellow bird lover? Be sure to follow my Everything Birdie Facebook page for all kinds of adorable bird crafts, DIYs and products!
Painted Bird Rock Tutorial
Materials for Painted Bird Rock
- Rock(s) (You can find your own or purchase them online or at a local store. Just be sure to purchase rocks without glaze on them.)
- Paint pens (Posca paint pens seem to work the best on rocks.)
- Fine point, black paint pen for outlining
- Pencil with an eraser
- Paper for sketching
- Glossy Sealer or Matte Sealer
Directions for Painted Bird Rock
Before you begin your painted bird rock project, it would be lots of fun to go on an adventure with the kids to collect your own stones and rocks. Be sure to look for smooth, flat stones which will be easy to draw and paint on.
1. Wash your rock with hot, soapy water and let it dry completely. This will give a clean and smooth surface to work with.
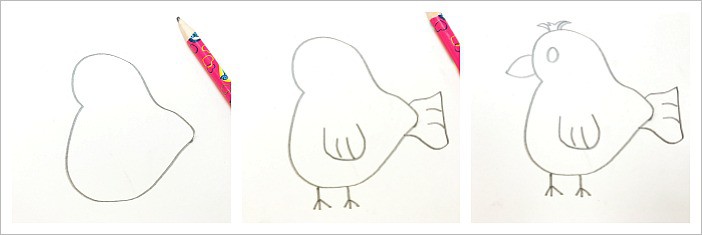
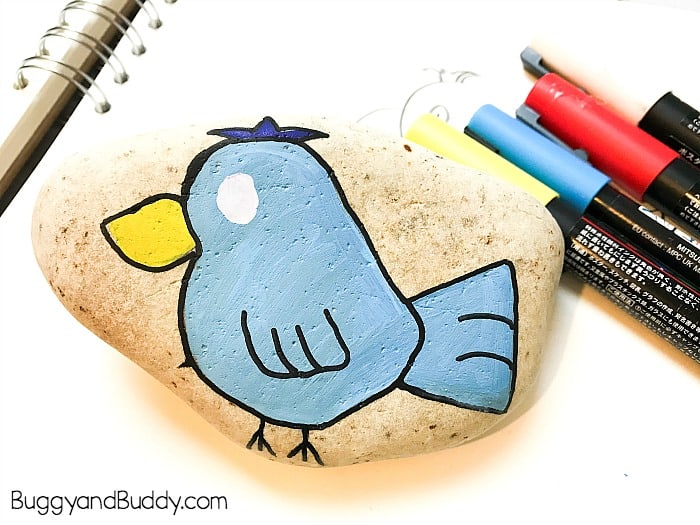
2. Design your bird. You can make your own bird or follow the instructions for this particular bird. Start by sketching your bird design onto a sheet of paper before painting onto the rock.
- First draw the outline of the bird.
- Add a tail, wing and feathers.
- Add some feet, a beak and an eye.
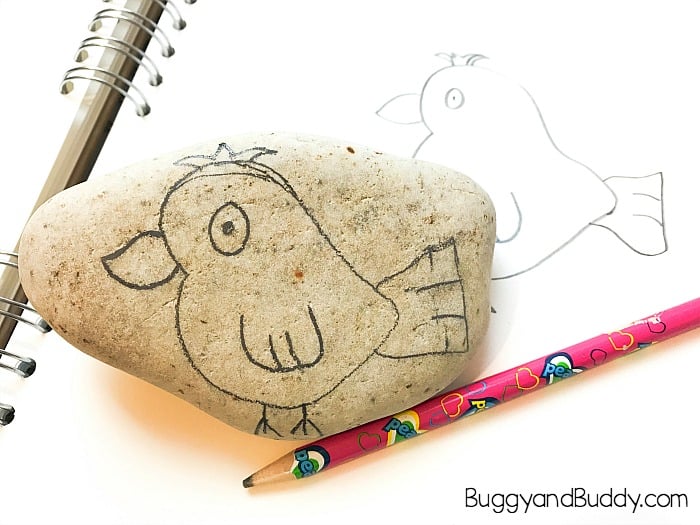
3. Draw your bird onto your rock using a pencil. Use the eraser if needed and don’t worry about any mistakes. They can be painted over.
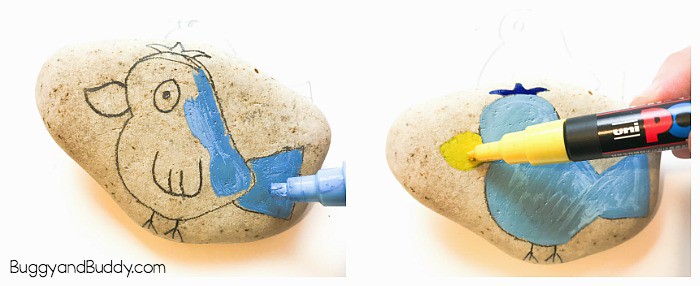
4. Color in your bird using paint pens.
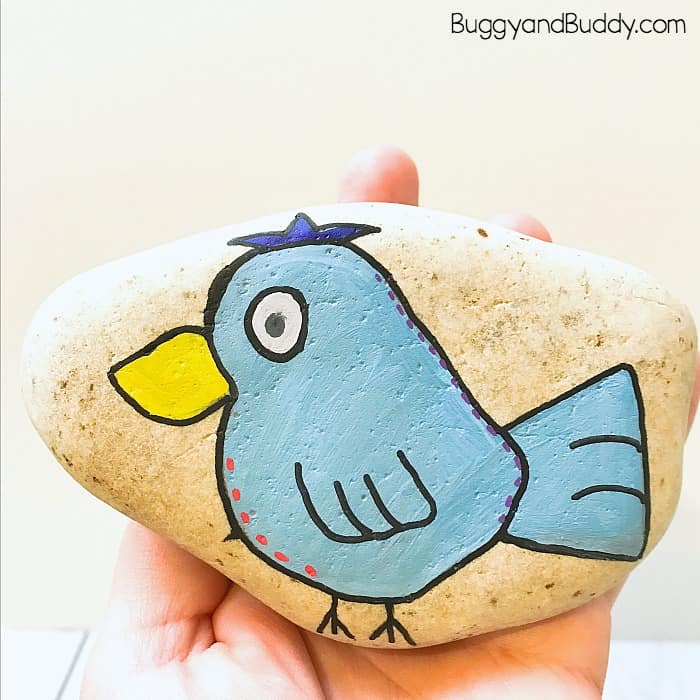
5. Color in the little patch of feathers on your bird’s head and color in the beak yellow or orange.
6. Use a thin, black paint pen to draw the outline of the bird. You can add lines to the tail and wings. Draw over your birds feet and add any further detailing you like with the paint pen.
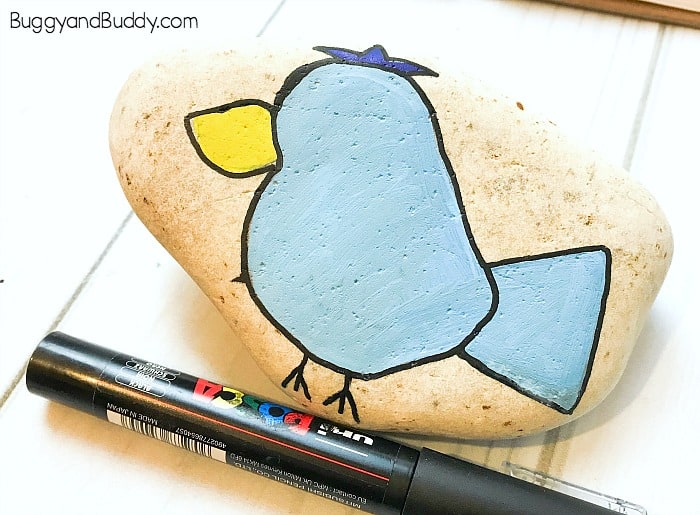
7. Add an eye to your bird using a white paint pen. While you wait for the paint to dry, you can add extra details like patterns, dots or lines using whatever colors you like.
8. Once the white eye is dry, draw around it with the black paint pen and add a black pupil to the eye.
9. Your bird is now complete!
10. Optional: Seal your painted bird rock using a spray sealer. This will allow the rocks to survive the outdoors- especially if you are into hiding rocks around your neighborhood or local town for others to find!
You might want to paint an entire collection of birds to place in a nest or you could try creating other animals or creatures with the kids. Painting stones is really fun for any age group and does not have to be perfect, it’s all about the process and having fun!