One of our favorite science activities for kids during the spring season is dissecting a bean seed! It’s an easy science experiment to setup and is always lots of fun! This post includes a free printable recording sheet.
NGSS: Disciplinary Core Idea LS1.C
Follow our Science for Kids Pinterest board!
As we observe all the new growth in spring, the kids are always interested in learning more about flowers, plants, and seeds. (Recently we observed how water travels through a leaf and explored flowers.) Today we’ll be looking at the inside of a seed!
(This post contains affiliate links.)
Materials for Dissecting a Bean Seed
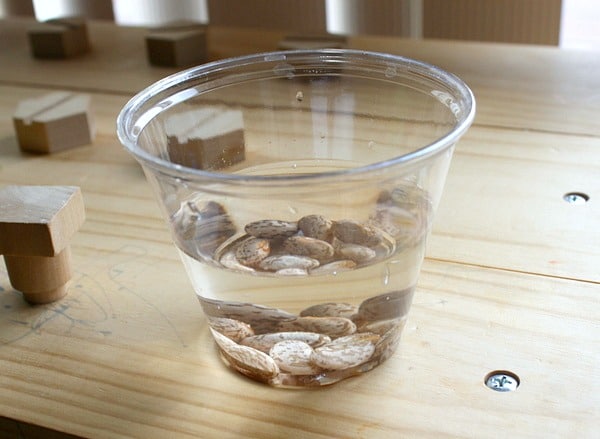
- Large beans (kidney, pinto or lima beans for example) soaked in water for 12-24 hours
- Magnifying glass (optional)
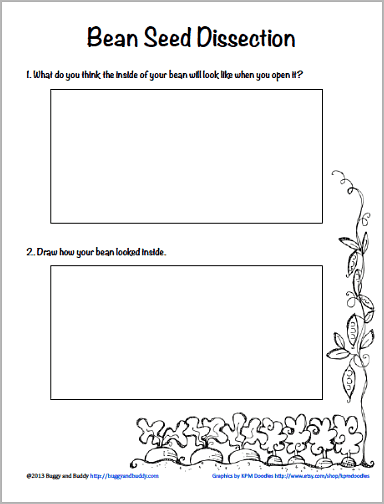
- Recording sheet (See below for free printable)
Procedure for Bean Seed Dissection
- Pick up a soaked bean and examine it.
- What do you think the inside of the seed will look like? Why? Illustrate your prediction on your paper.
- Rub the soaked bean between your fingers. The seed coat should rub off. Why do you think the seed coat is important?
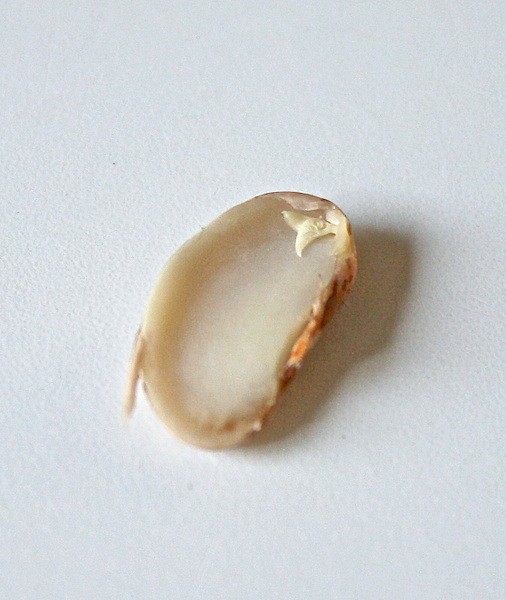
- Now split your seed in two. (There is a slit going down the middle of your seed where it should come apart with a little help.)
- Observe the inside. (Use a magnifying glass if you’d like). Describe and/or draw what you see. Were your predictions correct?
Lucy’s Observations & Comments: “I think it will have sparkles inside.” “Look, it’s a baby plant!” “I want to plant it.” “Will it grow if we broke it apart?”
Tips
– Different seeds require different amounts of time to soak in the water before being easy to dissect. We used pinto beans. They were ready within 12 hours.
– It’s easier to see the baby plant after the seed dries out. After the dissection, set your bean aside and reexamine it after it’s dry.
– You can go to this link to print the Bean Seed Dissection Recording Sheet.
Question to Spark More Curiosity & Critical Thinking
Compare the dried beans to the soaked beans. What is the same about them? What is different?
What’s Going On?
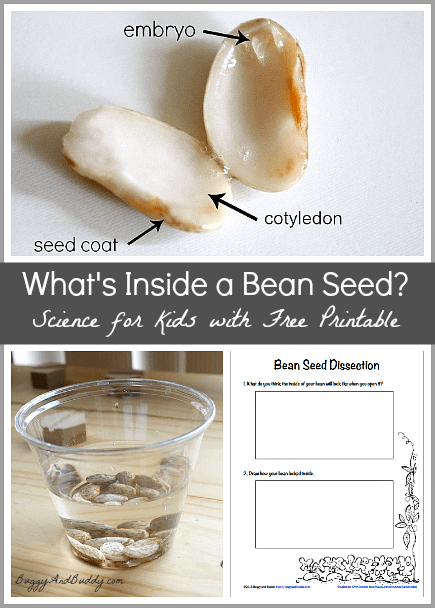
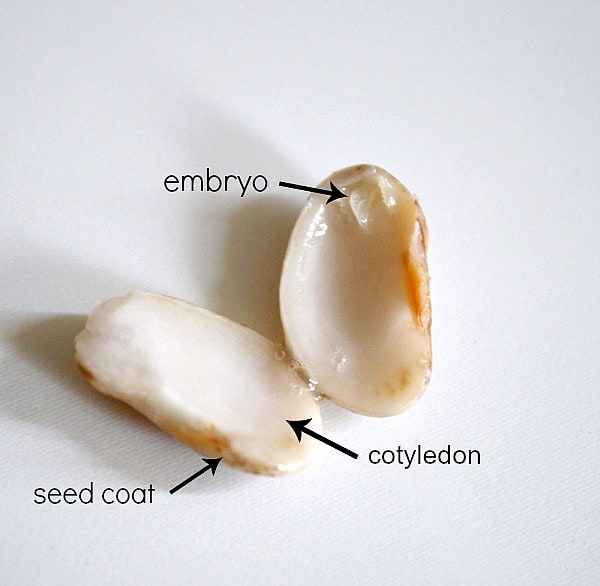
A bean is a seed and has many different parts:
- seed coat: the protective covering that surrounds the seed
- embryo: baby plant
- food supply (cotyledon): the material that feeds the baby plant
Want to go even further?
Even more activities to inspire creativity and critical thinking for various ages.
-
- Do this experiment with different kinds of beans or even peanuts in their shells. Compare your results.
- Plant the bean seeds and chart their growth.
- Create a diagram showing the life cycle of a plant.
- Can you create artwork using your leftover dried beans?
- Some related books: The Tiny Seed
by Eric Carle, Oh Say Can You Seed?
by Bonnie Worth, The Magic School Bus Plants Seeds: A Book About How Living Things Grow by Joanna Cole, From Seed to Plant
by Gail Gibbons