Use some crayon shavings and wax paper to make suncatchers in just about any shape you can think of. Perfect craft for kids any time of year!
Follow our Crafts for Kids Pinterest board!

I’m always looking for easy crafts for kids, and I especially love crafts where you can most likely find all the materials you need right at home. These suncatchers made from crayon shavings are simple and so much fun! (And they’re a great way to use up some old crayons you might have!) This post contains affiliate links.
Materials for Crayon Shaving Suncatchers
- crayons
- hand grater or pencil sharpener
- wax paper
- iron
- scissors
- old newspaper
- construction paper & glue (optional)
How to Make Suncatchers Using Crayons
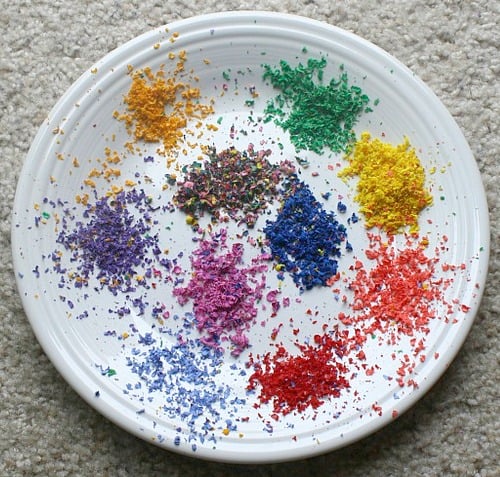
1. First you’ll need to make some crayon shavings. I gathered up some stray crayons we had around the house and got out our hand grater. Then I just peeled back the paper and grated. The fatter crayons were definitely much easier to grate, but the regular sized crayons worked too. (Just be careful not to grate your fingers! I still have a scar from accidentally grating my knuckle a few years ago when I was making dinner. This step should definitely NOT be done by a child.)
Edited to add: A reader recommended using a crayon sharpener to grate the crayons. Love that idea!
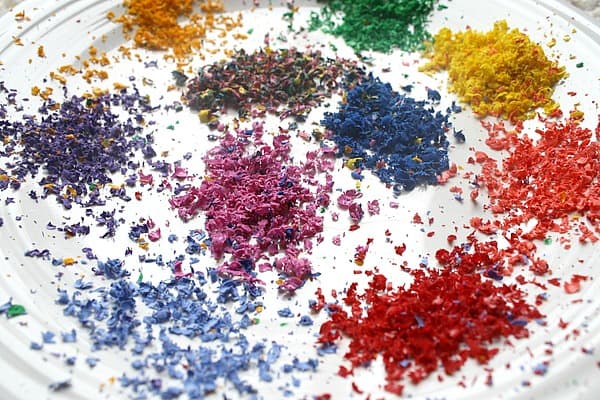
2. Gather all your shavings up into one place that’s easily accessible to the kids. We put ours on a large plate right in the center of our kitchen table.
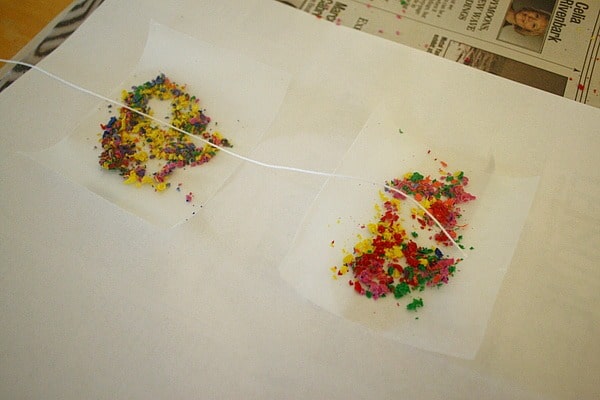
3. Cut some wax paper into the size and shape you want. We started off with some simple squares.
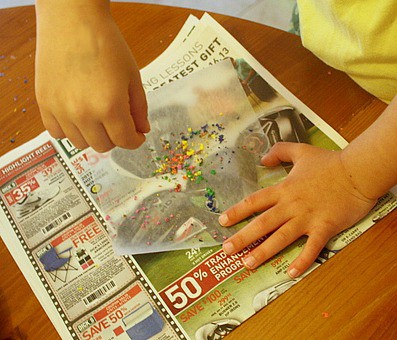
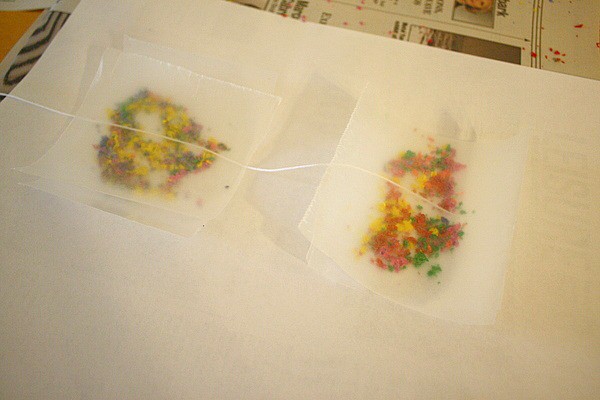
4. Place one piece of the cut wax paper onto an old piece of newspaper and sprinkle some shavings on top of it. Then place a second piece of wax paper on top.
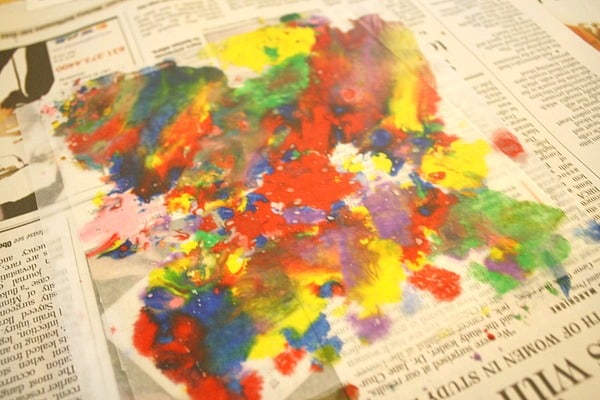
5. Turn on your iron and set it on a low setting (one without steam). Once it’s warmed you’re ready to melt the crayon shavings. Make sure your wax paper and crayon shaving stack is still on top of an old newspaper or thin stack of scrap paper. (There’s a good chance the crayon will melt out of the sides and you don’t want to ruin your table.)
Then place another sheet of newspaper or scrap paper on top of your wax paper and crayon shaving ‘sandwich’. This will protect your iron from getting melted crayon on it. Now slowly iron the paper. Keep checking every few seconds to see if your crayon shavings have completely melted. Once they have, set your project aside to cool and dry.
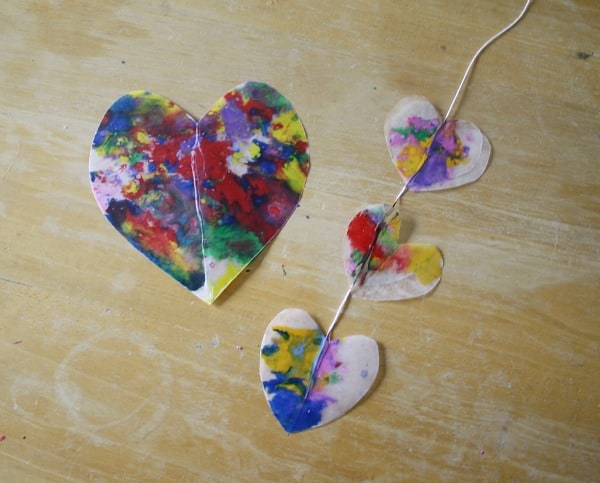
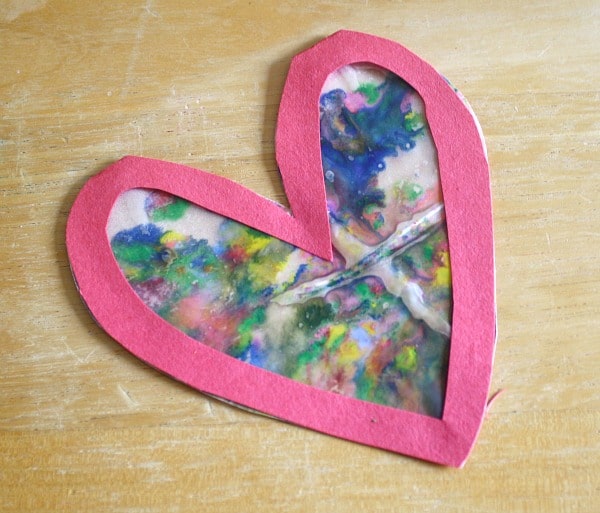
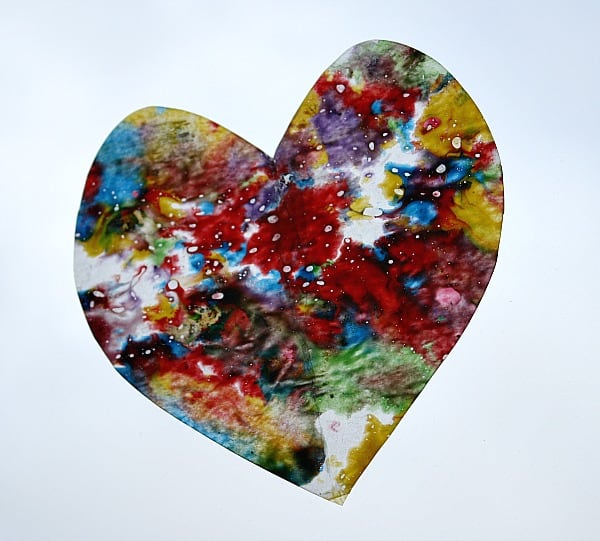
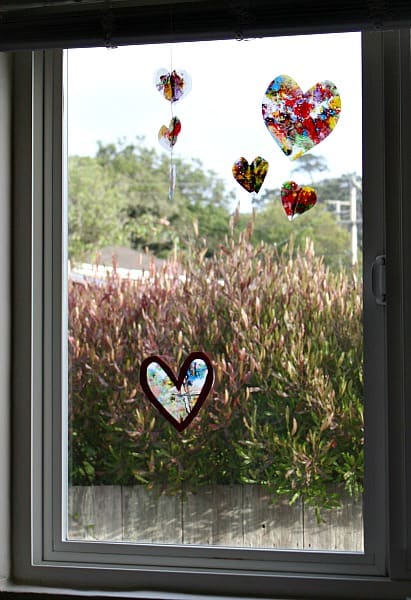
6. Once it’s dry, you can trim it into any shape you’d like. We cut ours into different sized hearts!
7. You can also create some frames with construction paper and glue the sun catcher inside.
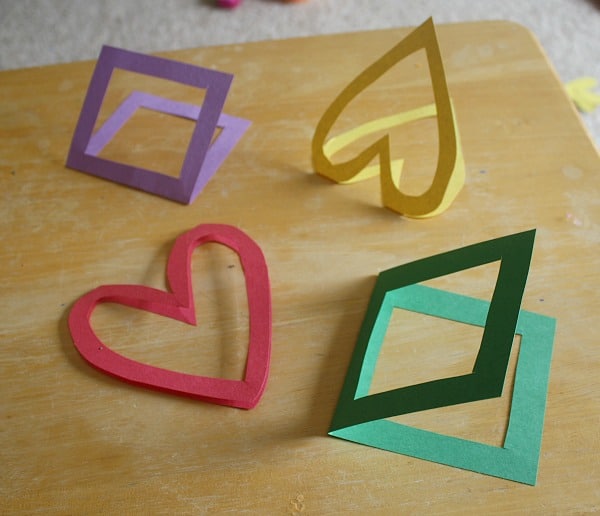
Open your frame and put glue on both sides.
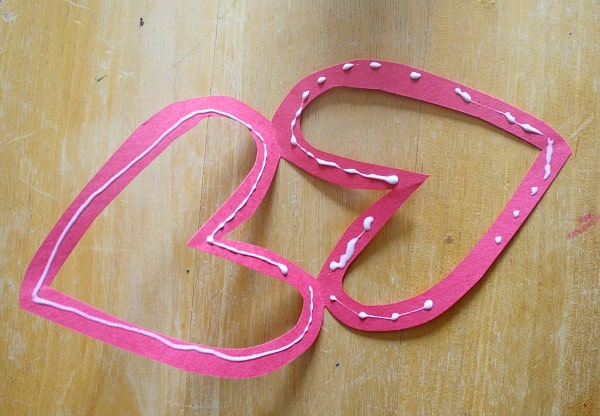
Stick your cooled wax paper onto one side.
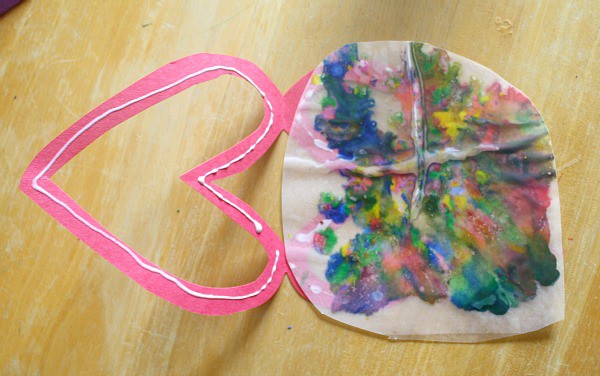
Close the frame and press the edges down.
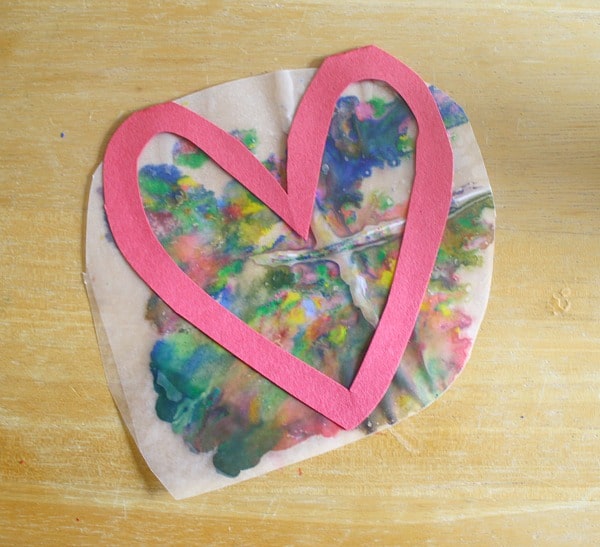
Trim off the wax paper that’s sticking out the sides.
If you’d like to have string on your finished sun catcher for hanging, you can place one end of the string in between the two sheets of wax paper before you iron it. Once it’s ironed and cooled, the string will be attached.
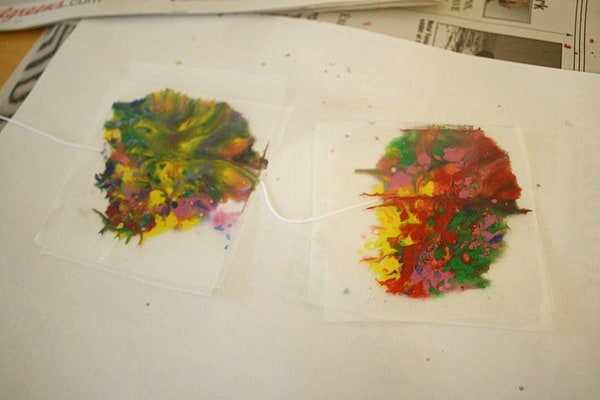
The kids LOVED seeing how their melted crayon shavings turned out!
Tips
– Be really careful when doing crafts with a hot iron. I made sure Theo was in his highchair where he couldn’t accidentally grab the iron or trip over the cord.
– Grating the crayons wasn’t too hard, but I definitely wouldn’t let the kids do it. I made sure to grate the crayons and put the grater away before the I called the kids in to begin the craft.
– Let the kids choose where to hang their sun catchers or even allow them to hang them up on their own if they are able to. It really gives children a sense of independence and pride when they can make decisions such as where to display their creations.
This is definitely a project worth trying. The kids really loved it and are excited to do it again!