Here are two fun art projects for kids inspired by Henri Matisse. In one Matisse-inspired art lesson, children use magnets to create art that can be moved around and changed. In the second art project children use scissors and colored paper to create an art collage of shapes on canvas.
Follow our Art for Kids Pinterest board!
(This post contains affiliate links.)
Our Trip to the Museum
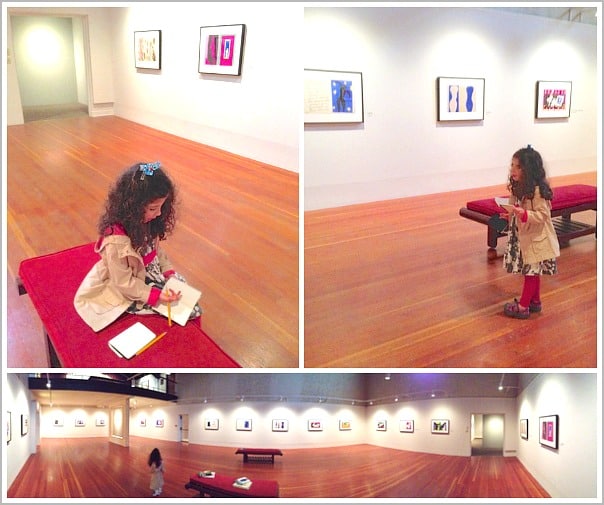
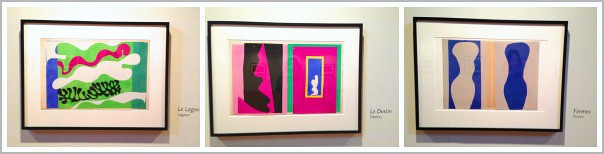
Recently Lucy and I headed to our local art museum looking for inspiration for our next art project. Luckily, they had a Henri Matisse exhibit going on that Lucy was immediately drawn to!
We walked around the large gallery taking photographs and commenting on each piece of artwork with Lucy unable to resist making a few echoing sounds in the large room. (Admittedly, it was a great room for making echoes.) Then we sat on the benches in the center of the gallery. Lucy got out her sketchbook, while I browsed the Matisse books the museum had made available.
Lucy began by drawing shapes from her favorite pieces. She loved writing the titles by them as well. Later, she came up with a game. We were to each secretly draw shapes from the one piece of Matisse’s artwork. Then, we had to look at each other’s and try to guess which piece the inspiration came from. We did that for quite a while!
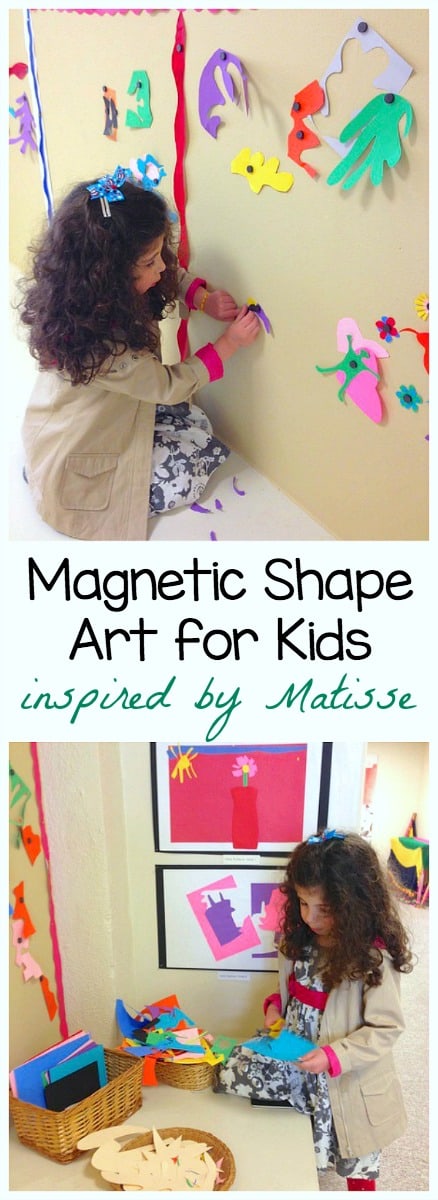
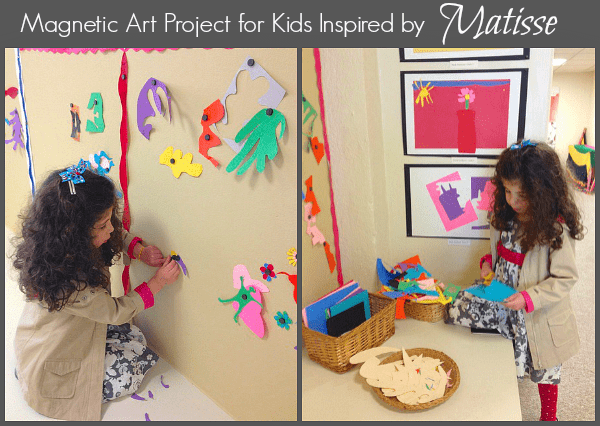
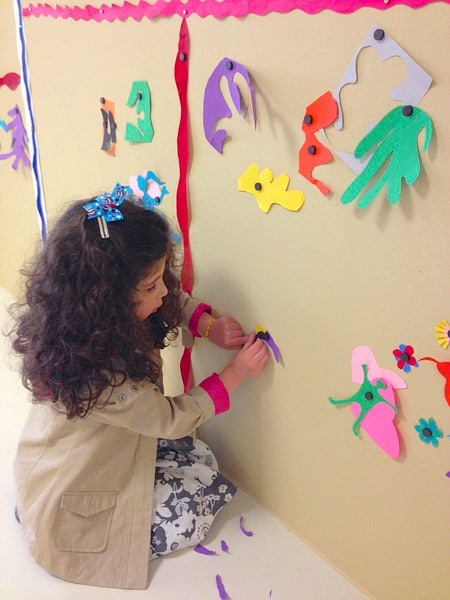
Magnetic Art for Kids Inspired by Matisse
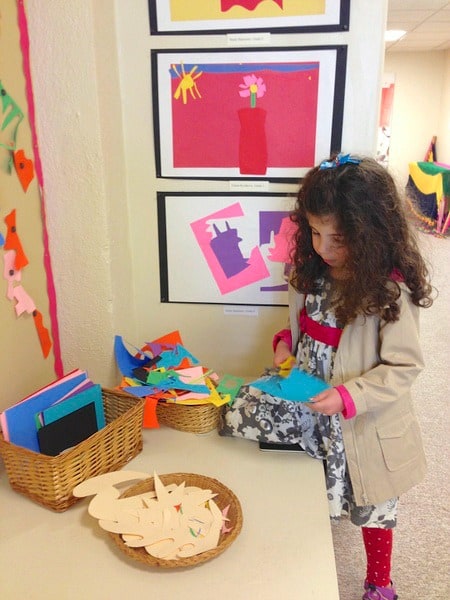
Later, we went downstairs and were pleasantly surprised to find a very inviting area set up for making art from paper cut outs just like Matisse did.
- The wall was painted with magnetic paint (which I have yet to try myself, but am dying to) and had magnets placed randomly around the wall.
- Near the wall were some baskets with different colored sheets and scraps of paper, scissors, and some children’s art books to serve as inspiration. (Some children’s books about Matisse: Matisse’s Garden, Henri Matisse: Drawing with Scissors, and Henri’s Scissors.)
- On the wall we found designs and shapes from previous visitors.
Lucy could not get enough of this! We made some collages together and some on our own. At one point she commented, “I’m an artist. Anyone can be an artist. You just have to be creative.”
She had us end with creating a tear art paper flower she had seen in one of the books nearby- “You do the center, Mommy, and I’ll do the petals.”
Wouldn’t this make a great creative center in a classroom? In place of a magnetic wall you could use magnetic cookie sheets or magnetic galvanized sheet metal.
After releasing some energy, we headed off to have lunch together, talking about ideas we had for our art project.
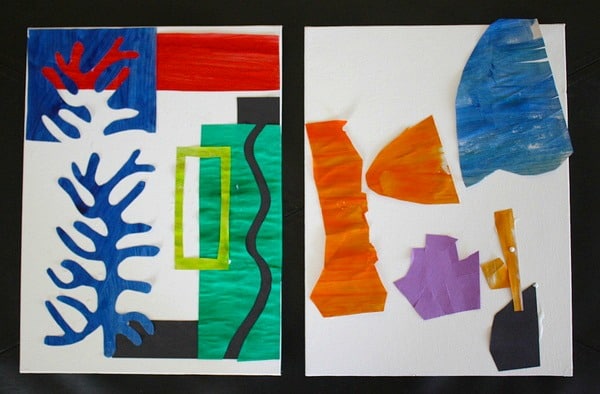
Paper Cut Out Art for Kids Inspired by Matisse
Learning about Matisse
Once we got home, we read some more about Henry Matisse online, mostly about how and why he created his artwork from cut outs.
We learned he had become ill and painting was more difficult for him so he decided to substitute scissors for paint. He would use scissors to cut large and interesting shapes from painted paper. He called this “drawing with scissors.” He would usually cut the shapes out freehand and save both the piece he had cut out and the remaining paper. He would then use those pieces to create art by arranging and rearranging them on his studio wall. Once he was satisfied with his creation, the collage of cut paper would be permanently glued down to some type of canvas or paper.
We also stumbled across this old video on youtube of Matisse making some paper cut outs.
Footage of Henri Matisse Making a Paper Cut Out
After seeing his artwork and learning more about him, we were finally ready to get started making our own artwork inspired by Matisse!
Materials for Matisse Cut-out Collage
- various colors of paper for cutting (or you can paint your own!)
- one large sheet of paper to serve as the canvas
- scissors
- glue stick
How We Created Our Matisse-Inspired Artwork
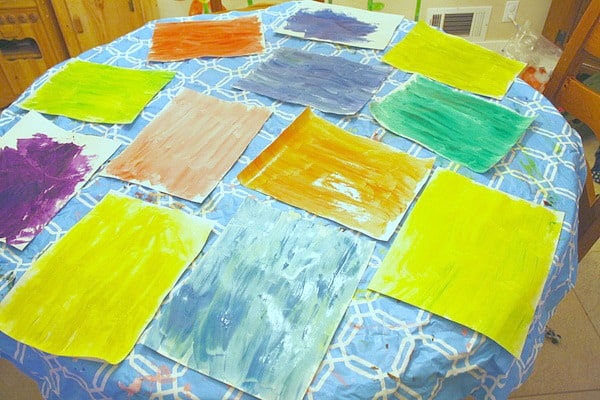
1. We decided to start by making our own painted paper. (This is completely optional. You could just skip this step and use colored construction paper). We got out some white sheets of paper, paint and brushes. Then we began mixing paints until we found colors we liked and then painted the sheets of paper, letting them dry overnight.
2. The next day we looked at some of the photographs we had taken at the museum. We noticed the bold colors Matisse used and described the shapes we saw.
3. Then we got our dry, painted paper, various colors of construction paper and scissors. We each chose some colored paper to use and got busy cutting various shapes. I loved listening to Lucy as she cut out shapes!
- “Look! Mine has lots of lines in it.”
- “I’m going to cut out squares and design with it.”
- “Look at me! I’m making a hill!”
- “I wonder what would happen if I folded it into a ball and then cut it. Let’s see what it would look like! It looks like the sun!”
- “I like to fold the paper and then cut.”
4. We played around with the shapes over in over, rearranging them until we were satisfied with what we had created, just as Matisse must have done in his studio. Lucy~ “I wonder how I should put it. There.”
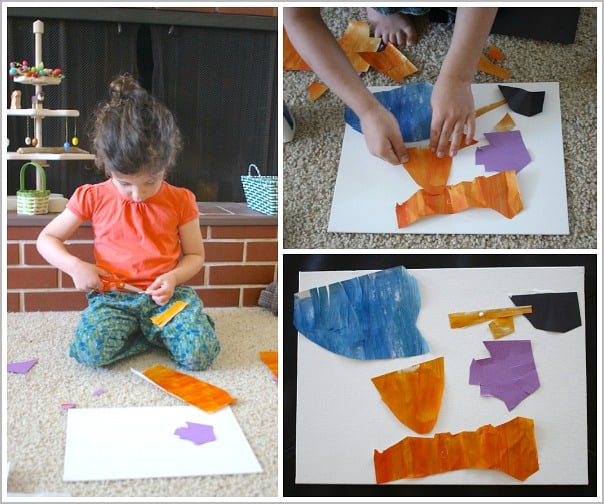
5. Then, we glued each piece into place on our blank canvas to complete our masterpieces!
This project would also be fun to do together in a classroom. I can imagine the kids sharing and discussing their shapes and designs as they are creating!