Learn how to make a kaleidoscope in this fun STEM/science activity and craft for kids. It’s such a fun way to explore light, reflections, and symmetry!
Follow our Science for Kids Pinterest board!
*This post was originally published 2/2/16 and has since been updated.
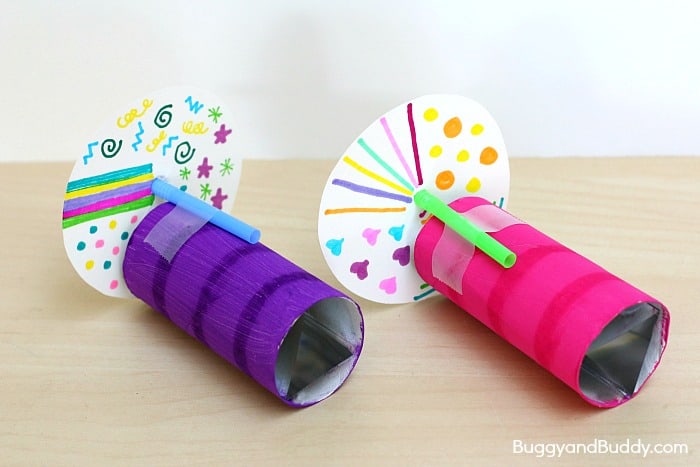
Last week I made these super fun kaleidoscopes with my after school science class (which is composed of 1st and 2nd graders). They loved exploring how their own designs reflected in the kaleidoscopes- such a fun STEAM activity for elementary students! (This post contains affiliate links.)
Meets Next Generation Science Standards (NGSS):
- Grade 1: Light and Sound PS 4 -2 and PS 4-3
- Grade 4: PS 4-2
SEE IT IN ACTION HERE
STEAM for Kids: How to Make a Kaleidoscope
Materials for Homemade Kaleidoscope
- Empty toilet paper roll
- Mylar sheets (thicker sheets, not rolls of thin paper) or mirrored sheets
- Scissors and/or paper cutter (This is the paper cutter I keep at home. It’s come in super handy!)
- Tape
- White cardstock
- Bendy straw
- Markers, stickers, or other materials for decorating your spinning circle
- Optional: Paint for decorating your cardboard tube
Directions for Homemade Kaleidoscope
1. If you are planning on painting your cardboard tube, do that first. We used our favorite tempera paint. Set it aside to dry.
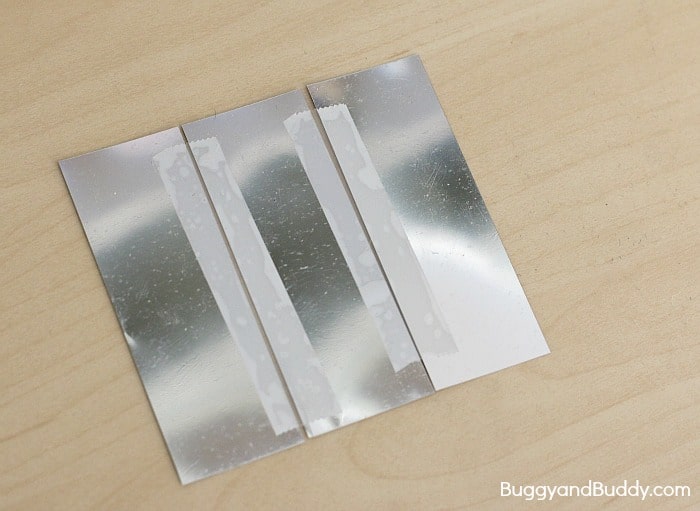
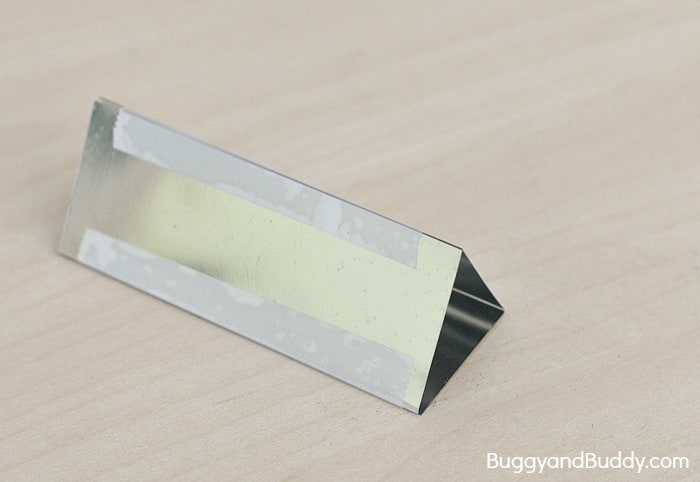
2. Next, you’ll need to cut your mylar sheets or mirrored sheets into three equal strips. You’ll want the size to be just right so the finished kaleidoscope insert fits snuggly in your cardboard tube and won’t fall out.
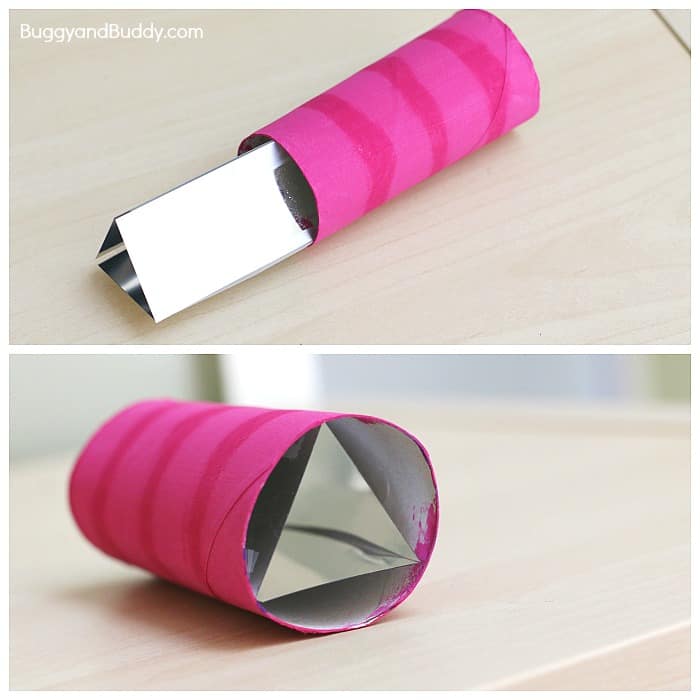
We used cardboard tubes from an empty Cottonelle toilet paper roll. I’m not sure if different brands of toilet paper use different sizes of cardboard tubes, but these are the exact sizes that worked with our Cottonelle tubes. You might need to adjust yours depending on the size of your tube. (Since you won’t want to waste any mylar, practice sizing yours using cardstock first.)
We cut our mylar into strips that measured 9.7cm x 3.5 cm.
3. Line up your mylar strips, leave a tiny space between each one. (Place the shiniest/least scratched sides face down.) Tape them together over the spaces.
4. Fold the taped mylar into a triangular prism and tape along the top to hold in place.
5. This should fit snuggly inside your cardboard tube.
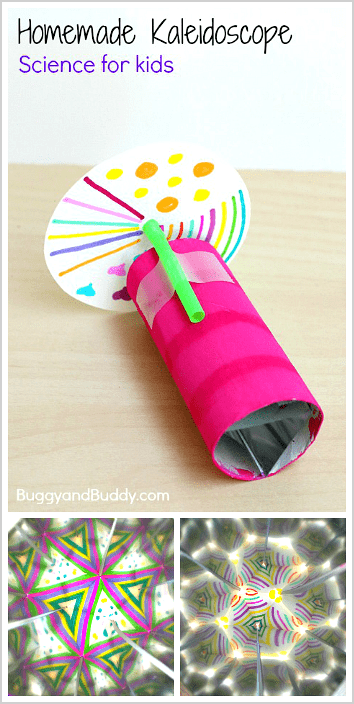
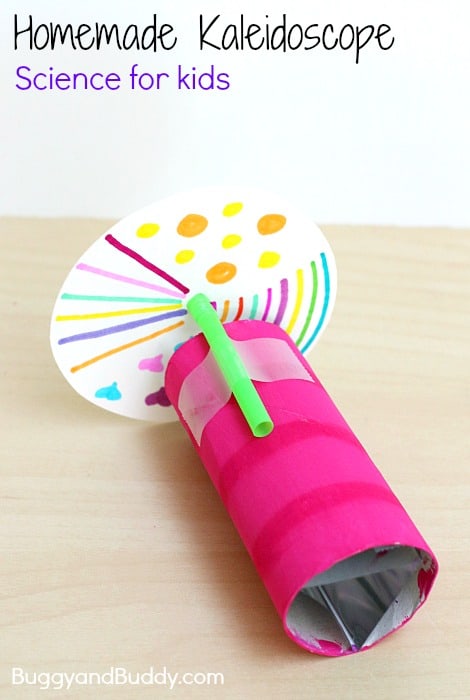
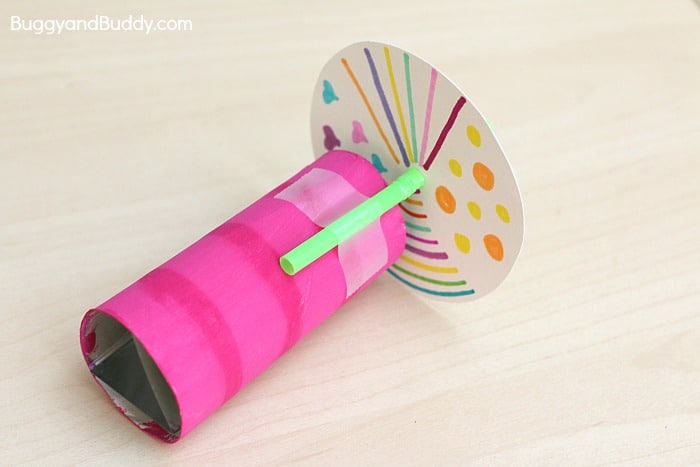
6. Cut off the bendy end of a flexible straw.
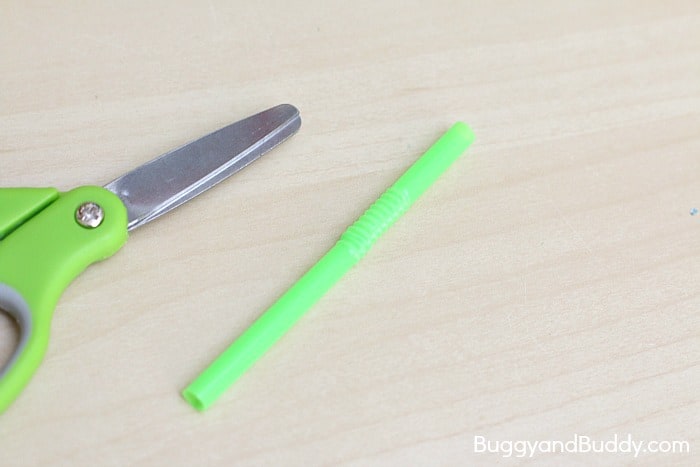
7. Tape it along the top of your tube with the flexible part of the straw hanging over the edge.
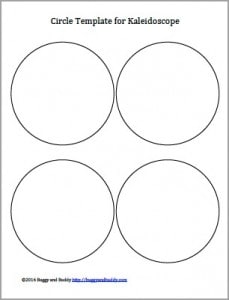
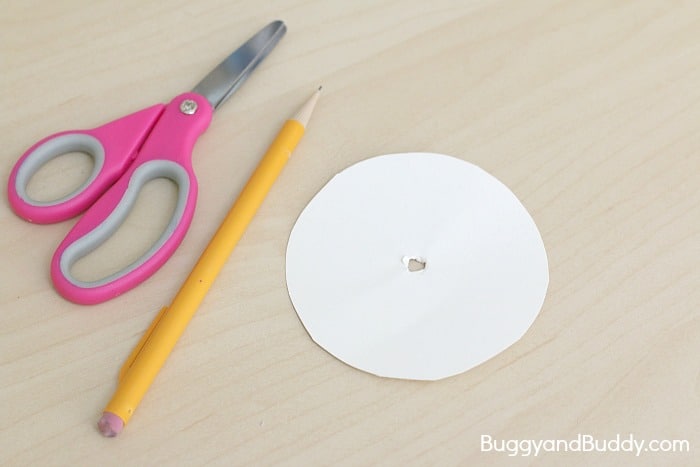
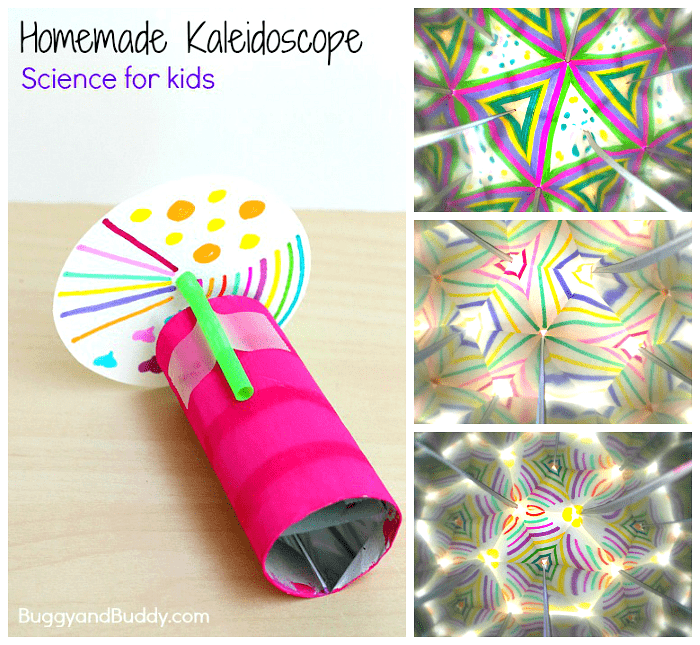
8. Cut out 3 circles from cardstock. Ours measured 3.75 inches in diameter. (You can print out our free circle template or just make your own.)
9. Poke a hole in the center of your circle. (I used a sharp pencil.)
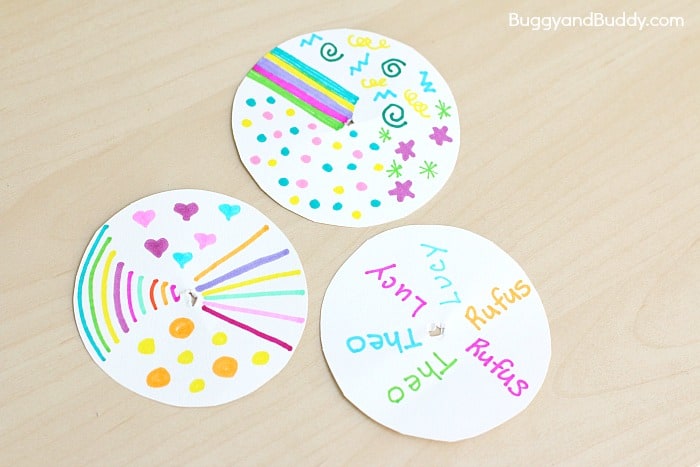
10. Decorate the circle using markers, stickers, crayons etc. Try out different designs, shapes, and letters!
11. Place the circle onto your straw with the design facing the kaleidoscope. You want the hole to fit over the flexible portion of the straw so it will turn easily.
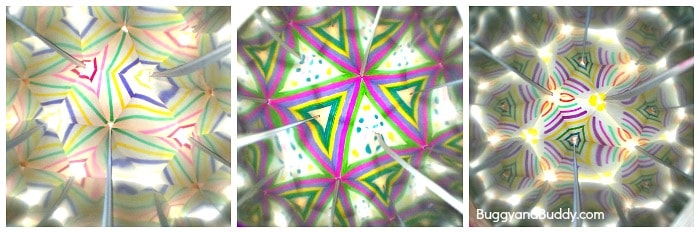
12. Look into your kaleidoscope and explore all the reflections created by your design!
Tips
- If you have trouble getting your triangular prism to fit snuggly into your cardboard tube, it will work on its own. Simply tape the straw directly on top of the prism rather than using a tube.
- Make as many cardstock circles as you want and try them all out!
Be sure to check out STEAM Kids book and ebook for even more creative STEM and STEAM ideas!