Make your very own magnetic LED lights in this fun science activity for kids. This STEM / STEAM project is a super fun way to explore magnetism and circuits!
Follow our Science for Kids Pinterest board!
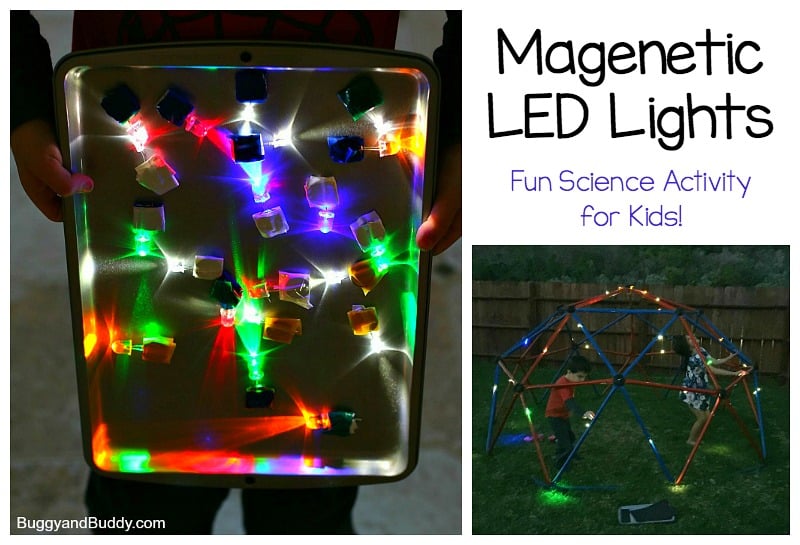
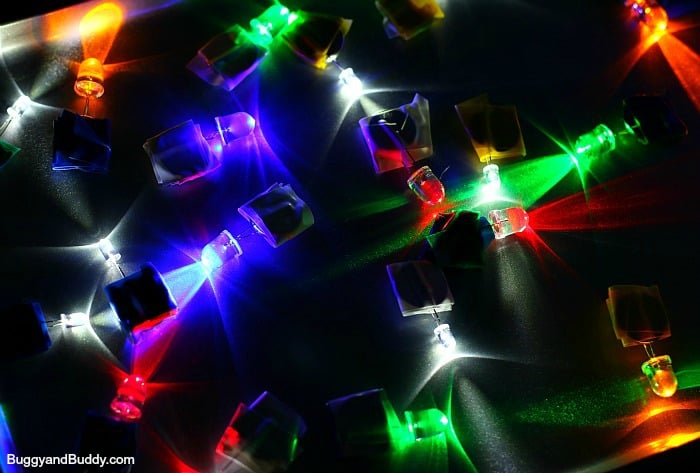
Have you heard of LED throwies? They’re little magnetic LED lights created by Graffiti Research Lab. They are called throwies because you can toss them onto a magnetic surface and they’ll stick.
I love how fun they are for kids to make, and they can inspire all kinds of scientific learning, creativity, and play! This post contains affiliate links.
Safety Note
Neodymium magnets are extremely dangerous if swallowed. If several magnets are swallowed, they could get stuck in the intestine and cause perilous complications. Do NOT use them around young children! Adult supervision is a must during this activity! Neodymium magnets can also interfere with electronics- keep them away from computers, phones, etc. Be sure to read this safety sheet before doing this activity.
Coin cell batteries can also be very dangerous is swallowed. Adult supervision is required when doing this activity.
Science for Kids: LED Throwies
When I first saw LED throwies, I knew we would have to make some ourselves. They have inspired so much science learning an creativity with the kids and are just pure awesomeness!
Materials for LED Throwies
- 10mm LED lights (You can also use 5mm- they are smaller, but still fun and actually last longer! This set includes 5mm.)
- Lithium CR2032 3V coin cell battery
- Strong magnets (We used neodymium magnets. You can also use strong ceramic magnets. See safety note above.)
- Electrical tape
- Scissors
Directions for Making LED Throwies
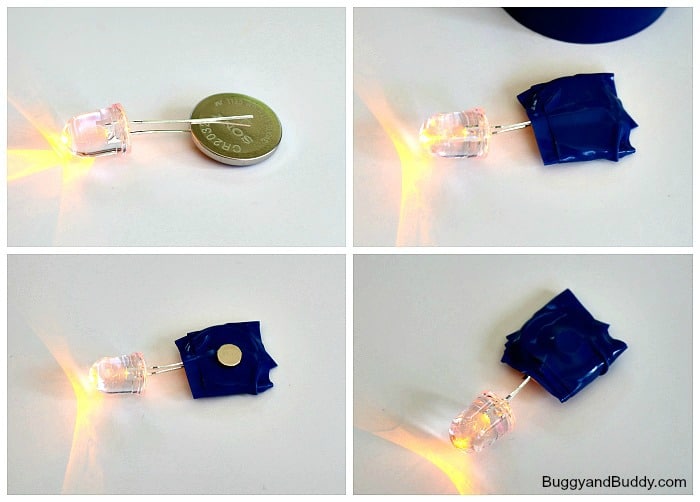
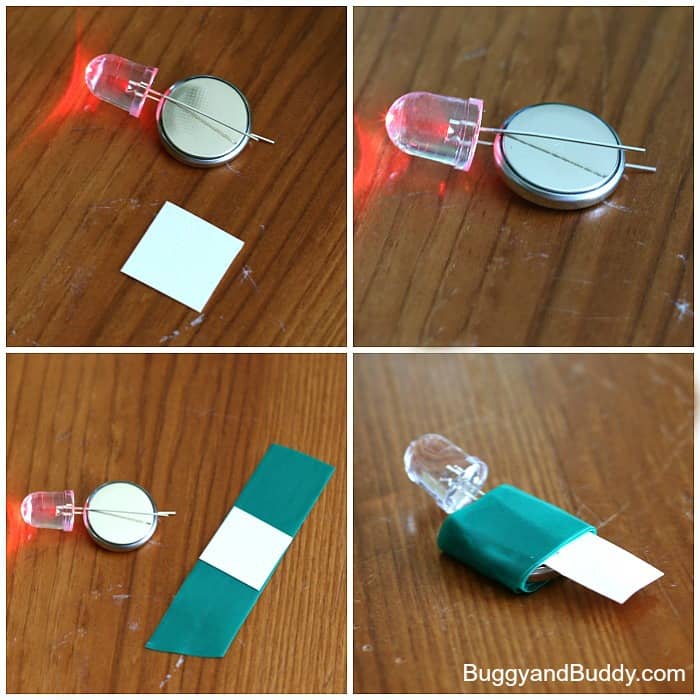
1. Start by pinching the leads of your LED over a coin cell battery. If it doesn’t light up, flip the battery over so the leads are touching the correct sides.
2. Cut a small piece of electrical tape and wrap it securely around the LED leads and battery. (The leads of the LED can be poky, so be sure to tape them down.)
3. Add a strong magnet on top of the taped battery. Tape it securely in place. That’s it!
These will stay lit about 1-2 weeks.
When your LED throwie dies, you can remove the electrical tape, replace the battery, and re-tape it together.
(You can also tape a piece of cardstock between one lead of your throwie and the tape surface. When you want to turn it off, slip a separate tiny piece of cardstock into this space between the lead and cardstock attached to the tape.)
Using the LED Throwies
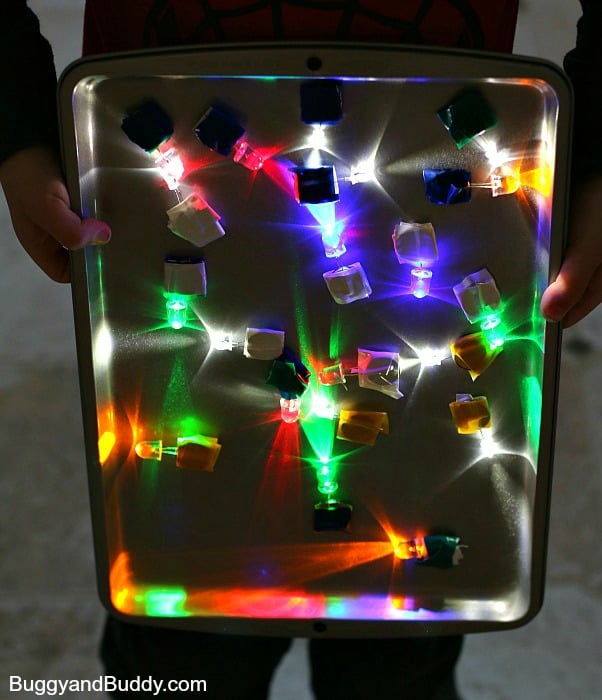
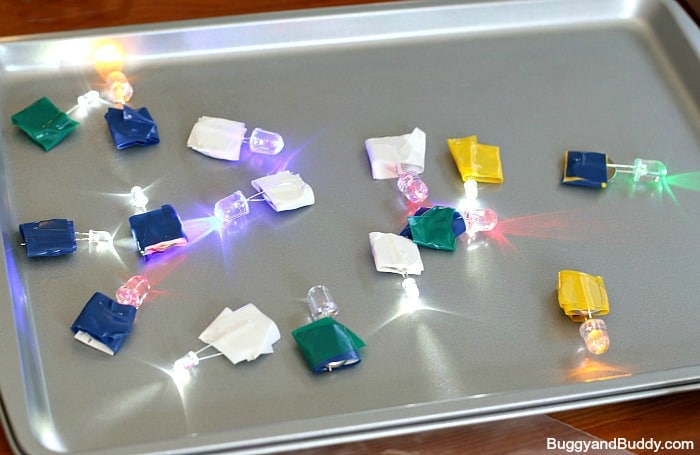
- Use the magnetic LED lights to create designs on a magnetic surface.
- See how we used LED throwies to learn about constellations.
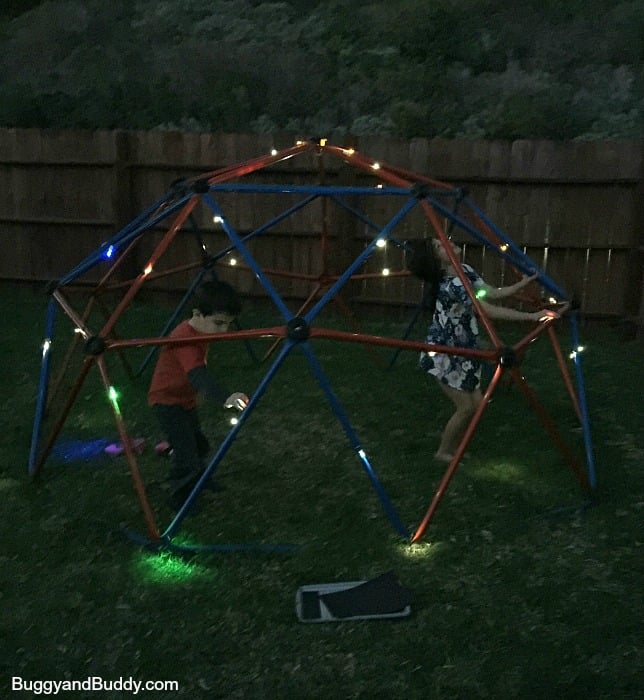
- Use them to discover what is and isn’t magnetic around your home or classroom. The kids were so excited to discover their outdoor play structure was magnetic!
Be sure to check out STEAM Kids book and ebook for even more creative STEM and STEAM ideas!

