Here’s an easy paper plate craft for kids- a Statue of Liberty Crown and Torch! This craft is perfect for a unit on American symbols or for the 4th of July.
Are you following our Patriotic Crafts for Kids Pinterest board?
Do your kids enjoy dressing up? Mine absolutely LOVE it! Lucy and Theo especially love dressing up in costumes they’ve made themselves.
With the Fourth of July almost here, we thought it would be so much fun to dress up like The Statue of Liberty! Here’s how to make a crown and torch from paper plates. (This post contains affiliate links.)
Statue of Liberty Crown & Torch Using Paper Plates
Materials for Crown and Torch
- Paper plates (at least 4)
- Scissors
- Tape
- Paint and paintbrushes
- Glitter glue (optional)
- Toilet paper roll
Directions for Making the Crown
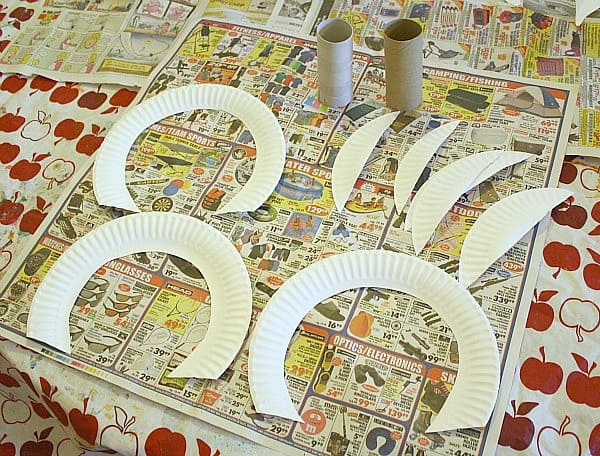
1. Cut off the bottom of a paper plate. (Save this little piece to make the spikes on the crown later on. I was able to get two spikes from each little piece so you’ll need about 4 total.)
2. Cut out the center of the plate. (Save this piece to make flames for the torch. Each piece can make one flame piece. You can make as many as you want depending on how you want your finished torch to look.)

3. Do this for all your paper plates.
4. Paint the crown and spike pieces a greenish-blue gray. We started with white paint. Then we added some green. When we were happy with that color, we added a few drops of black paint to give it a grayish hue.
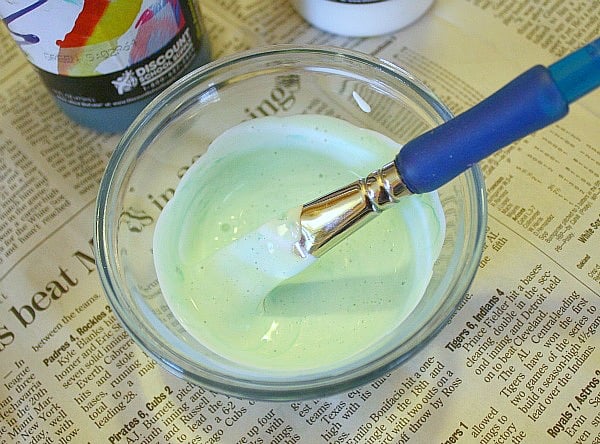
5. Set the pieces aside to dry. (This would also be a good time to paint the base of your torch- the cardboard tube- since it is the same color as the crown.)
6. Once they are dry, it’s time to make the spikes. The Statue of Liberty’s crown has 7 spikes (representing the 7 continents and 7 seas). Cut out 7 long triangles from your small scraps to make the spikes. You can either glue or tape them to your crown.
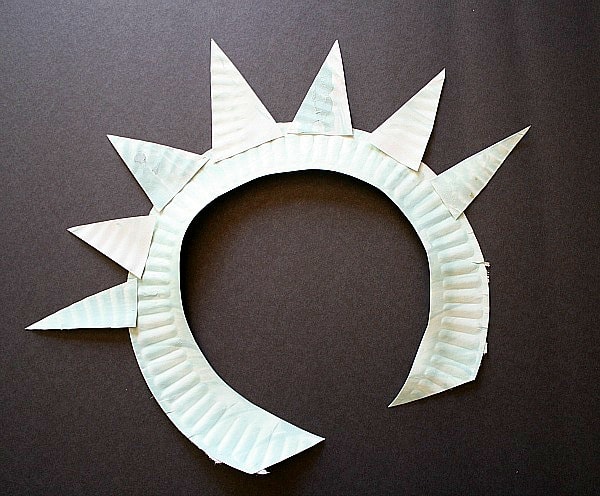
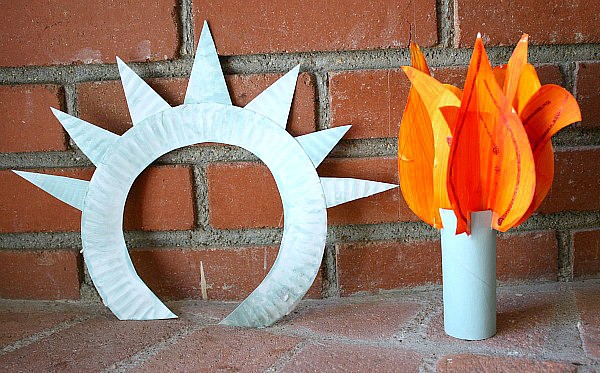
7. Your crown is finished!
Directions for Making the Torch
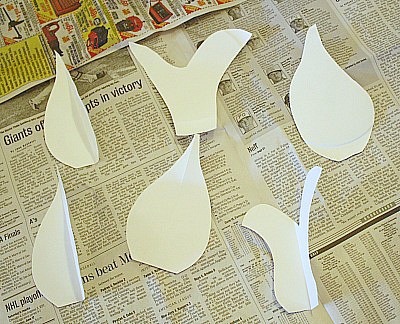
1. For the flames we used the circles we cut from inside the plate. First, cut out random flame shapes from the circles.
2. Paint them an orange-red to look like fire. We started with orange paint and then added some red to it until we liked the color we had created.
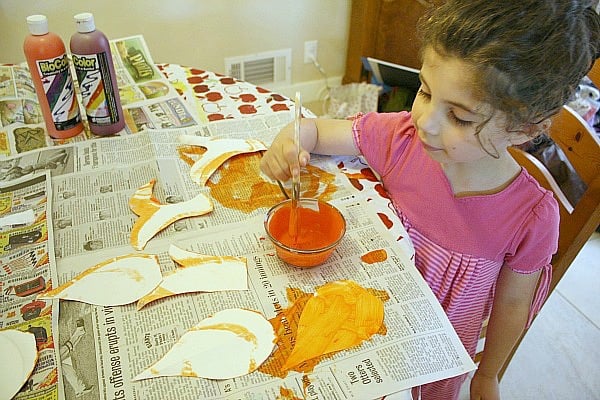
3. You can also add some details with red glitter glue like we did. (We were given ours for free from Craft Project Ideas.)

4. Set your flames aside to dry.
5. Now paint your toilet paper roll the same color you used to paint your crown and allow it to dry.
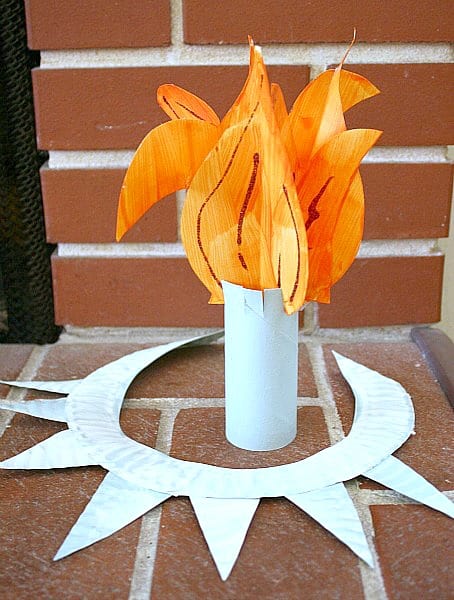
6. Once everything is dry, it’s time to build your torch!
7. Fold your flames in half vertically so when they unfold they remain bent a bit.
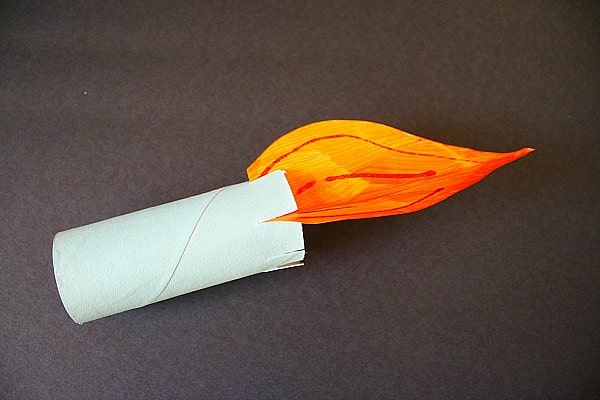
8. Cut some slits in the top of your toilet paper roll.
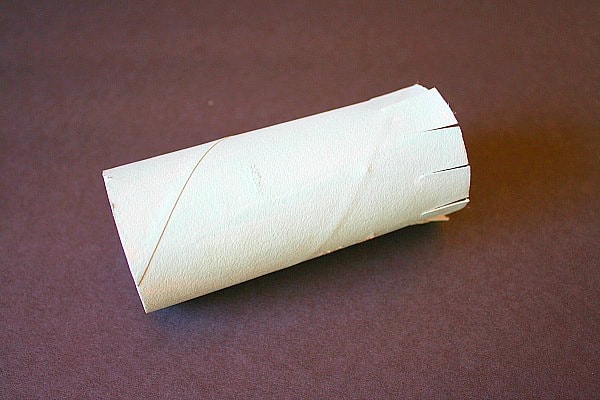
Slip your flames into the slits in the tube one flame at a time. (I also taped each flame from the back to make it more sturdy.)
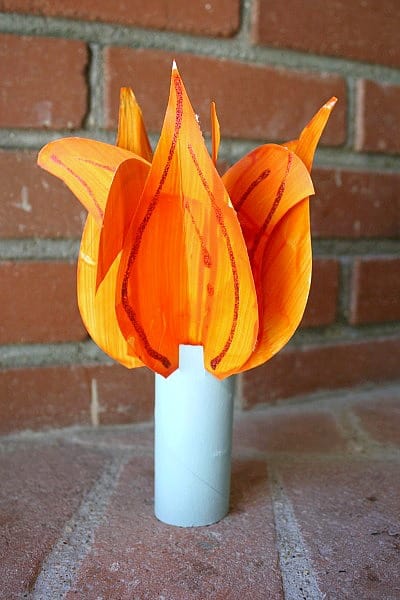
9. Once you have arranged your flames all around the cardboard tube, you are ready to carry your torch proudly!
Lucy loved wearing her new homemade costume!

If you’d like to learn about the Statue of Liberty, here’s a great site. You can take a virtual tour of the monument!