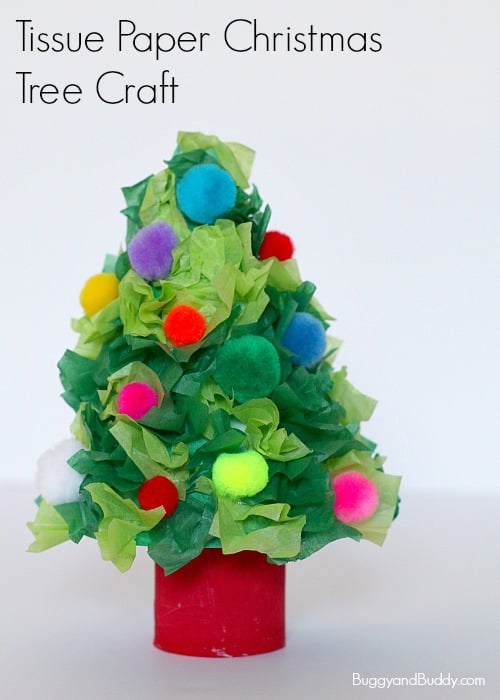
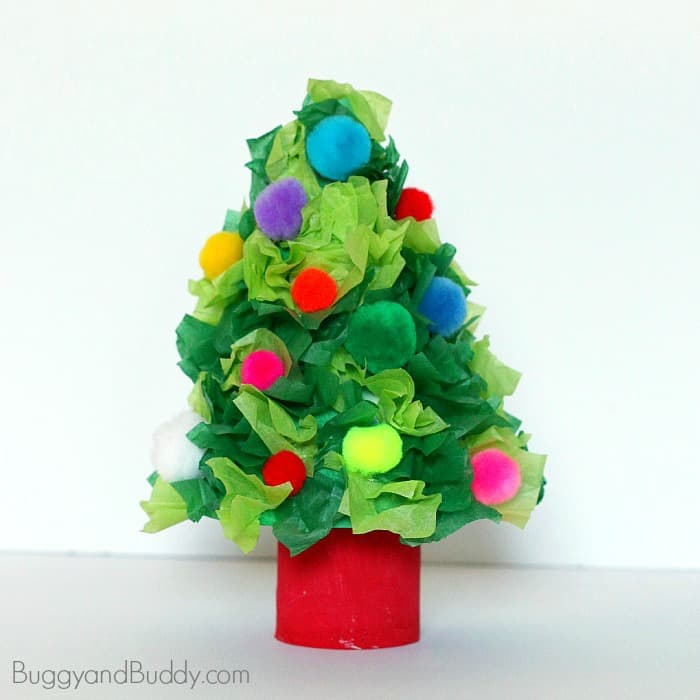
We used tissue paper and empty toilet paper rolls to make this cute mini Christmas tree craft. Kids love decorating their little trees, and the finished craft makes a wonderful holiday decoration!
Follow our Christmas for Kids and Family Pinterest board!
My students always loved making these cute mini Christmas trees! We would keep them in the classroom to decorate for the holidays, and the kids would take them home to share with their families once winter break started.
We would usually do this project over two days. The first day we’d make the actual tree and then let it dry overnight. On the second day, we’d decorate it! I always loved seeing how each child decorated his or her tree. They were always so proud of their finished craft! This post contains affiliate links.
Mini Christmas Tree Craft Using Tissue Paper
Materials for Christmas Tree Craft
- Green construction paper
- Toilet paper roll
- Brown or red tempera paint (This is my favorite tempera paint!)
- Green tissue paper squares
- Pencil
- Liquid glue
- Stapler
- Scissors
- Craft materials to decorate the tree (pom poms, tinsel, yarn, sequins, etc.)
Directions for the Christmas Tree Craft
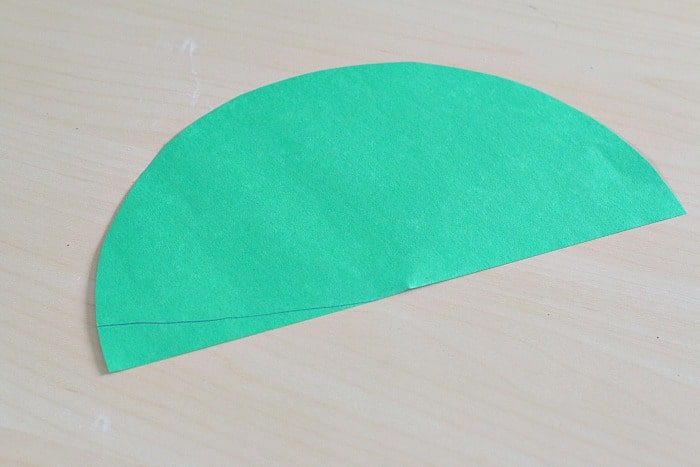
1. Cut out a circle from your green construction paper. (Ours had about an 8-9 inch diameter.)
2. Cut the circle in half. You will use one half of the circle to make your Christmas tree.
3. Use a pencil to draw a small line on one side of the green half circle. Leave this area blank to make folding the paper into a cone shape easier in later steps.
4. Cover the rest of the green half circle with green tissue paper squares. To do this, spread some liquid glue onto a small section of the paper. Take one tissue paper square and wrap it around the eraser end of a pencil. Gently press the tissue paper onto the glue using the pencil. Carefully remove the pencil. Your tissue paper will remain on the glue.
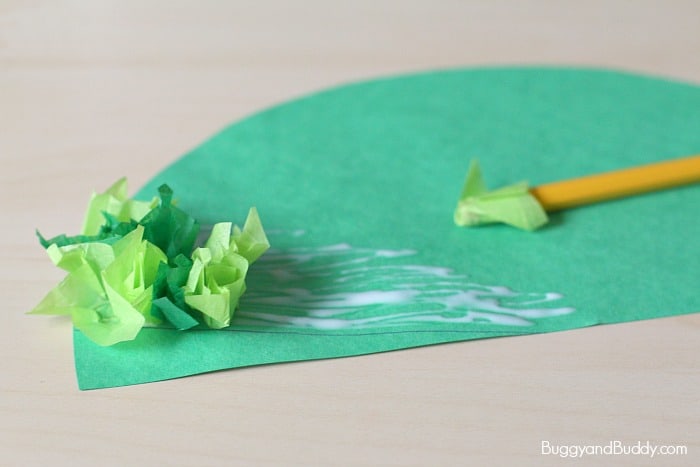
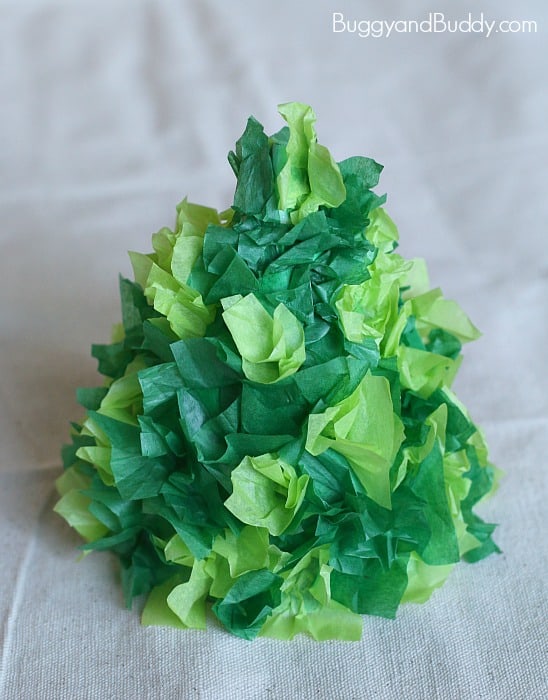
5. Continue until your tree is completely covered with green paper. Let the glue dry overnight.

6. Once the glue is dry, fold the paper into a cone shape and staple into place.
7. Decorate your tree! We decorated ours with pom poms in various colors, but you can use any craft material you’d like- sequins, yarn, etc.
8. Paint a toilet paper roll for the trunk of your tree. You can paint it brown for a more realistic tree trunk or red for a holiday-colored tree. After the paint has dried, make some small snips around one end of the toilet paper roll. Fold them down.
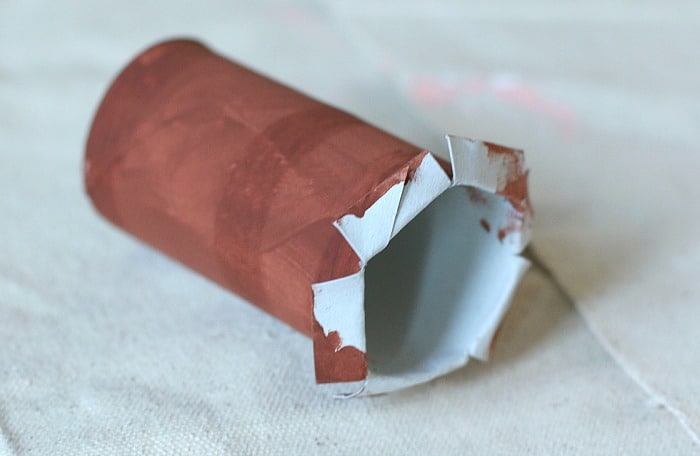
9. Place liquid glue on all the resulting tabs. Put the glued end into the cone tree and let it dry.
Display your mini Christmas tree!
Looking for the perfect gift? Be sure to check out all our gift guides for kids!
