In this fun spring craft for kids, children will illustrate the butterfly life cycle right onto a paper plate. This post also contains a free printable template to help get you started! (This post contains affiliate links.)
Follow our Spring Crafts and Learning Pinterest board!
*This post was originally published on March 12, 2015 and has since been updated.
Spring is the perfect time of year to learn all about butterflies! We’ve seen quite a few fluttering around our backyard over the last couple weeks, and have encountered lots of cute, fuzzy caterpillars around town.
The kids have had lots of questions about caterpillars and butterflies, so we’ve been reading some books about the life cycle of butterflies to learn more. (From Caterpillar to Butterfly is a good one to read!)
After learning all kinds of butterfly facts, I decided it was time to whip out my trusty, old paper plate butterfly life cycle craft from my teaching days to do with the kids!
See it in action here:
Be sure to check out these other caterpillar and butterfly activities on Buggy and Buddy:
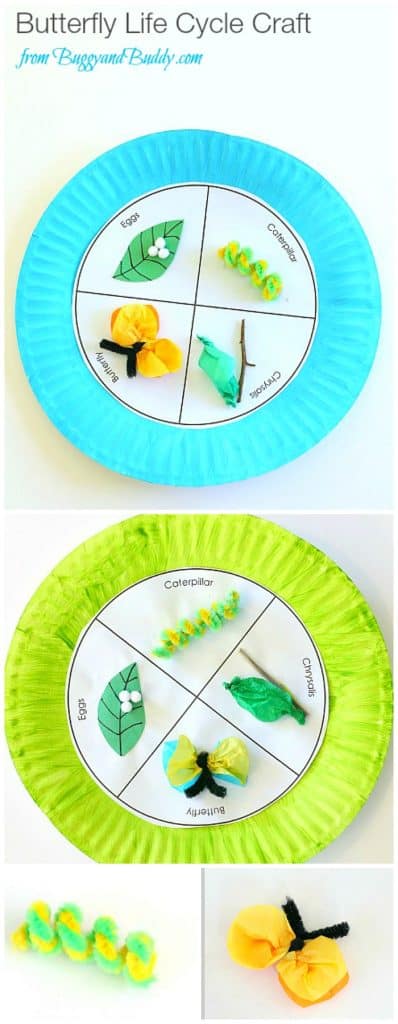
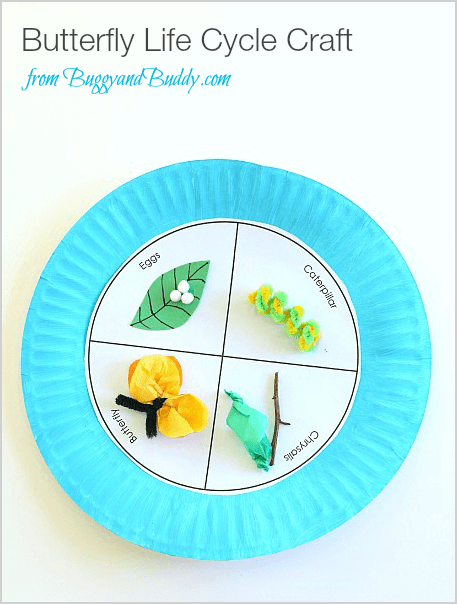
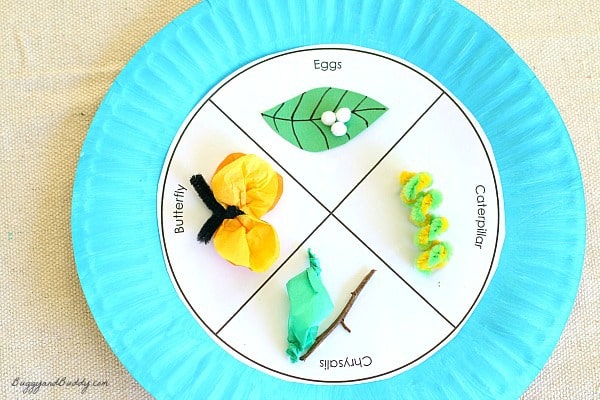
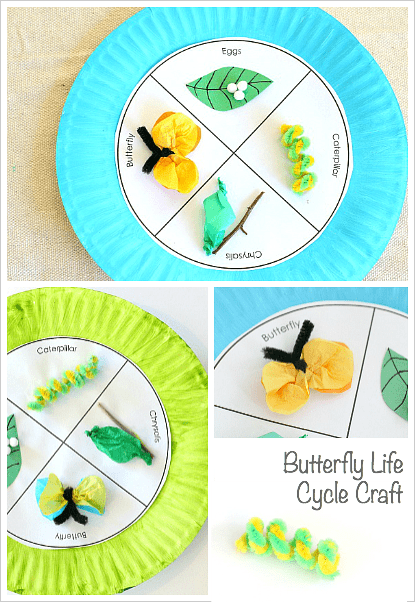
Butterfly Life Cycle Craft
Materials for Butterfly Life Cycle Craft
- Paper plate
- Scrap of green construction paper
- Small, white pompoms- 3 per child (We received ours free from Craftprojectideas.com)
- Tissue paper (2 inch x 3 inch piece of green for the chrysalis, and any other colors you want for your butterfly cut to 2 inch x 2.5 inch)
- Pipe cleaners (2-inch piece in black for the butterfly, and any other colors you want for your caterpillar cut to 6 inches)
- Pencil
- Black marker or crayon
- Liquid glue
- Scissors
- Small twig from outside
- Tempera paint (optional)
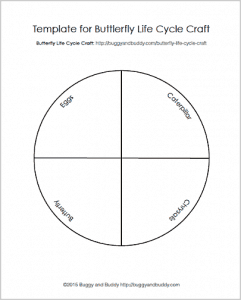
- Free butterfly life cycle template
Directions for Butterfly Life Cycle Craft
1. Optional: Use tempera paint to paint your paper plate. Let it dry. (You can skip this step, we just wanted to add some color to our craft!)
2. Print out the free butterfly life cycle template. Cut out the circle and glue it in the center of your paper plate.

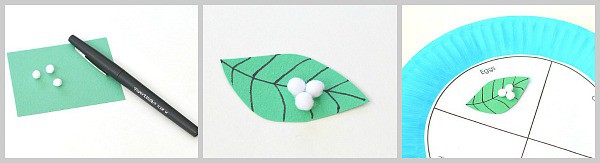
3. Egg Section
- Cut out a small leaf from your green construction paper.
- Draw lines on your leaf with your black marker or crayon. (These are our absolute favorite black pens to use for tracing and drawing.)
- Glue some small, white pompoms onto your leaf to represent the eggs.
- Glue the leaf and eggs onto the leaf section of your plate.
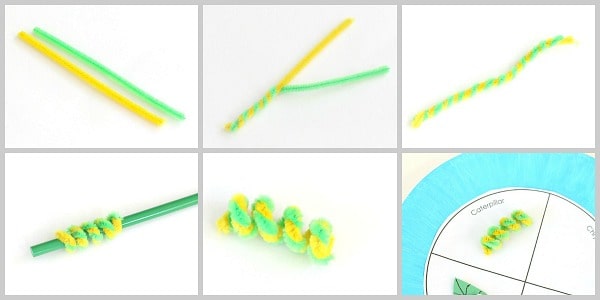
4. Caterpillar Section
- Choose two different colored pipe cleaners to use for your caterpillar. Cut the pipe cleaners so they are each 6 inches long.
- Twist the two pipe cleaners together.
- Wrap the twisted pipe cleaners around a pencil.
- Slide it off.
- Glue your caterpillar onto the caterpillar section of your plate.
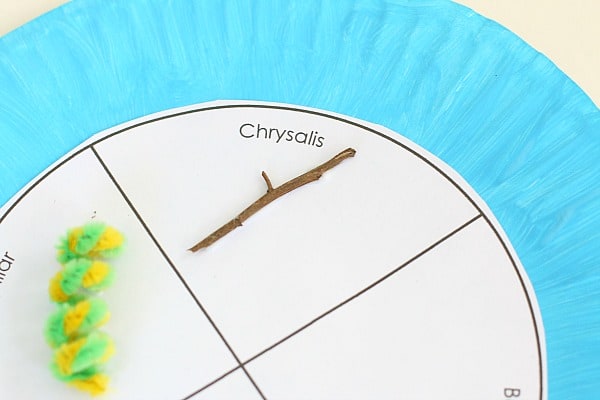
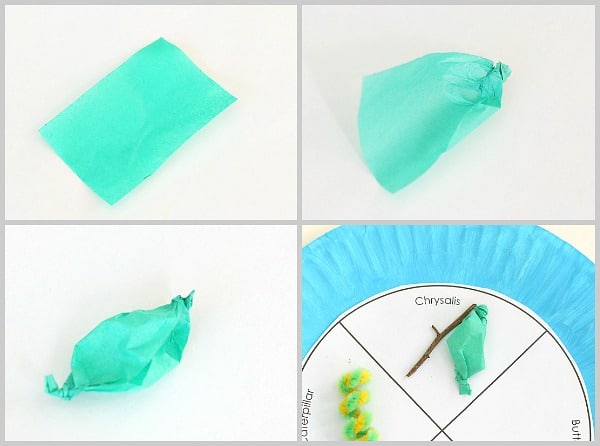
5. Chrysalis Section
- Glue a small twig onto the chrysalis section of your plate.
- To make the chrysalis, cut a piece of tissue paper so it’s 2 inches x 3 inches.
- Twist the top and bottom of the rectangle to form a chrysalis shape.
- Glue it next to the twig on your paper plate.
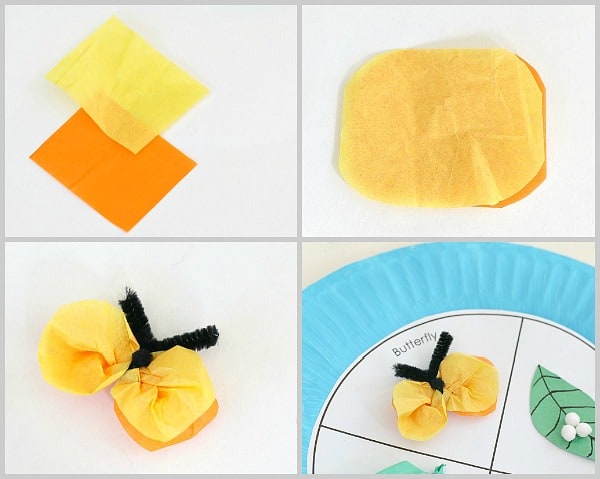
6. Butterfly Section
- Choose two colors of tissue paper to use for your butterfly wings. Cut them to 2 inches x 2.5 inches.
- Stack the pieces of tissue paper together and round the corners with your scissors.
- Cut a black pipe cleaner so it’s 2.5 inches long. Scrunch up the center of both pieces of tissue paper and twist your black pipe cleaner around it.
- Glue your cute, little butterfly onto the butterfly section of your paper plate.
You’re all done! Once the craft is dry, your child can use it to retell the stages of the butterfly life cycle!

Be sure to check out STEAM Kids book and ebook for even more creative STEM and STEAM ideas!