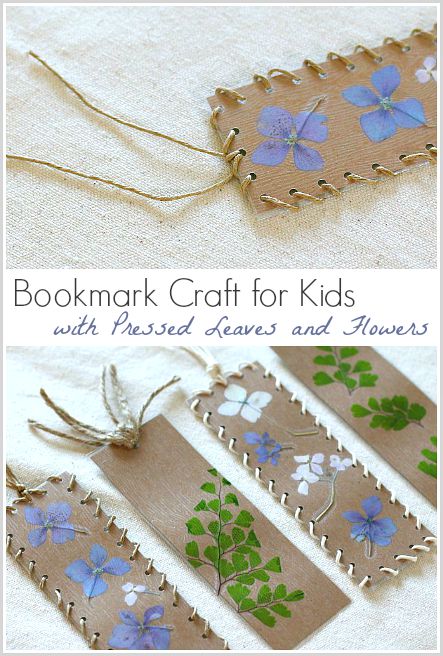
This nature-themed bookmark craft for kids is so simple to make and is perfect for a wide range of ages. Children will enjoy the process of pressing flowers and leaves and then using the natural materials to create all kinds of designs for their homemade bookmarks!
Follow Buggy and Buddy on Pinterest!
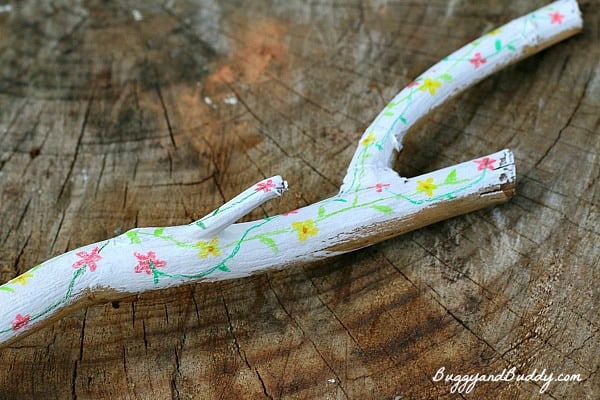
My kids are always bringing little nature treasures in from outside. Theo’s current obsession is finding fairy hats (acorn tops) to collect, while Lucy usually finds unique rocks, shells, or sticks to bring inside. The natural materials the kids find outdoors often inspire various crafts we do- like when we used some sticks as our canvas for drawing.
For our latest craft, we were inspired to create something unique using all the beautiful leaves and flowers we’ve found in our backyard. (This post contains affiliate links.)

Pressed Flowers and Leaves Bookmark Craft for Kids
Materials for Bookmark Craft for Kids
- Various leaves and flowers
- Cardstock
- Scissors
- Glue
- Contact paper or laminator
- Single hole punch (This is my favorite!)
- Yarn, string, or raffia ribbon
Directions for Bookmark Craft for Kids
1. To make this bookmark craft, you’ll need some pressed leaves and flowers. Here’s how we pressed ours:
- Take a nature walk or head into your own backyard and pick some small flowers and leaves.
- Press your flowers and leaves by placing them inside the pages of a thick book for 3-4 days.
- Once your flowers and leaves are pressed and dry, carefully remove them from the book.
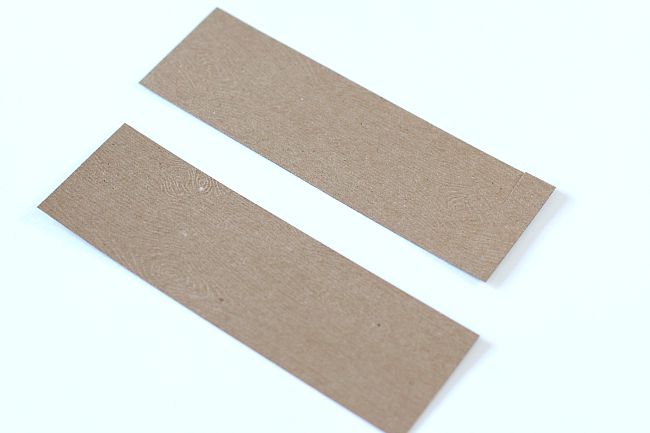
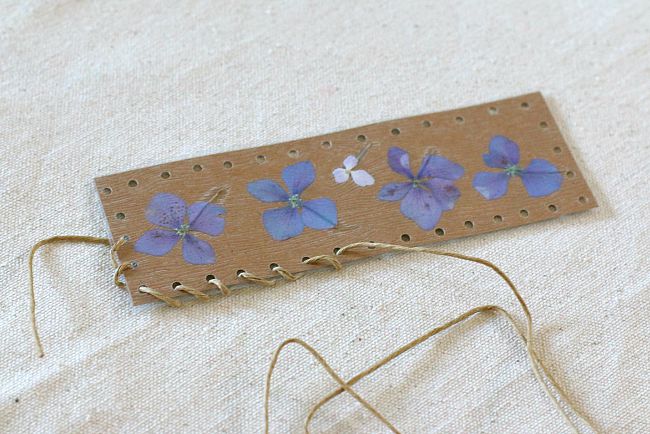
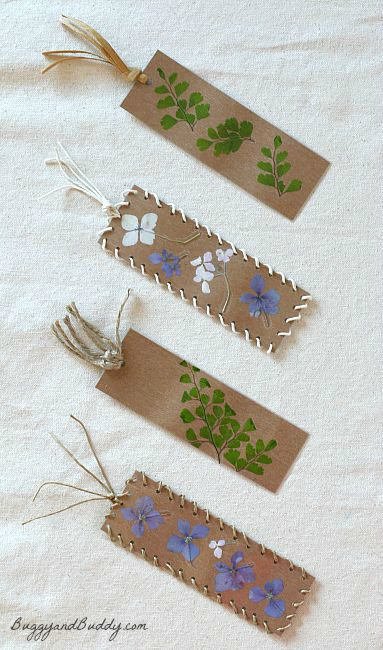
2. Cut some cardstock the size you’d like your bookmark to be. (We cut ours to be 6 inches x 2 inches.) We used a light brown cardstock like this one, but it would also be fun to play around with other colors for your bookmarks.
3. Use your pressed flowers and leaves to make a design on your cardstock. Once you’re happy with the design, you’ll want to lightly attach the flowers and leaves to your bookmark before you permanently cover them up. I used a dot glue runner, but you could also use a glue stick.
4. Next you’ll want to cover the bookmarks with plastic to protect them during use. We used our own personal laminator (which is actually pretty inexpensive), but you could also cover your bookmark with clear contact paper.
5. Once you’ve covered your bookmark, trim off the excess plastic.

6. Now it’s time to add the finishing details- get as creative as you’d like!
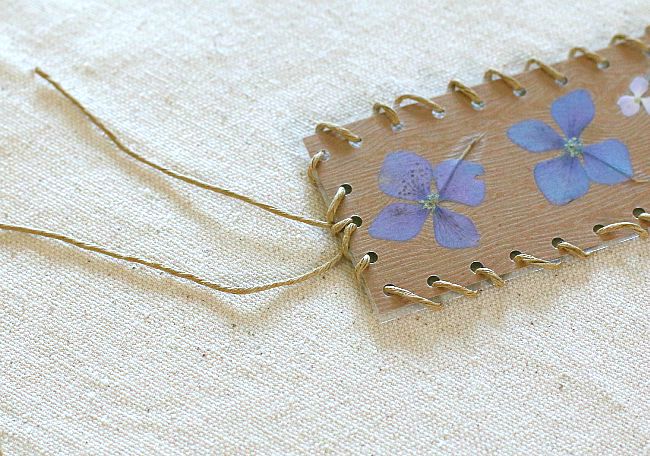
We used a small single hole punch to punch holes around the border of bookmark. We then threaded some hemp cord (we received from Craftprojectideas.com) around the border and tied it off at the top.
For other bookmarks we simply punched a single hole through the top of the bookmark and tied various materials through it like twine and raffia ribbon.
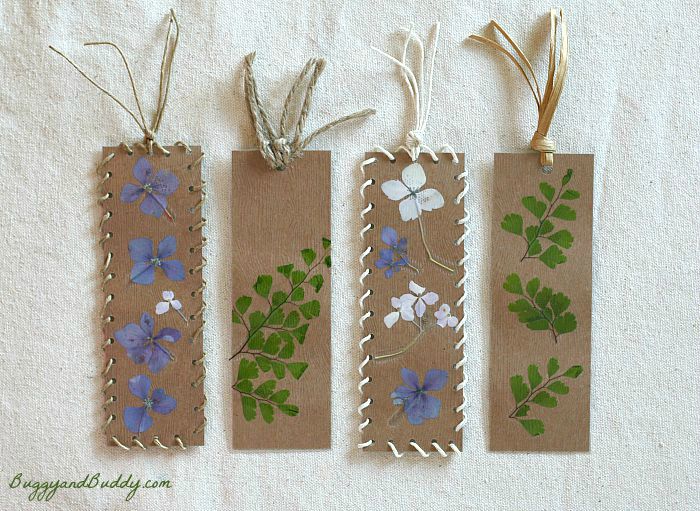
I just love how the finished bookmarks turned out! Wouldn’t they make a great homemade gift for kids to make for Mother’s Day?
More Crafts for Kids Inspired by Nature
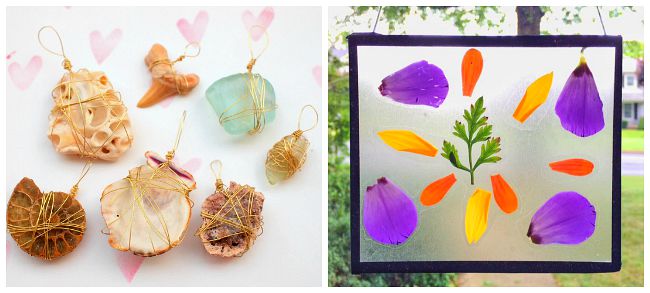
This post was part of the Nature Crafts 101 Series– a collaboration of 10 kid bloggers bringing you 20 crafts for kids inspired by nature! Be sure to follow along for all kinds of inspiration using natural materials. Yesterday Pink Stripey Socks shared some gorgeous stone and shell pendants, and tomorrow Inner Child Fun will be showing you how to make a colorful suncatcher using old CD cases!