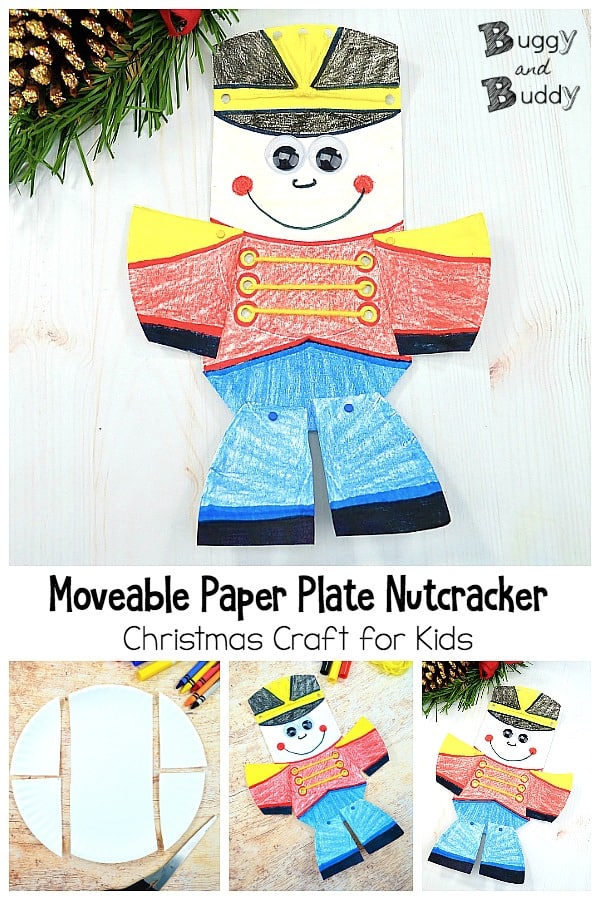
This moveable paper plate nutcracker craft for kids is perfect for Christmas! You’ll only need a few supplies and can even add a lacing component for fine motor practice and extra details to your finished craft. Children will love how the arms and legs of the nutcracker can move!
This post contains affiliate links.
This paper plate nutcracker craft just adorable and so perfect for the upcoming holidays. I love how you only need a few supplies, and you can modify the craft for both younger and older kids. It also makes a great extension to some popular Christmas books for kids.
See it in action here:
Moveable Nutcracker Paper Plate Craft for Kids
Materials for Paper Plate Nutcracker
- White paper plate
- Markers or crayons: red, black, blue and yellow
- Tape
- Single hole punch
- Scissors
- Google eyes
- Brads
- Yellow yarn
Directions for Paper Plate Nutcracker Craft
The lacing component adds an extra challenge for older kids. Skip the hole punching and lacing for younger kids.
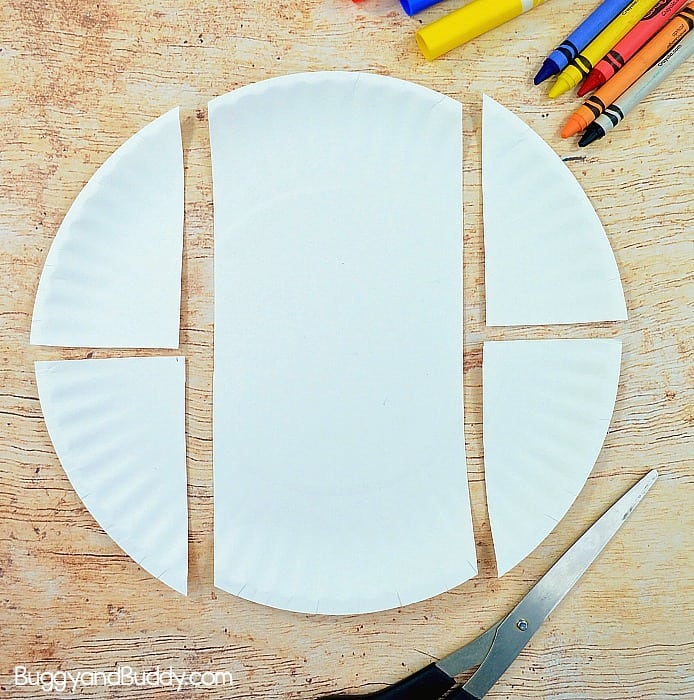
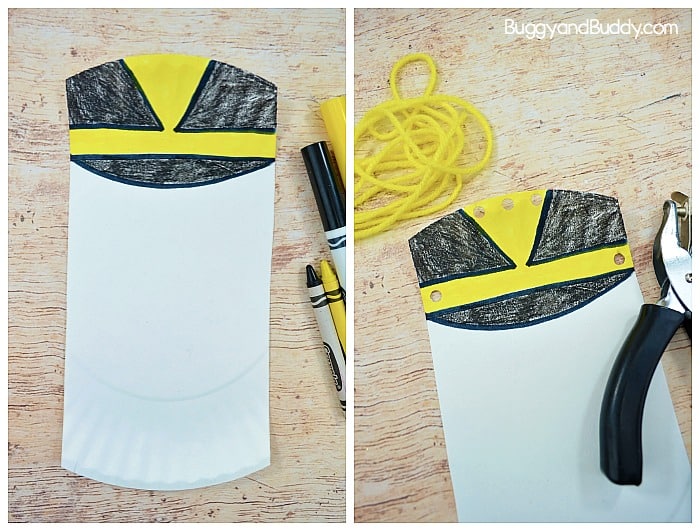
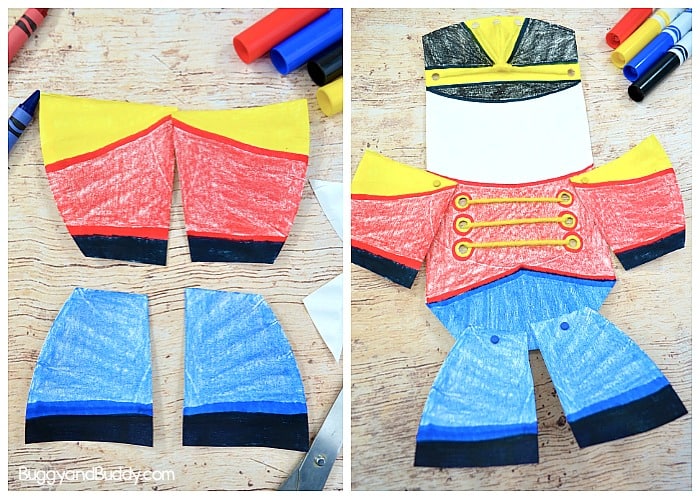
1. Cut the paper plate into pieces as shown below.
- Cut off the two sides, making a long rectangle in the middle – this will be the body.
- Cut each end piece in half too – these will be the arms and legs.
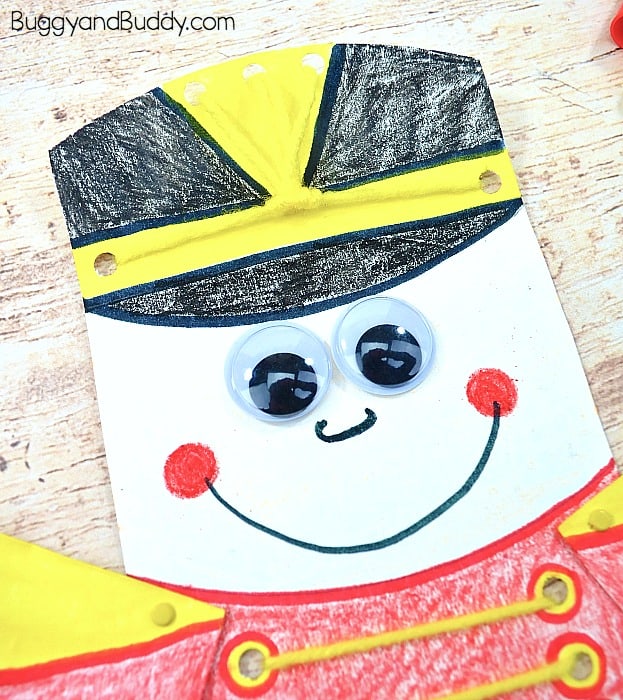
2. Color the center section of the plate. Make the hat with black and yellow crayons and markers as shown below.
3. Use your single hole punch to punch five holes total into the colored section of the paper plate: 3 along the top of the hat, one on each side of the hat as shown below.
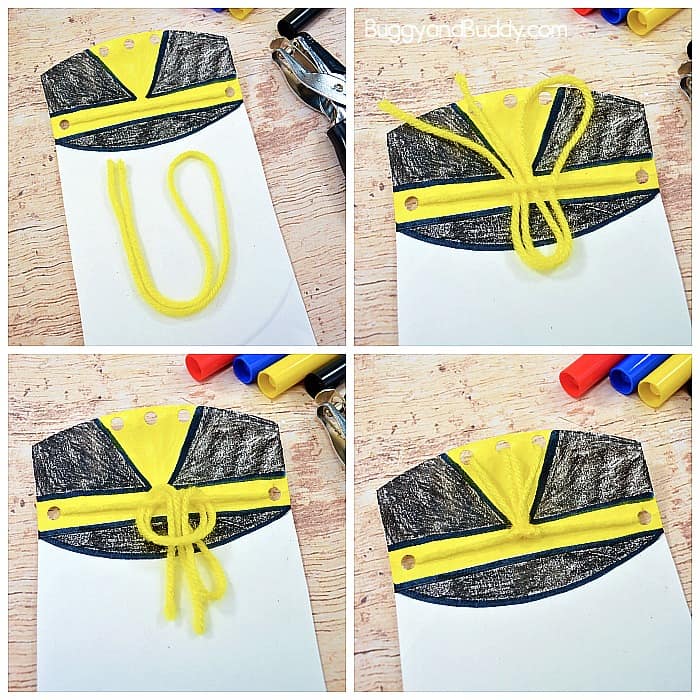
4. Take one piece of yellow yarn and lace it through the yellow, horizontal stripe. Secure it behind the plate by tying it or taping the ends.
5. Take a length of yarn and fold it in half, then fold it in half again. Feed this under the horizontal stripe yarn piece, creating a loop at the bottom.
6. Wrap the two loose ends and doubled strand (3 pieces total) over the horizontal, laced yarn and down through the bottom loop. Pull to create a knot on the horizontal stripe piece. Lace the yarn through the top holes, doubling up the middle hole. Secure on the back of the plate with tape.
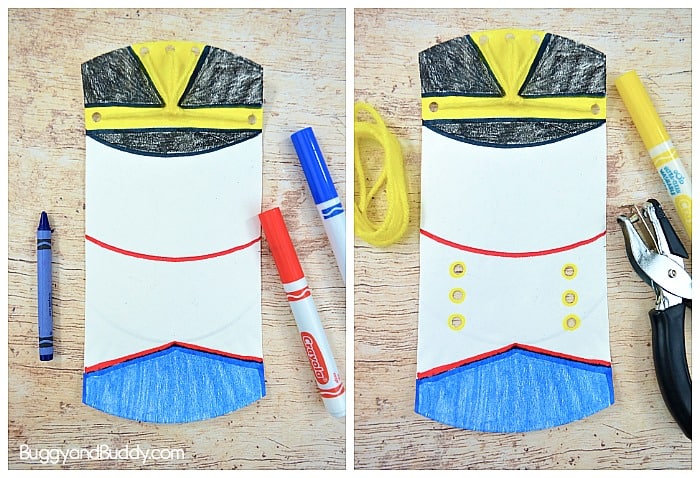
7. Next, make a curved red line in the middle of the paper plate, creating the top of the shirt. Draw a upside down ‘V’ at the bottom of the paper plate, creating the bottom of the shirt. Color the bottom portion blue to make part of the pants.
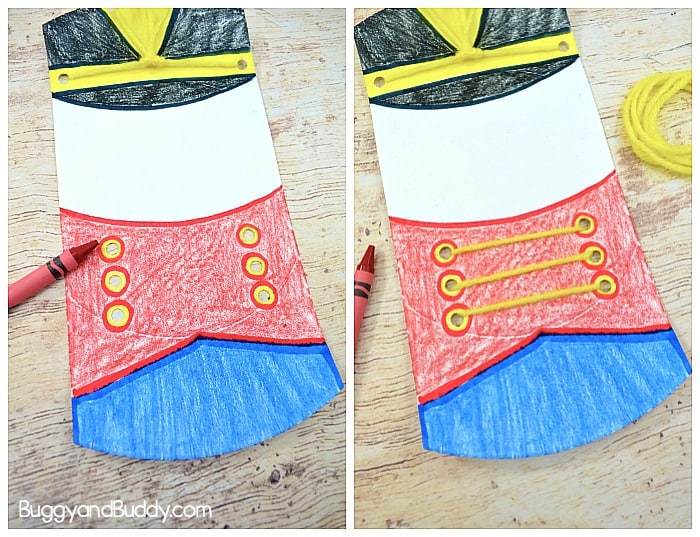
8. Use your single hole punch to make 3 holes on each side of the shirt, so you have 6 holes total. Use the yellow marker to draw circles around these holes, making ‘buttons’. Color the surrounding area red.
9. Lace yellow yarn to connect the buttons. Secure the yarn in back with tape or by tying the ends.
10. Now it’s time to use the other pieces you cut off from your paper plate. Trim the pointed ends and color them so they make arms and legs. The arms are red with black mittens and a yellow angled top. The pants are blue with black boots.
11. Attach the arms and legs to the body using brads.
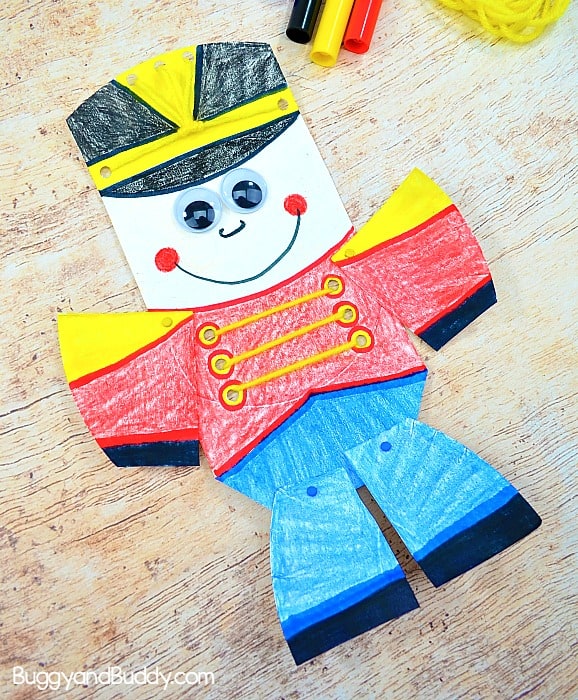
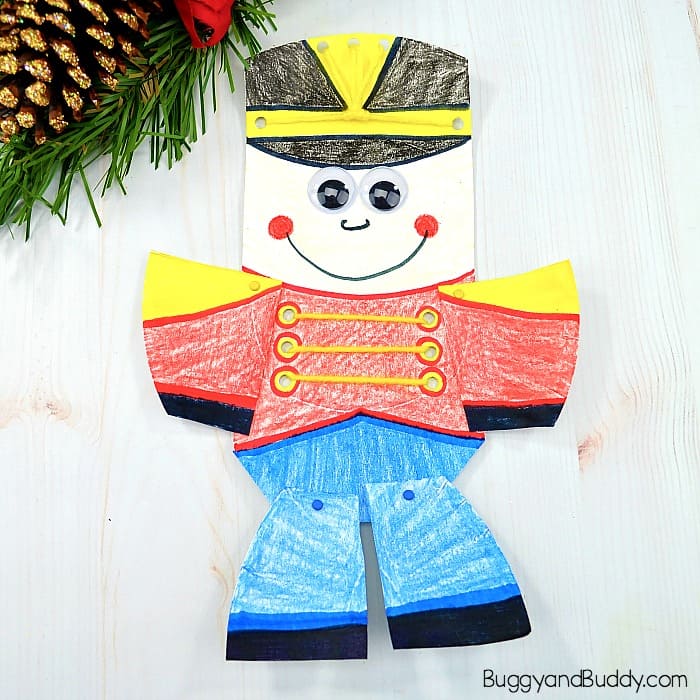
12. Finish it off with some googly eyes, nose and a big smile highlighted with rosy cheeks.
The toy soldier is ready to march into your holiday!