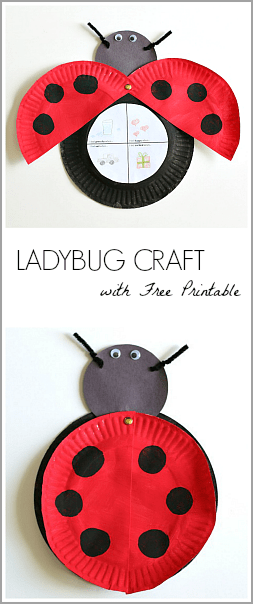
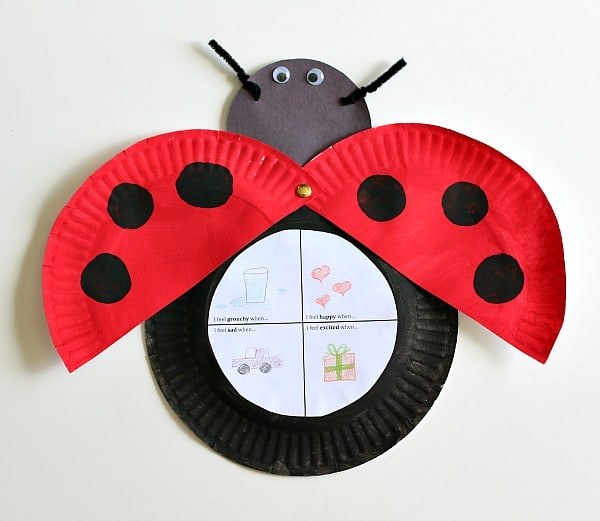
Here’s an easy paper plate ladybug craft for kids to go along with Eric Carle’s The Grouchy Ladybug. The ladybug craft also includes a free printable children can use to respond to the story and attach to their paper plate ladybug, a fun craft and extension activity for kindergarten, first grade and second grade.
Follow our Children’s Books and Activities Pinterest board!
This post contains affiliate links.
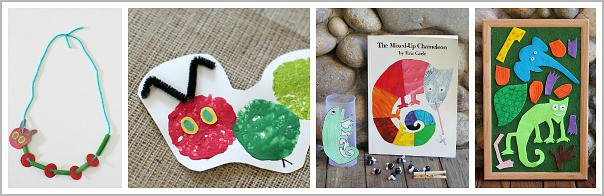
Previous Projects Inspired by Eric Carle
We are huge fans of Eric Carle’s books and have made quite a few projects to go along with his stories! (We’ve made caterpillar necklaces and sponge painted caterpillars inspired by The Very Hungry Caterpillar, and we’ve also made a counting game and felt story set to go with The Mixed Up Chameleon!)
More Crafts for Kids from Buggy and Buddy in the Video Below
Paper Plate Ladybug Craft Inspired by The Grouchy Ladybug
For our most recent activity based on a children’s book, we made paper plate ladybugs based on The Grouchy Ladybug! This story lends itself to all kinds of learning opportunities. You can use it to discuss times of day, using manners, and it fits perfecting in a unit on insects!
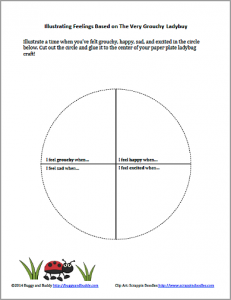
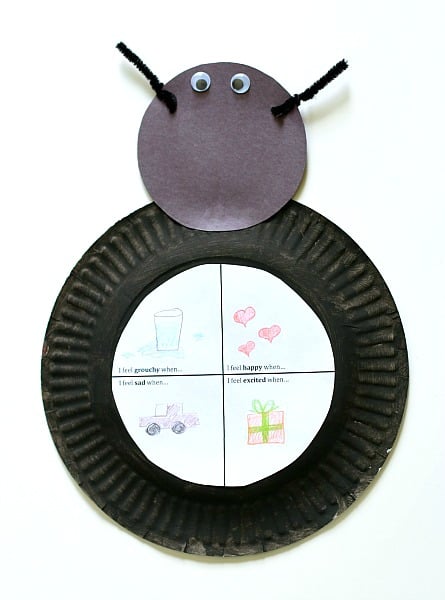
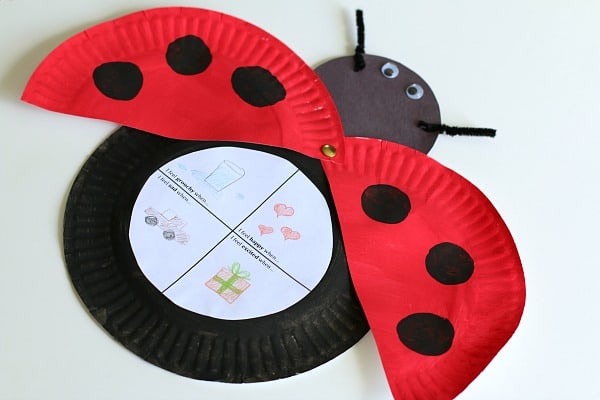
For this particular activity I decided to focus on feelings. Theo and I have been talking a lot about different feelings people can have. This book is a great way to initiate conversations about this topic. I also created a free printable kids can use to illustrate various times when they’ve felt grouchy, happy, sad, and excited. The printable fits right inside the ladybug craft! (*Clipart from Scrappin Doodles.)
Materials for the Ladybug Craft
- Two white paper plates
- Red and black tempera paint
- Paintbrush
- Scissors
- Black construction paper
- Black pipe cleaner (optional)
- Googly eyes
- Glue stick
- Single hole punch
- One brad
- Free Feelings Printable
How to Make the Ladybug Craft
1. After reading The Grouchy Ladybug by Eric Carle, fill in the feelings circle on the free printable. Cut out the circle and set it aside.
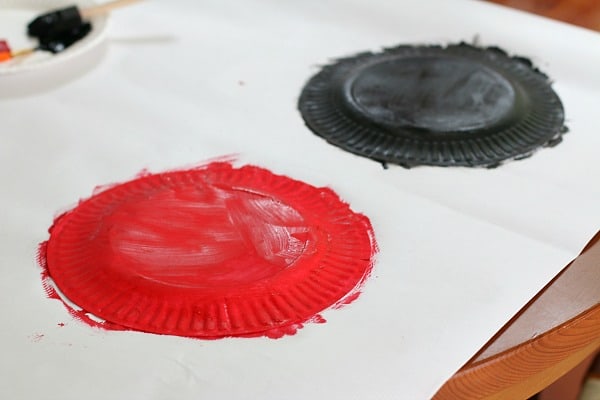
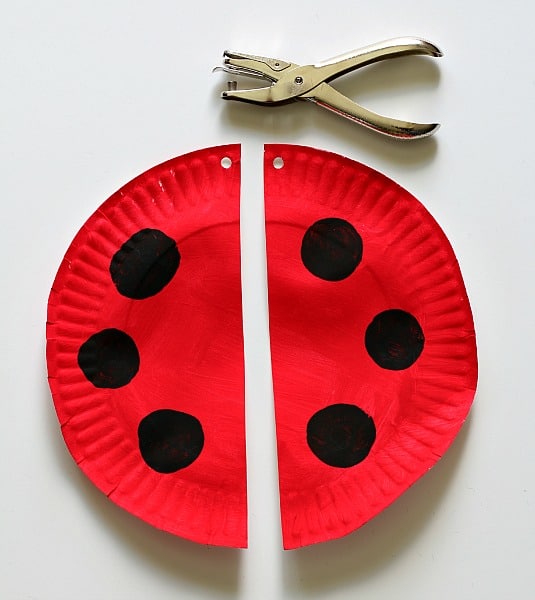
2. Paint one paper plate black and one paper plate red.
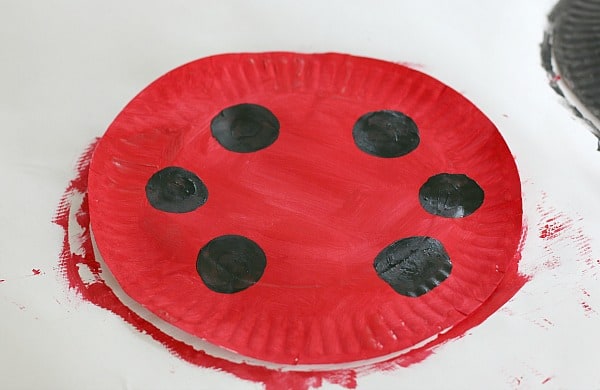
3. Once the red paper plate has dried, paint some black circles onto it.
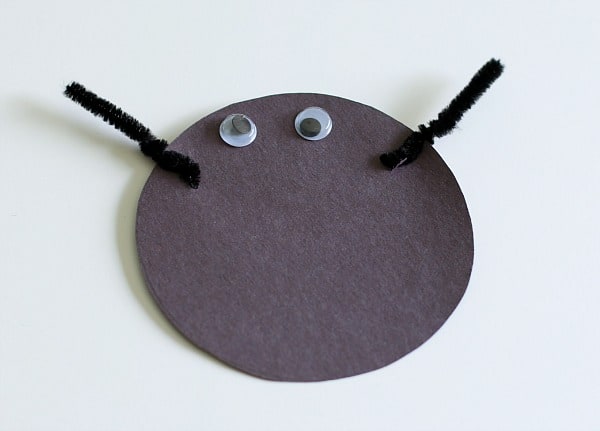
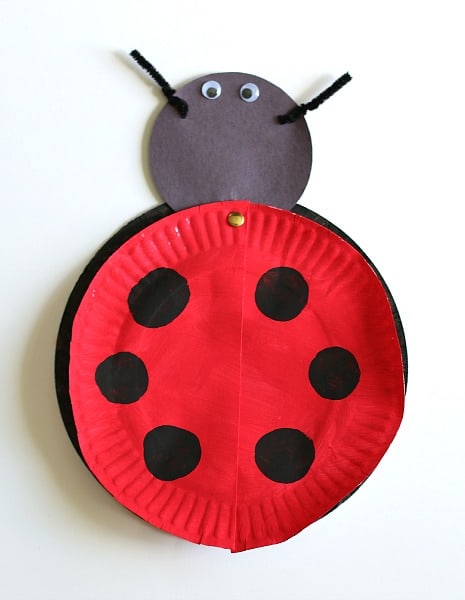
4. Cut out a black circle for the ladybug’s head from the construction paper. Add some googly eyes and black antennae. (We used black pipe cleaners for the antennae, but you can also just cut them from paper and glue them onto the head.)
5. Glue the head to the top of your black paper plate. Glue the feelings circle you cut out previously to the center of the black plate.
6. Cut the red plate in half. Use a hole punch to punch a hole in the top of each red half.
7. Poke a hole right through the bottom of the ladybug’s head and black plate. (Try to line up the red wings to the black plate as best you can before deciding exactly where to poke the hole.) Use a brad to attach the two wings to the body.
That’s it! You can display your ladybug with the wings open or closed!
Be sure not to miss these other activities inspired by children’s books from Buggy and Buddy:
- Chicka Chicka Boom Boom Play Set
- Sponge Painted Elmer the Elephant
- Math Game for Pete the Cat and His Four Groovy Buttons