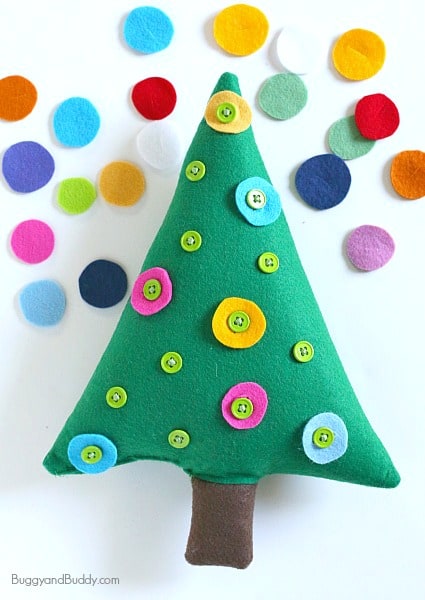
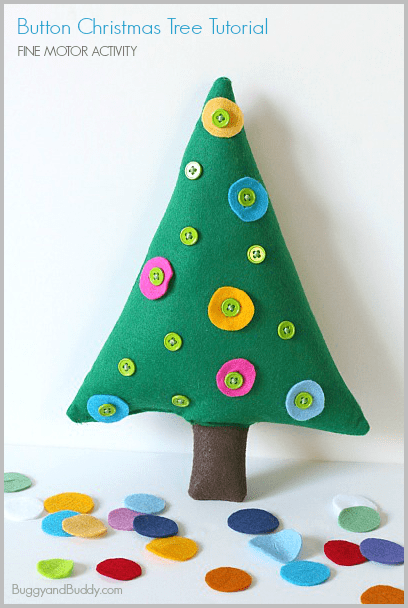
This button Christmas tree has become one of my favorite Christmas activities for kids! It provides a great way for kids to practice fine motor skills and encourages creativity and independence as well. This felt Christmas tree is super easy to make, and can even second as Christmas decor when it’s not being used!
Follow our Christmas for Kids and Family Pinterest board!
*This post was originally published on November 24, 2014 and has since been updated.
Theo has been showing a lot of interest in practicing fine motor skills like buttoning, snapping, and zipping, so I decided to create a homemade toy for him focusing on buttoning practice. Since I love using felt to make toys (like our tooth fairy pillow and stuffed felt letters), I knew felt would be my go-to fabric for this project too. Felt is just so easy to use and so forgiving! (This post contains affiliate links.)
How to Make a Button Christmas Tree
Materials for Button Christmas Tree
- Green felt (size depends on how large you want your tree to be)
- Brown felt (if you want a trunk on your tree)
- Scraps of various colored felt for the ornaments
- Pins
- Good scissors
- Buttons
- Needle, thread, and/or embroidery floss (to sew on buttons)
- Sewing machine (unless you will be sewing by hand)
- Stuffing (like Poly-fil)
Directions for Making Your Button Christmas Tree
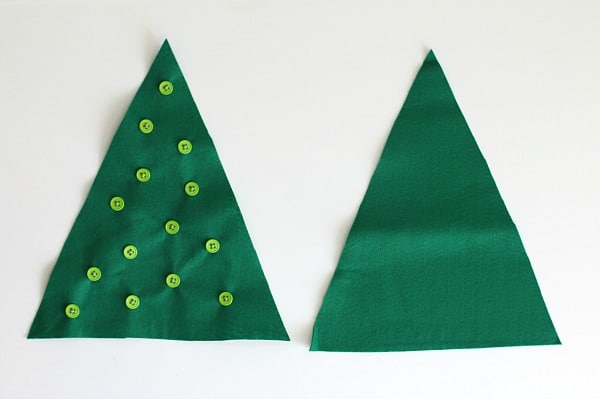
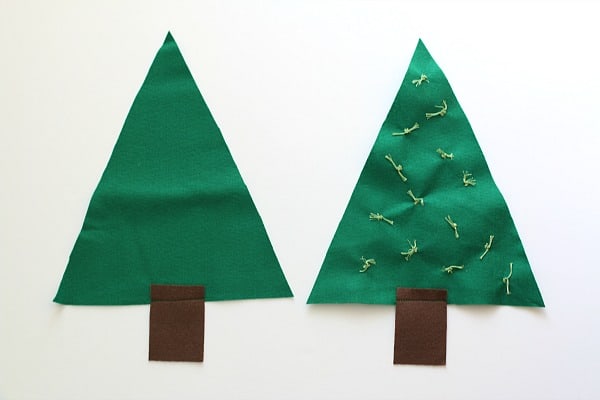
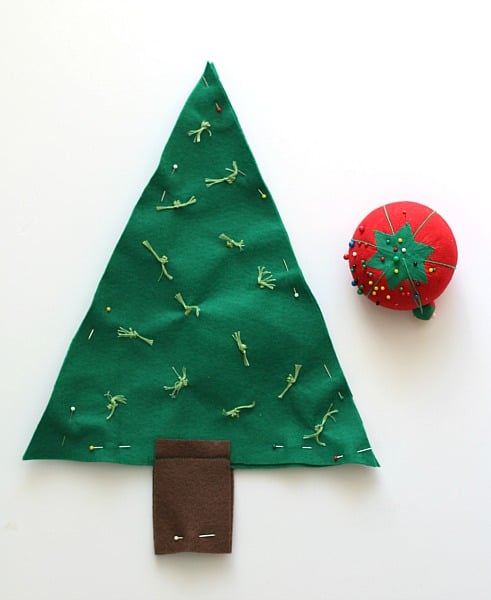
1. Cut out two Christmas trees from your green felt. Be sure they are identical since one will be the front and one will be the back.
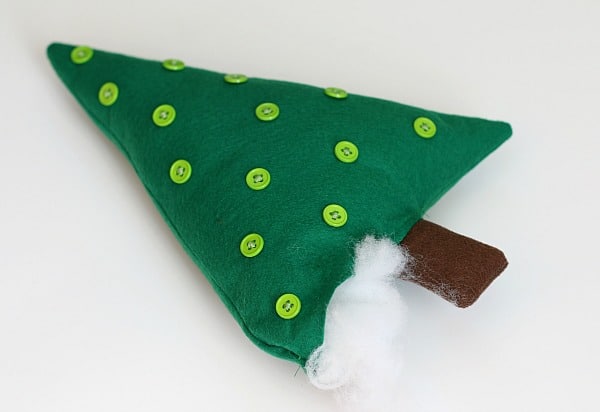
2. Sew buttons all over one of the trees. (I used embroidery floss to sew the buttons.)
3. If you want your tree to have a trunk, cut out two brown rectangles and sew them onto the bottom of each tree. (I think the tree would also look cute without a trunk!)
If sewing by hand: Stack your tree pieces together so the front and back are facing out. Pin in place. Use your needle and embroidery floss to sew around the edges using either a whip stitch or blanket stitch. Leave an opening to stuff your tree. Skip to direction #4
If using a sewing machine:
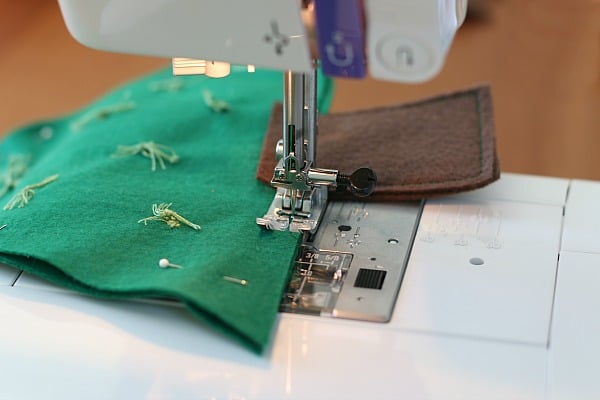
– Stack your trees so the front and back are facing inward (like the tree is inside out). Pin in place.
– Sew around the outside of your tree leaving a 1/4 inch border. Leave an opening so you can turn your Christmas tree right-side out.
– Trim off any large edges or corners. Turn your tree right-side out. I stuck a pencil into the tree and used it to push out those hard-to-reach places and corners.
4. Stuff your Christmas tree.
5. Sew the hole closed using any method you’d prefer. (Here’s a tutorial if you’re interested in sewing an invisible seam.)

How to Make the Ornaments
To make the ornaments simply cut out felt circles in different colors. Make a little snip in the center of each one so it can be buttoned onto the tree.

Playing with the Button Christmas Tree
Kids can decorate the felt Christmas tree with all kinds of ornaments by just buttoning them on. The tree can be decorated and redecorated over and over- a great way to combine fine motor practice with creativity! It also makes the perfect quiet time activity!